Warehouses
View all your warehouses from a single screen, create new warehouses, and track the total number of racks, cells, and locations for each warehouse.
To access this page; Admin Panel > Warehouse Management > Warehouses
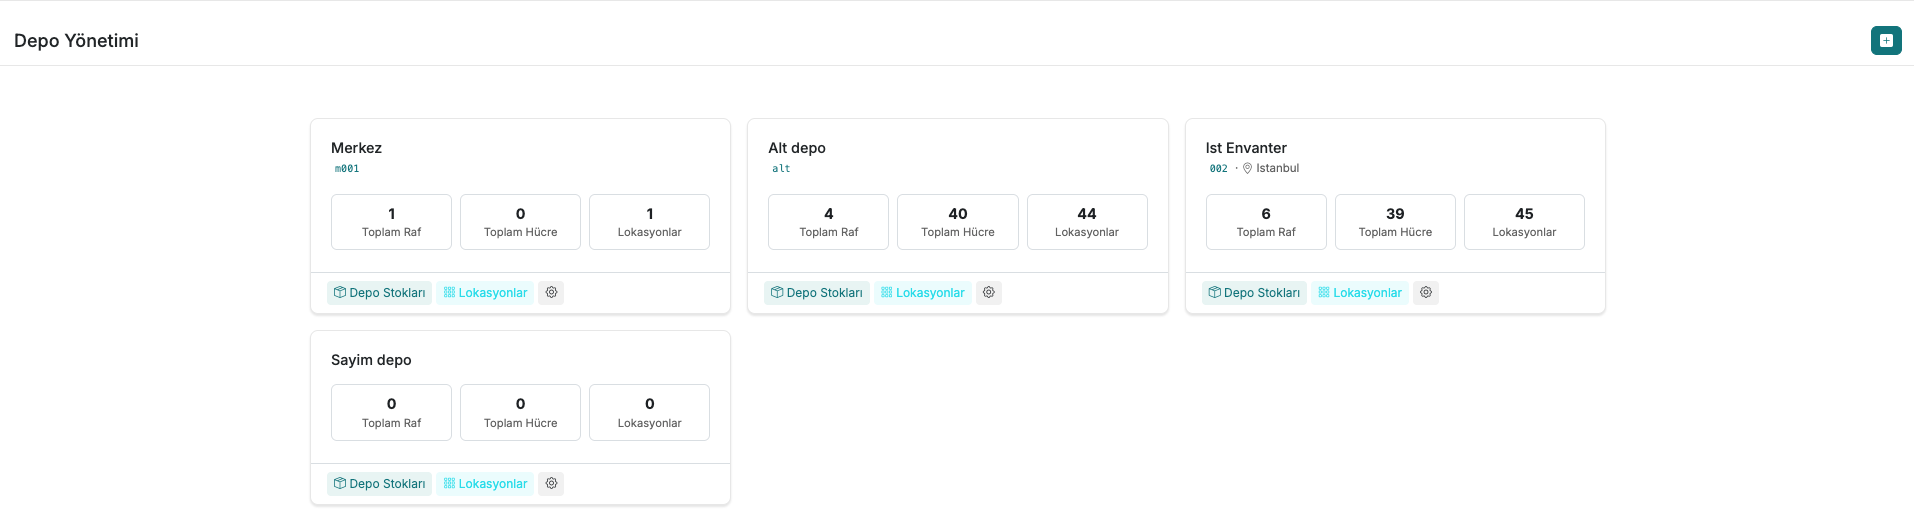
Each warehouse card displays the following information:
- Warehouse name and code — the warehouse's short identifier (e.g. m001, alt, 002)
- Location — physical location information if available (e.g. Istanbul)
- Total Racks — the number of racks in the warehouse
- Total Cells — the number of cells across all racks
- Locations — total number of locations
At the bottom of each card there are three quick-access links: Warehouse Stock, Locations, and Settings (gear icon).
1. Creating a New Warehouse
Click the + button in the top right to open the new warehouse creation form.
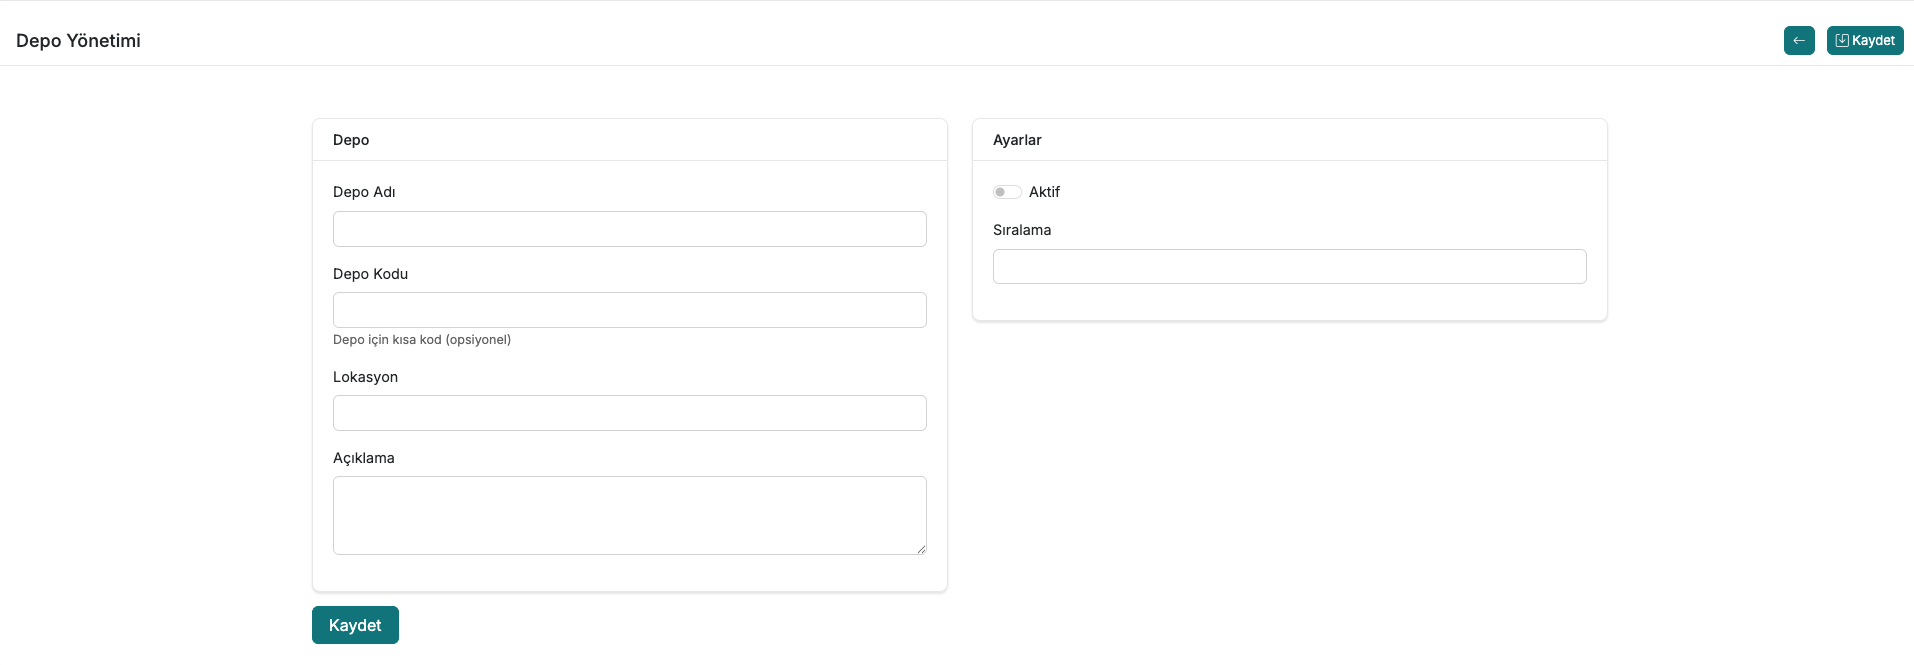
The form consists of two sections. In the Warehouse section, you can enter the warehouse name, optional short code, physical location, and description note. In the Settings section, you can set the warehouse as active or inactive and determine its display order in the list. After filling in the information, click the Save button.
2. Locations
Clicking the Locations link on a warehouse card takes you to the page where you can manage the rack and cell structure for that warehouse.
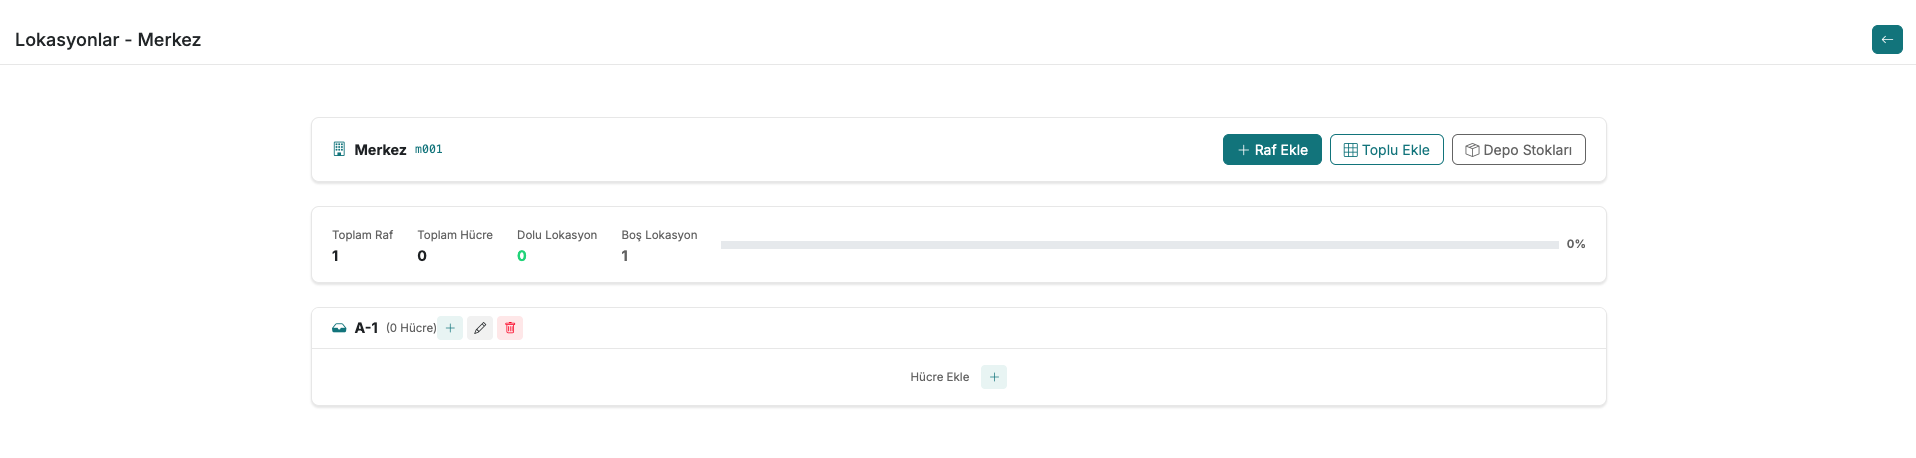
The page header shows the warehouse name, code, and summary statistics: Total Racks, Total Cells, Occupied Locations, and Empty Locations counts, along with a percentage bar showing the occupancy rate.
Each rack row shows the rack name, the number of cells it contains, and edit/delete icons. The Add Cell + button below a rack lets you add cells to that rack one by one.
Adding a Rack
Click the + Add Rack button in the top right.
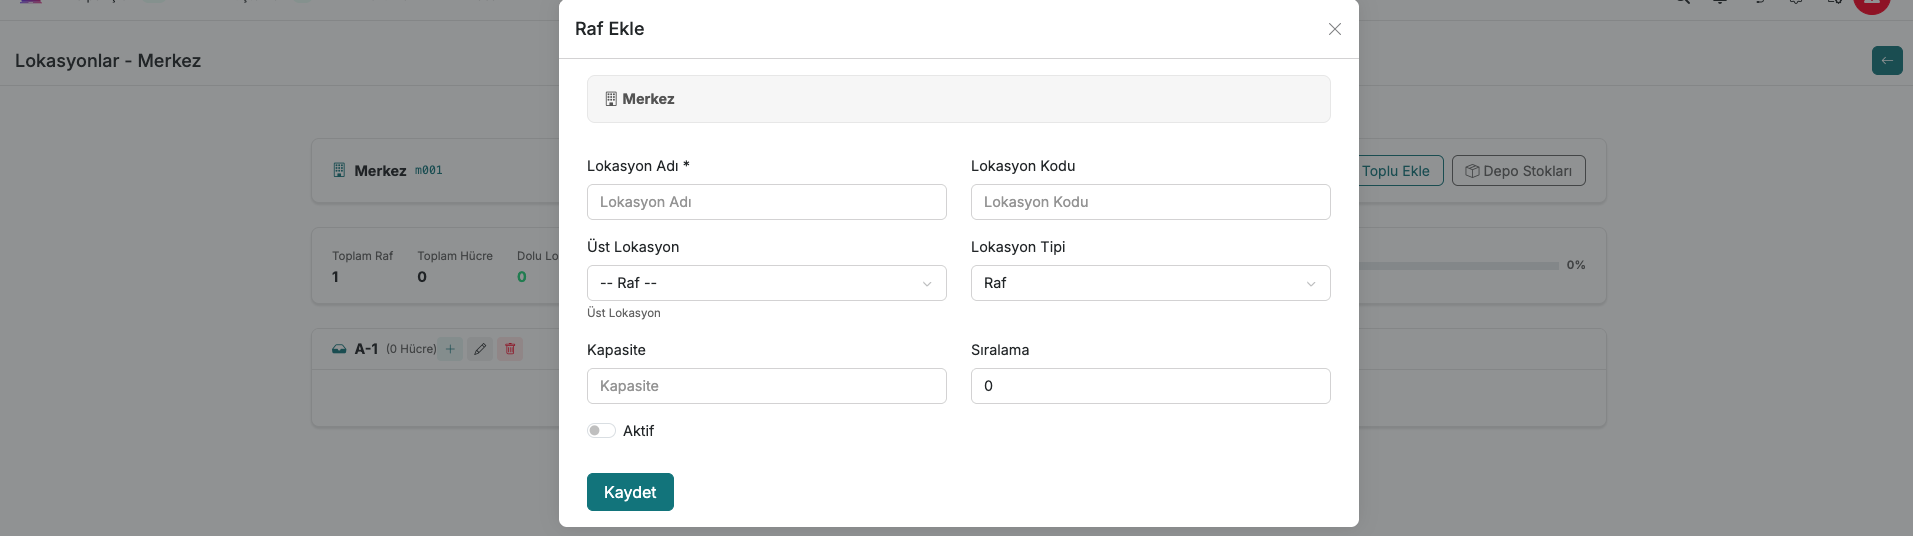
In the form that opens, enter the location name (required) and optionally the location code. Select the parent location this rack belongs to from the Parent Location field, and specify the type (such as rack or cell) using the Location Type field. Enter capacity and sort order values, set the Active status, then click the Save button.
Bulk Rack and Cell Addition
To add multiple racks and cells at the same time, use the Bulk Add button.
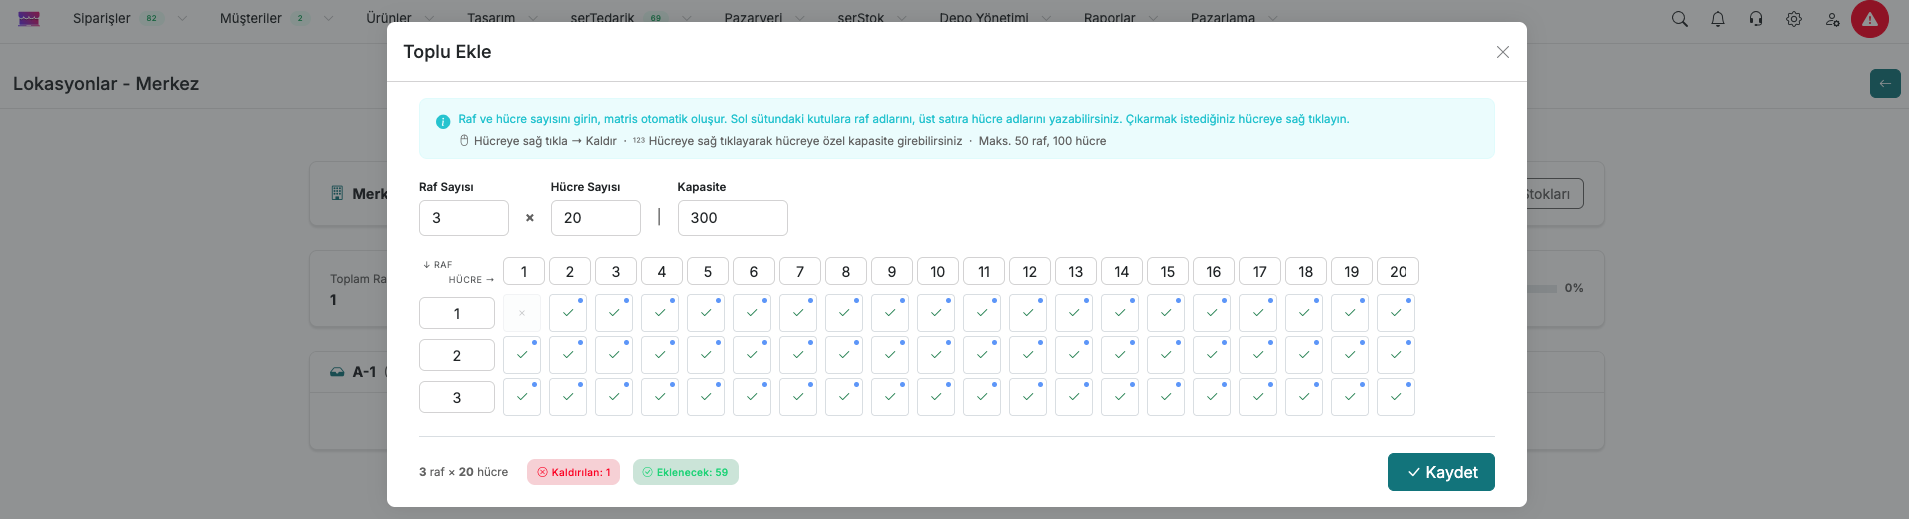
Fill in the Rack Count and Cell Count fields and the matrix is generated automatically. You can enter rack names in the left column and cell names in the top row. Right-click on a cell you do not want to add and select Remove; you can also right-click on a cell to enter a custom capacity for that cell. A maximum of 50 racks and 100 cells can be added. The number of removed and cells to be added is summarized at the bottom. Click Save to apply all changes.
3. Warehouse Stock
Clicking the Warehouse Stock link on a warehouse card lets you view all product stock in that warehouse.
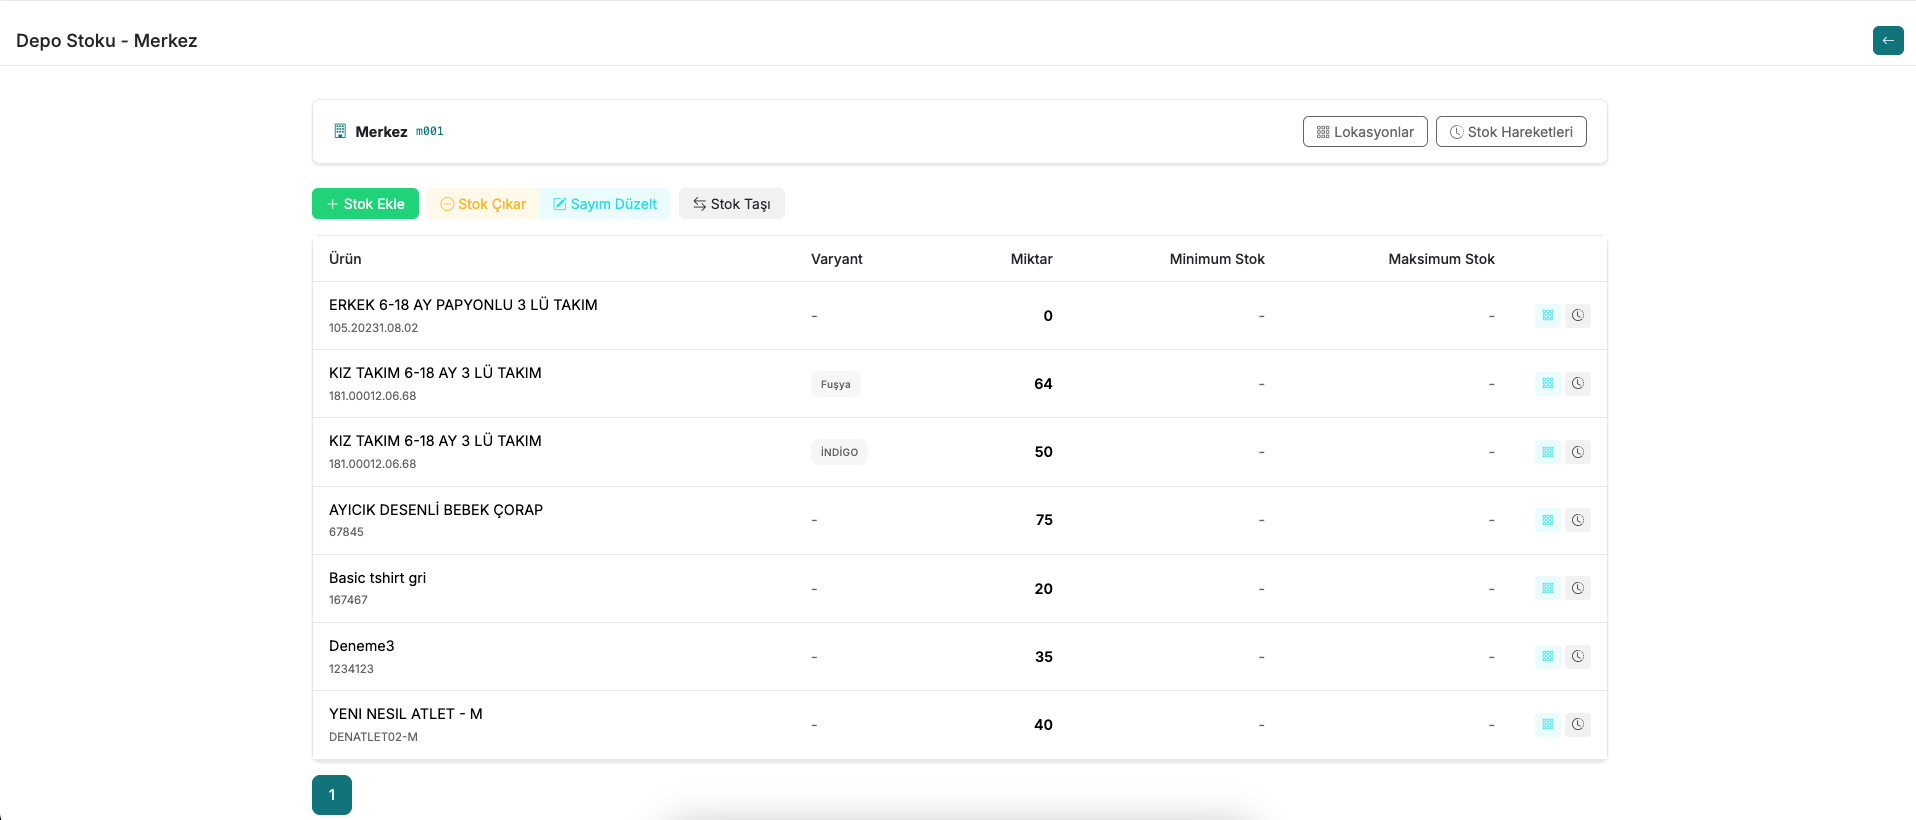
The list displays product name, product code, variant, quantity, minimum stock, and maximum stock information for each product.
There are four action buttons on the page: + Add Stock to record new stock into the warehouse, Remove Stock to record a stock withdrawal, Adjust Count to update the stock quantity based on a physical count, and Move Stock to move stock to another location or warehouse.
The Locations and Stock Movements buttons in the top right allow you to quickly switch to the warehouse location view or movement history.
Contact and Support
If you encounter any issues or need assistance, you can contact our support team. We will be happy to help you as soon as possible.