serMobile PRO | Home Page Design
You can customize your mobile app's home page design according to the language options defined in your serB2B system, and instantly publish it on App Store, Google Play Store, and Huawei App Gallery without the need for additional update approvals.
By navigating to Design > Advanced > serMobile PRO from the admin panel, you can customize and easily manage the mobile app's home page design by adding as many widgets as you like.

The design changes will take effect in the application stores where your serMobile PRO app is live. For more information about having your app on all application stores, please contact [email protected].
Before You Start
serMobile PRO | How to Create Image Files?
Decide on how you want your app's home page design to look, create the necessary images, and save each image separately on your computer.
Prepare your design by checking the usage models provided by the serMobile PRO Widget components. Save your image files in .png, .jpg, .jpeg, or .webp format.
For video content, the file format should be .mp4.
For the best content display quality, set the image widths to 1000 px.
To ensure optimum app speed, it is recommended to keep the file sizes of your image files (.png, .jpg, .jpeg) under 1 MB for a better user experience.
To ensure optimum app speed, it is recommended to keep the file sizes of your video files under 2 MB for a better user experience.
serMobile PRO | How to Set Redirects?
Each widget you add can be linked to specific areas when clicked. To enhance the user experience, you can set redirects for each widget in the following scenarios.
To set redirects for the added widget types, enter the corresponding data for id and type variables.
1. Redirect to the Registration Screen
To redirect to the registration screen, define the following values when adding the widget.
Example:
| ID | TYPE | |
|---|---|---|
| Register | 200 | register |
2. Redirect to a Brand/Supplier Product List
To redirect to a specific brand/supplier product list when a widget is clicked, define the brand's Id value as shown below.
Example:
| ID | TYPE | |
|---|---|---|
| Brand/Supplier | 1 | brand |
To find the Brand's Id value, click on Lists > Brands in the admin panel.

3. Redirect from Main Category to Subcategory List
To redirect to a list of subcategories under a specific main category when a widget is clicked, define the main category's Id value as shown below.
Example:
| ID | TYPE | |
|---|---|---|
| Main Category | 100 | main_category |
To find the Main Category's Id value, click on Lists / Categories in the admin panel, or click on the main category on your site and note the numeric value at the end of the URL.
4. Redirect to Product List in Subcategory
To redirect to a list of products in a specific subcategory when a widget is clicked, define the subcategory's Id value as shown below.
Example:
| ID | TYPE | |
|---|---|---|
| Subcategory | 101 | category |
To find the Subcategory's Id value, click on Lists / Categories in the admin panel, or click on the subcategory on your site and note the numeric value at the end of the URL.
5. Redirect to Filtered Product List
To redirect to a filtered list of specific products when a widget is clicked, define it as shown below.
Example:
| ID | TYPE | |
|---|---|---|
| Filtered List | filter_kumas=5 | filter |
Info: To find the Id value of a filtered product list, select the corresponding filter on your site and copy the string after ? from the URL, then paste it into the Id field.
6. Redirect to Pop-Up Content
To open a Pop-Up screen when a widget is clicked, define it as shown below to show pre-defined content from the Pop-Up list.
Example:
| ID | TYPE | |
|---|---|---|
| Pop-Up Content | 1 | modal |
To access or create new Pop-Up content, go to Admin Panel > Design > SerMobileBoss screen.

serMobile PRO | What Does Each Widget Do?
Add widgets to your mobile app’s home page design from the appropriate widget types in the SerMobileBoss screen.
Widget Types
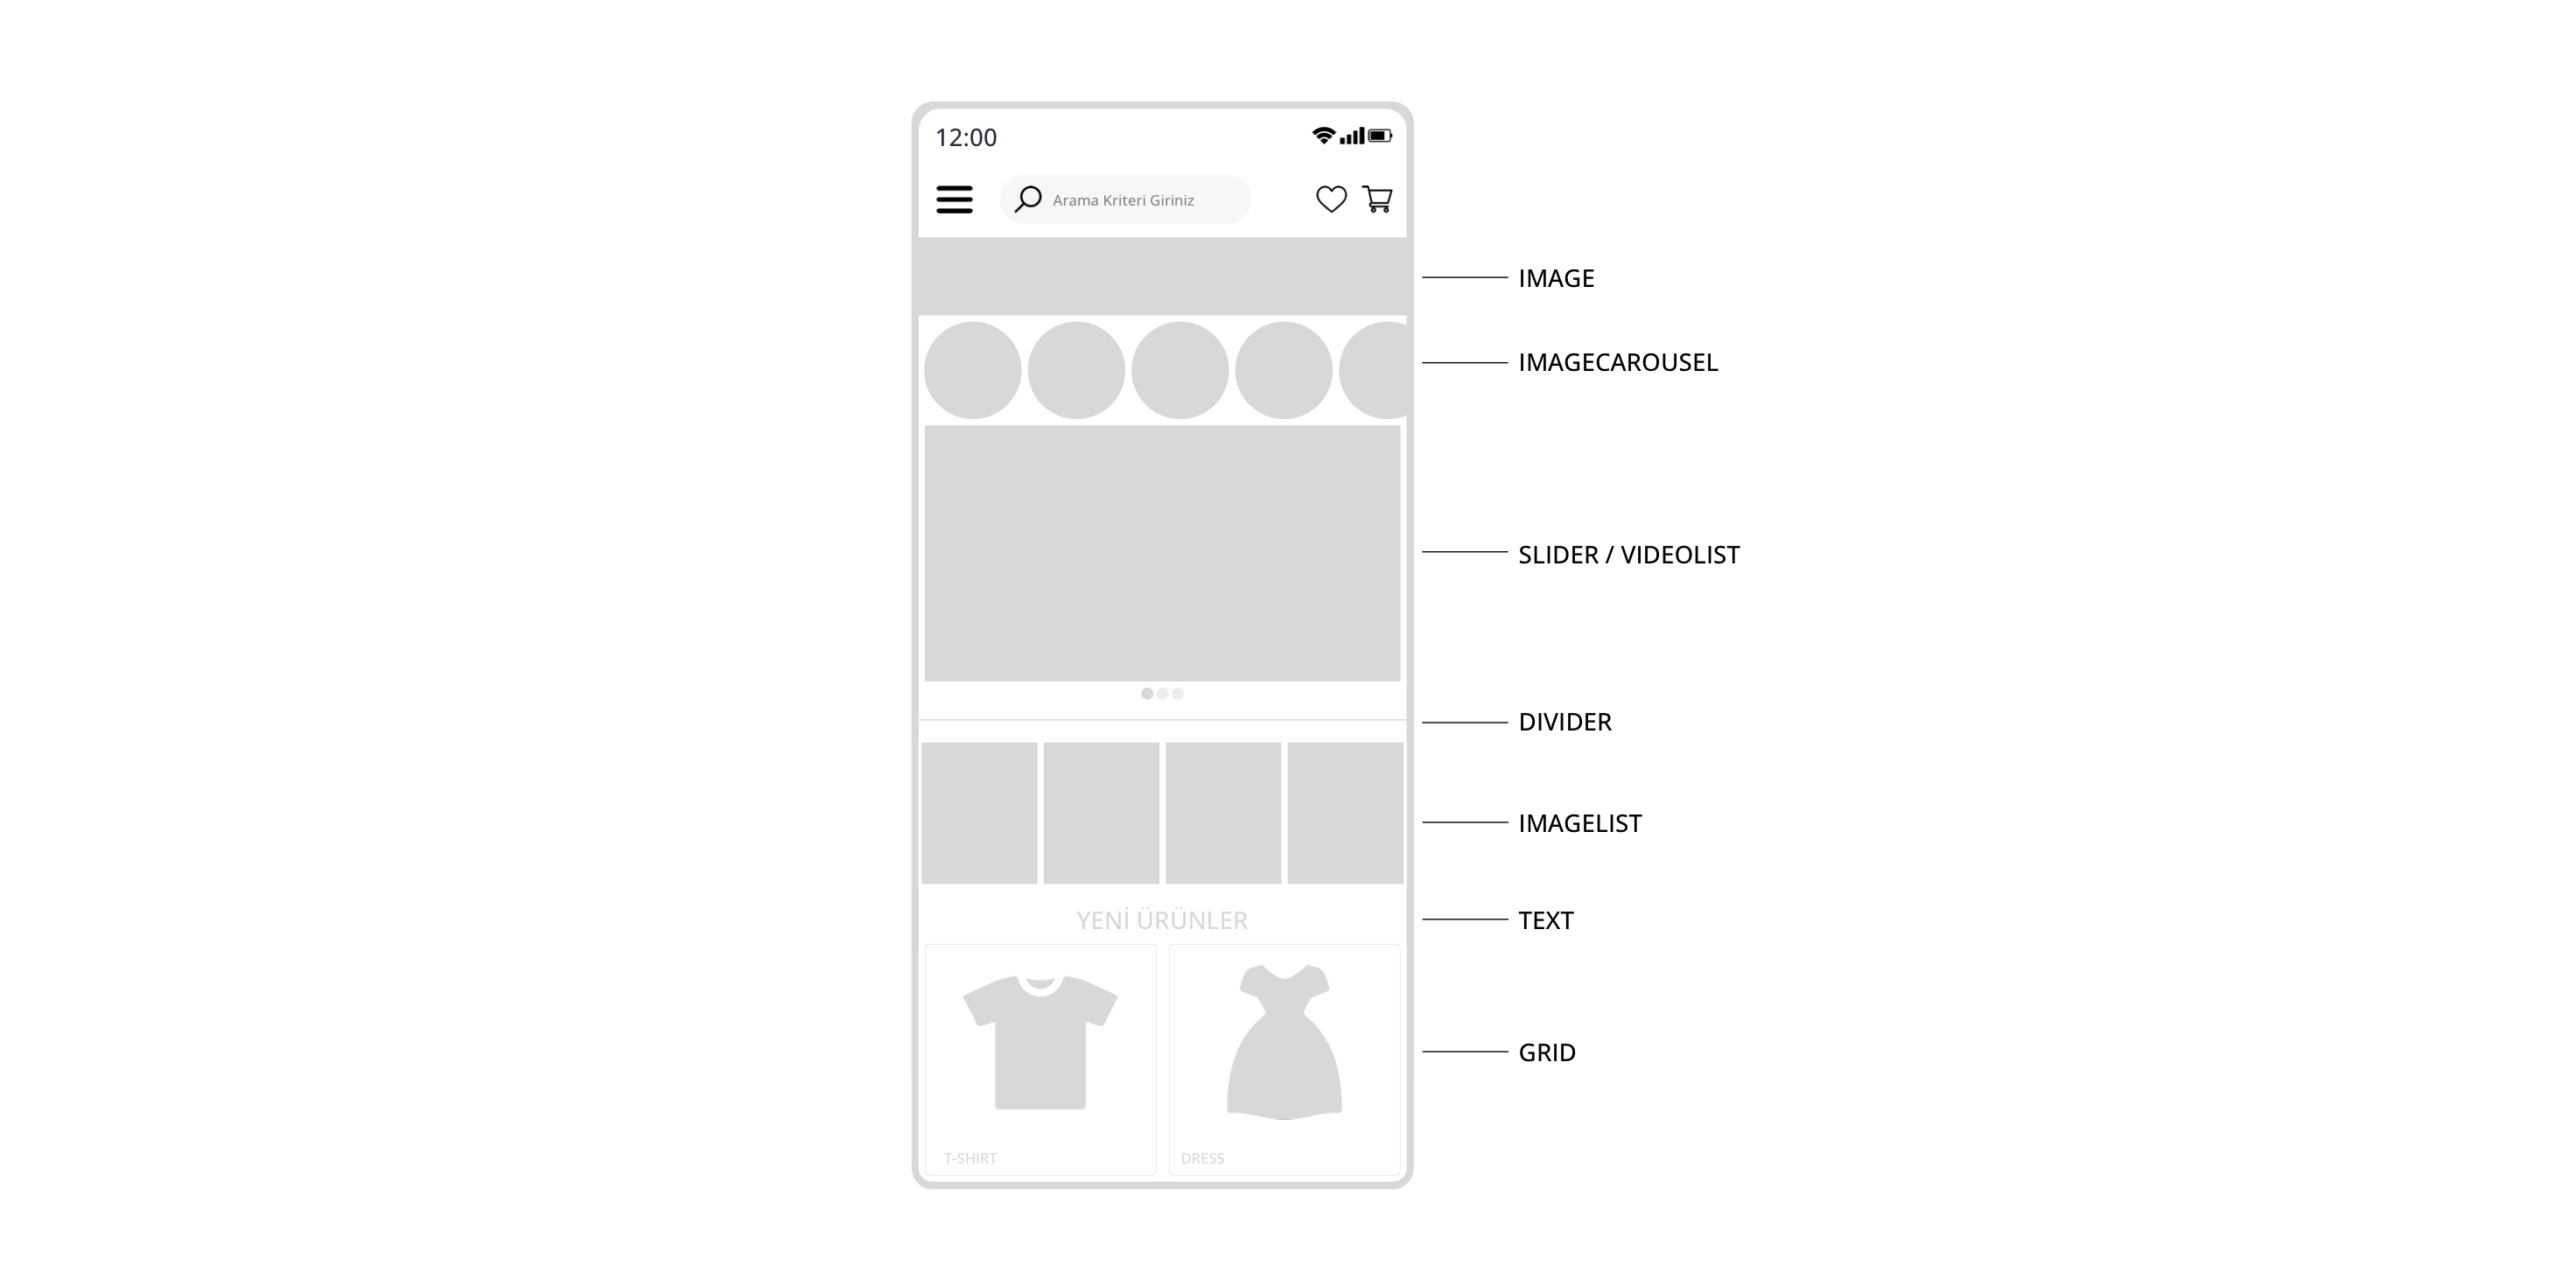
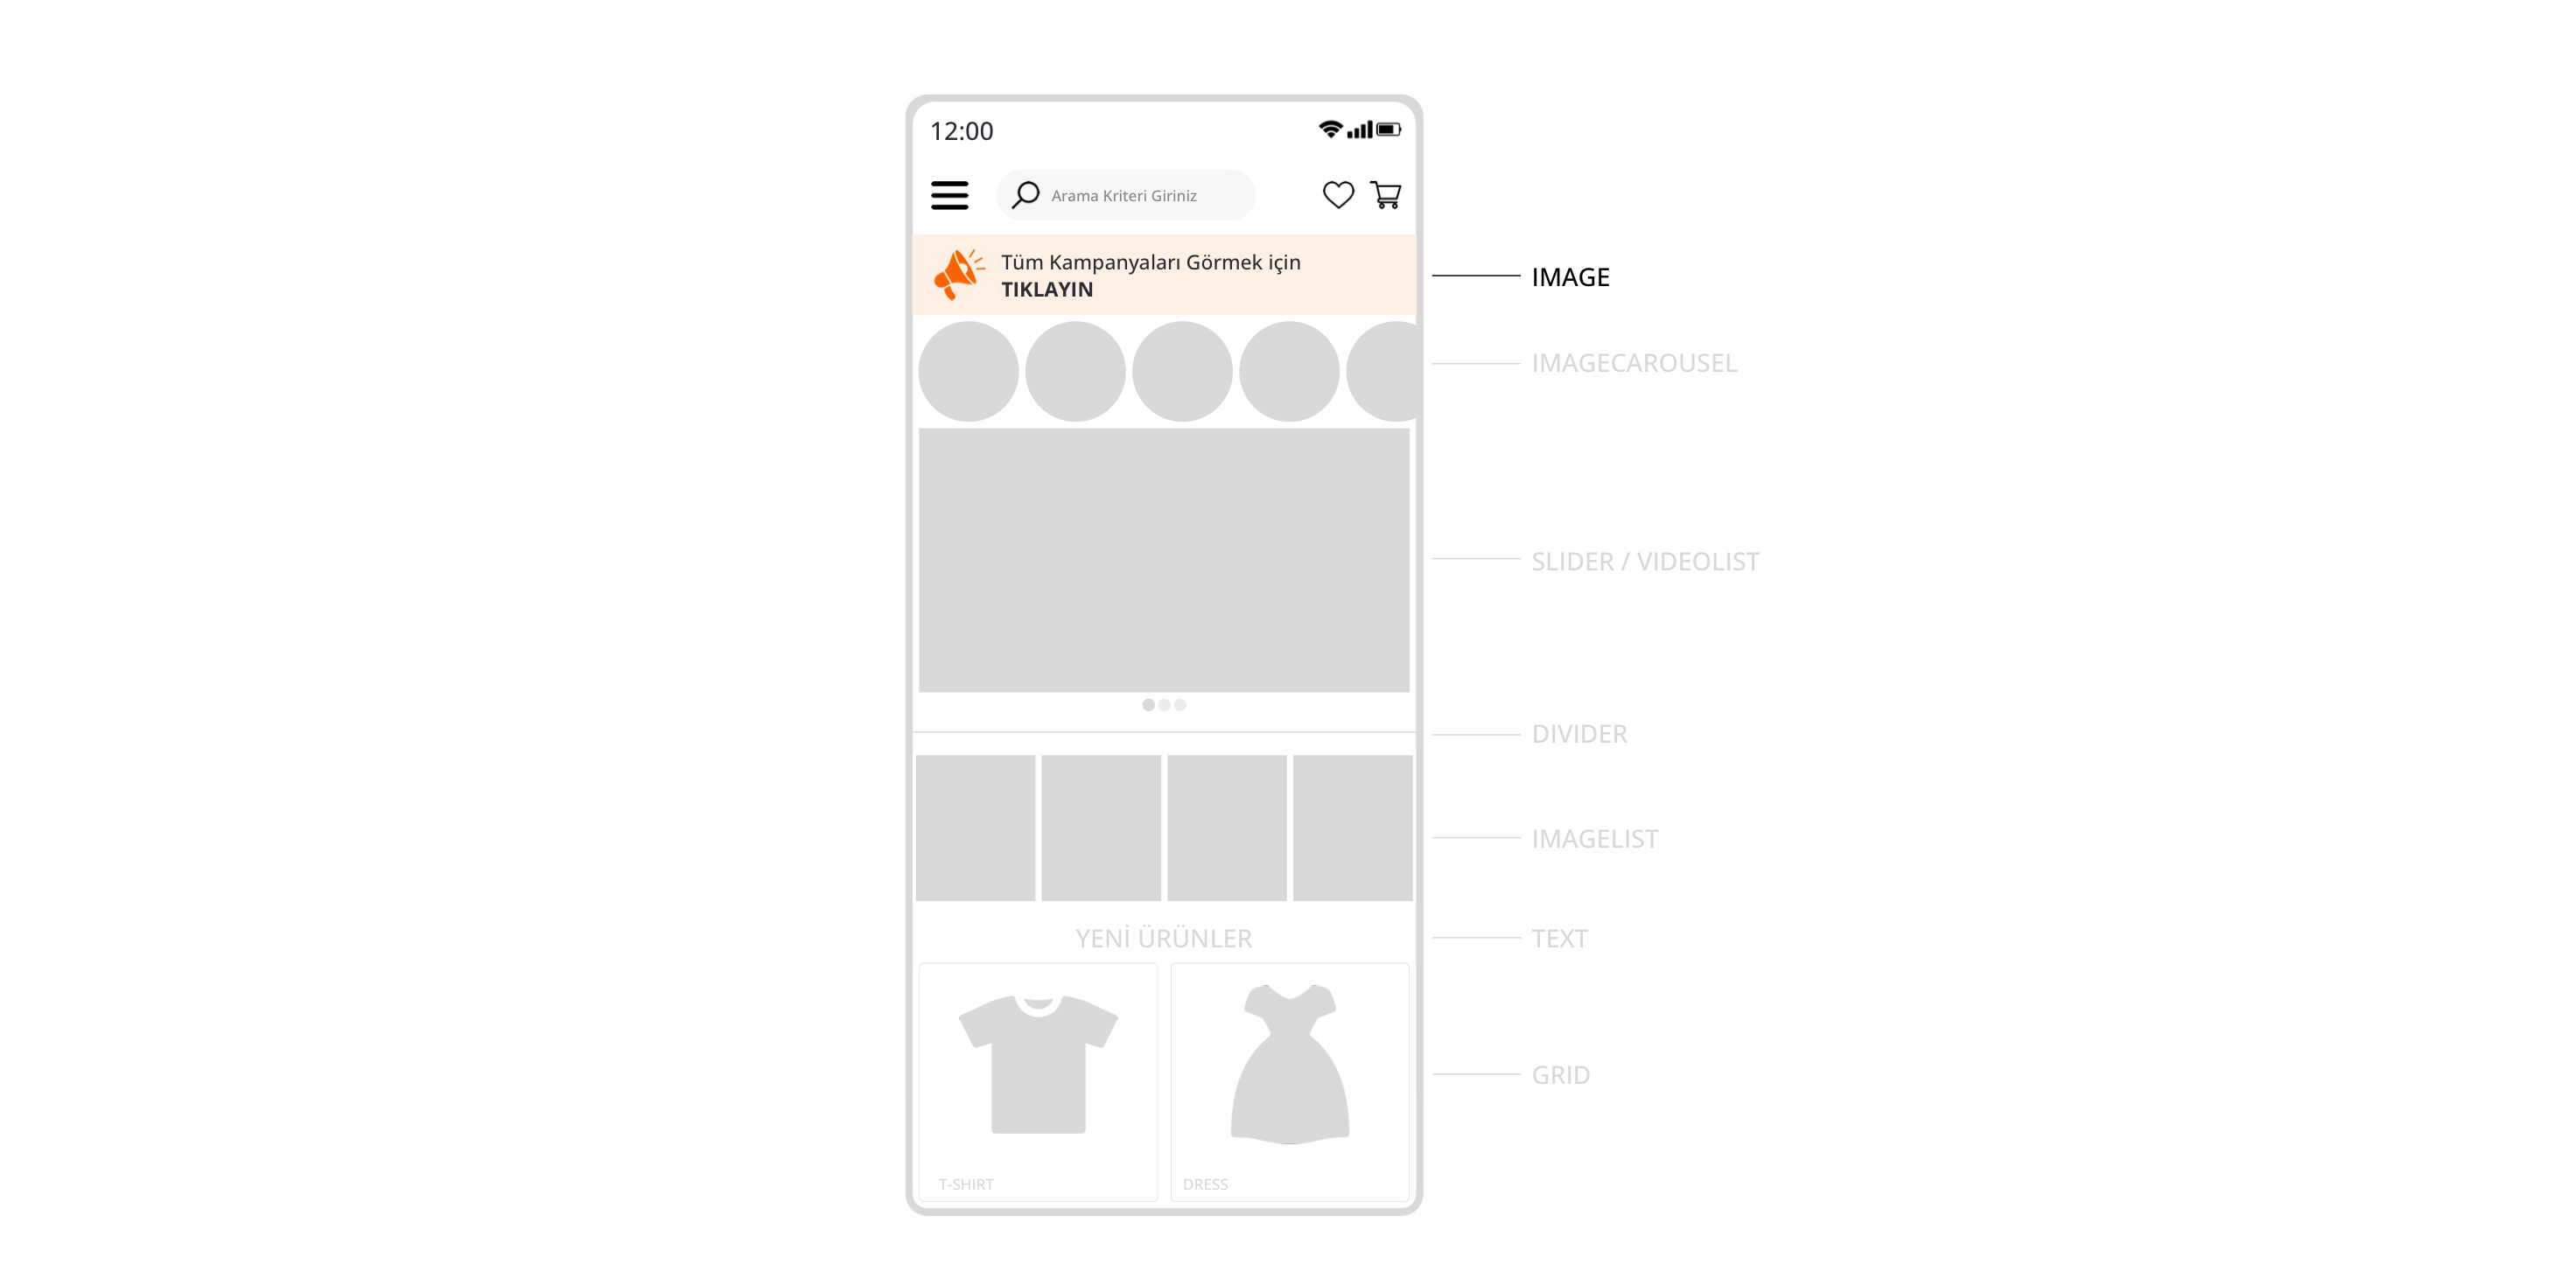
Widget | IMAGE
With this widget, you can easily add any image to your mobile app.
- Click the Add Widget button.
- Select the IMAGE widget type.
- Click Choose File in the Url field to select the image file you want to upload.
- Click the Save button.

If you want to add a redirect to the image, enter id, type values.
For optimal image quality, set the height percent value correctly.
Example to calculate Height Percent:

Output Example:
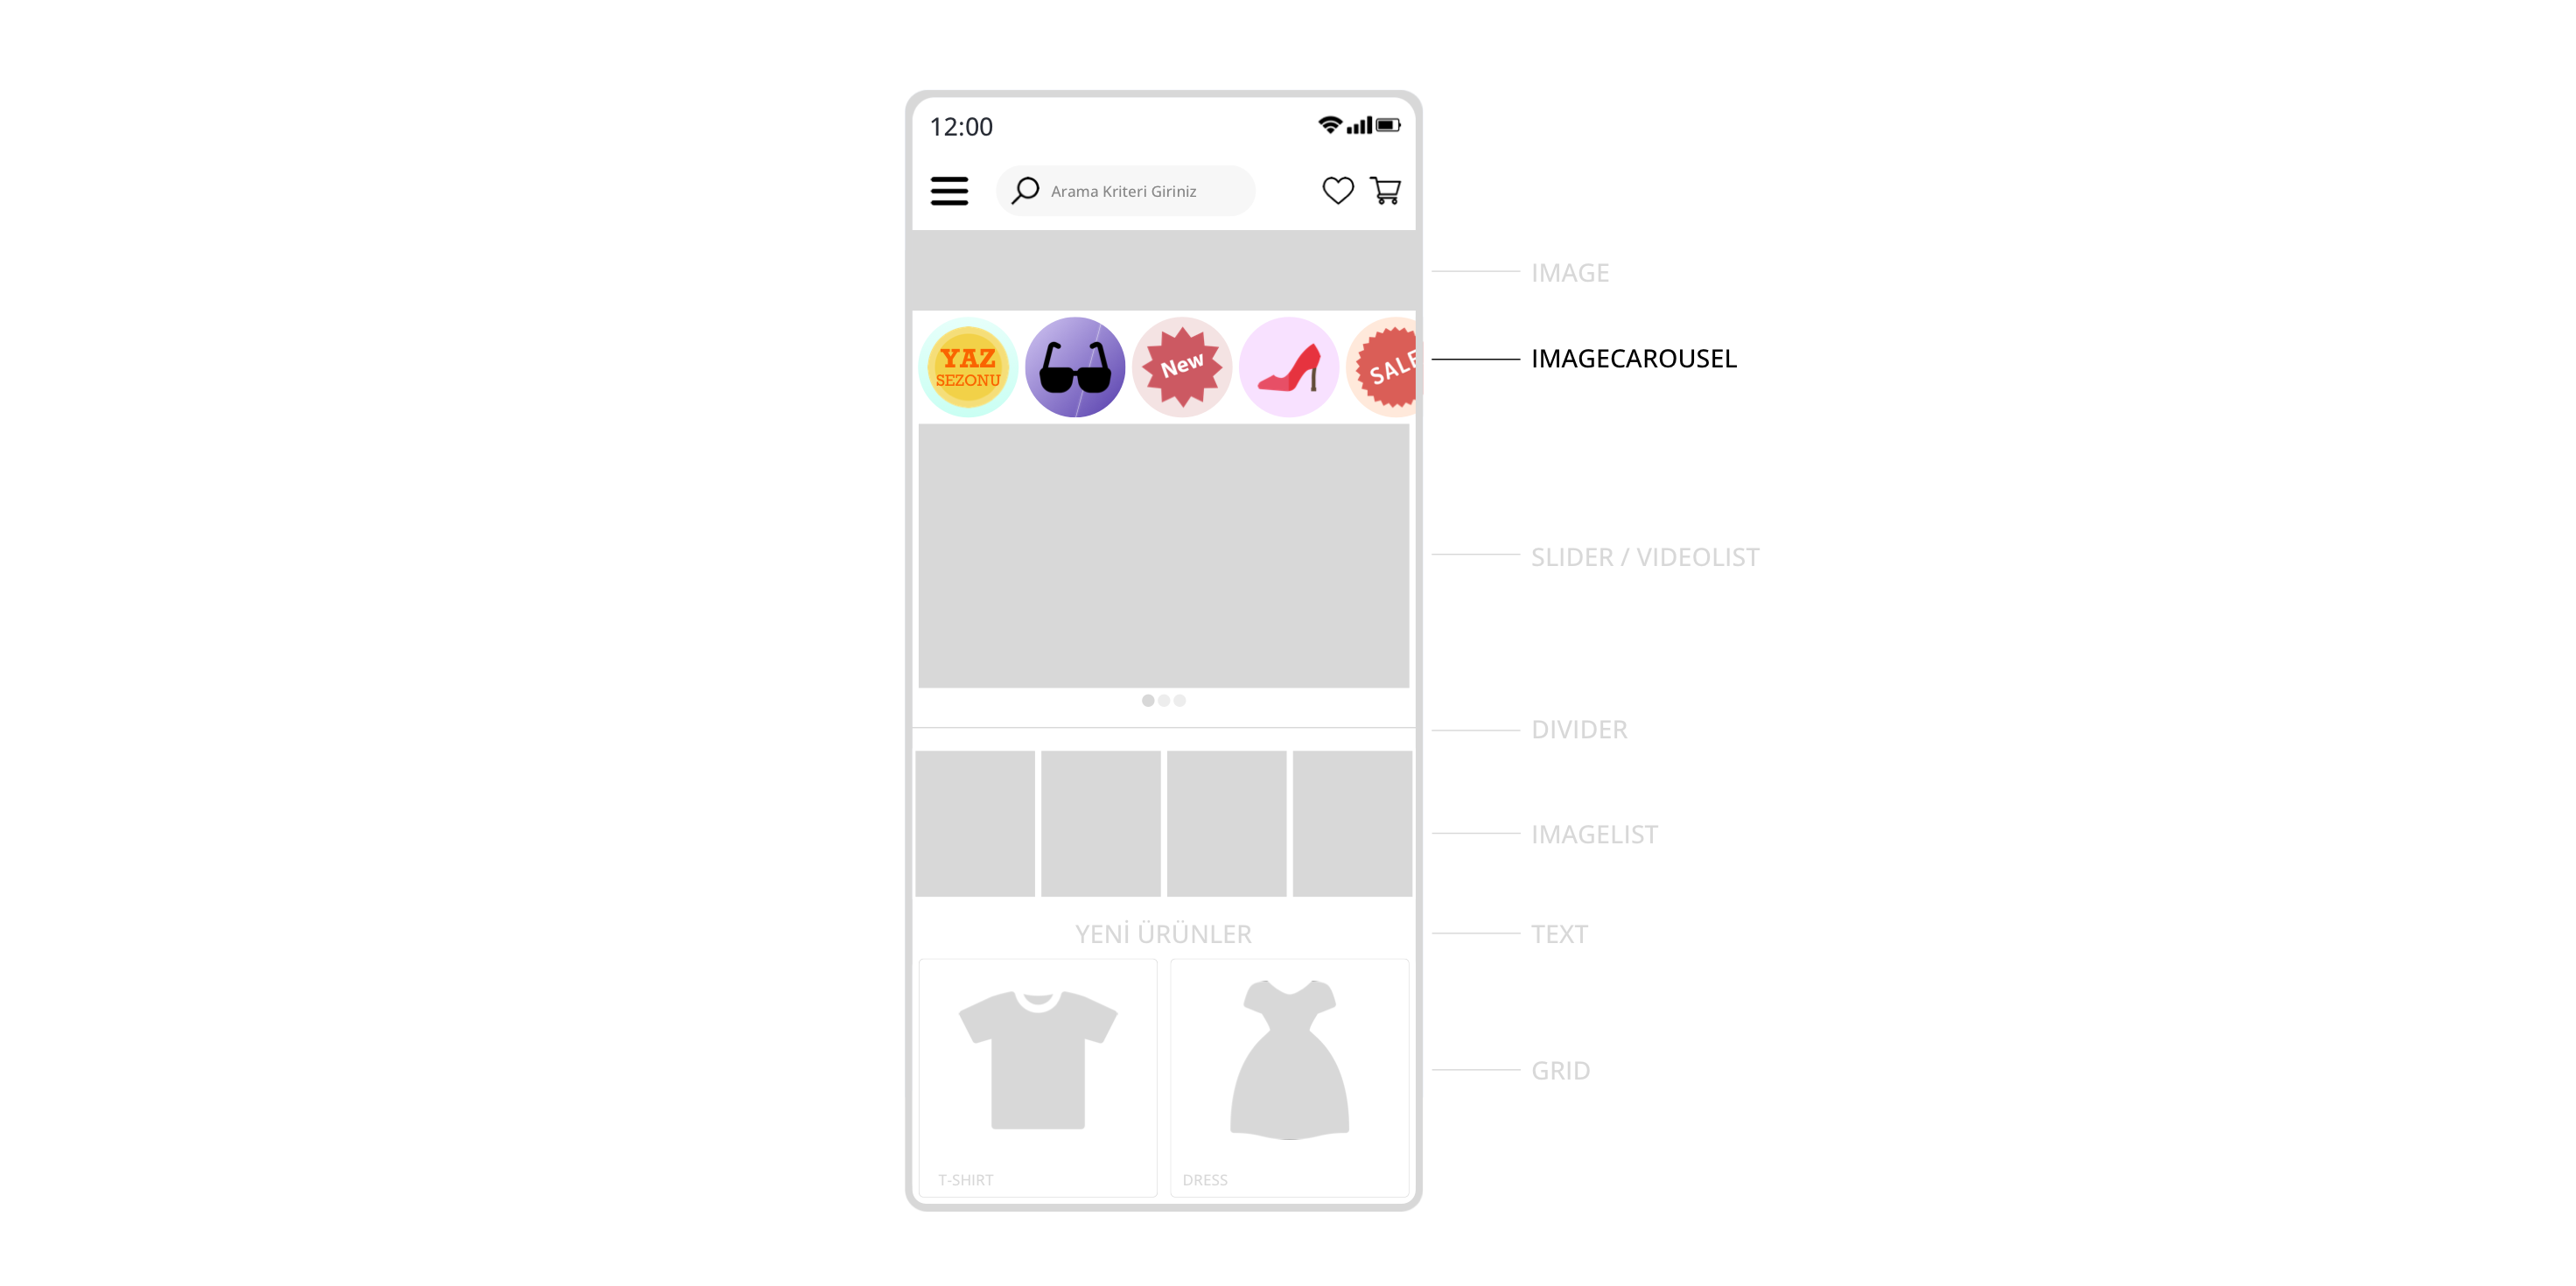
Widget | IMAGECAROUSEL
For this widget, first add the images to the Sliders section in the Admin Panel under Design > Slides. When adding the IMAGECAROUSEL widget, enter the id value of the created slide.
The images added through the Slides section will move horizontally in IMAGECAROUSEL.
To find the Slide's ID value, note the numeric value at the end of the URL of the page where the slide is located.
- Click the Add Widget button.
- Select the IMAGECAROUSEL widget type.
- Specify how many images should be displayed in the Item_count field. (Example: 4)
- Enter the Slide ID value in the id field.
- Click the Save button.

If you want to add a redirect to the image, enter type value in the Type field and id in the url field when adding the image to Slides.
For optimal image quality, set the height percent value correctly.
Example to calculate Height Percent:

Output Example:
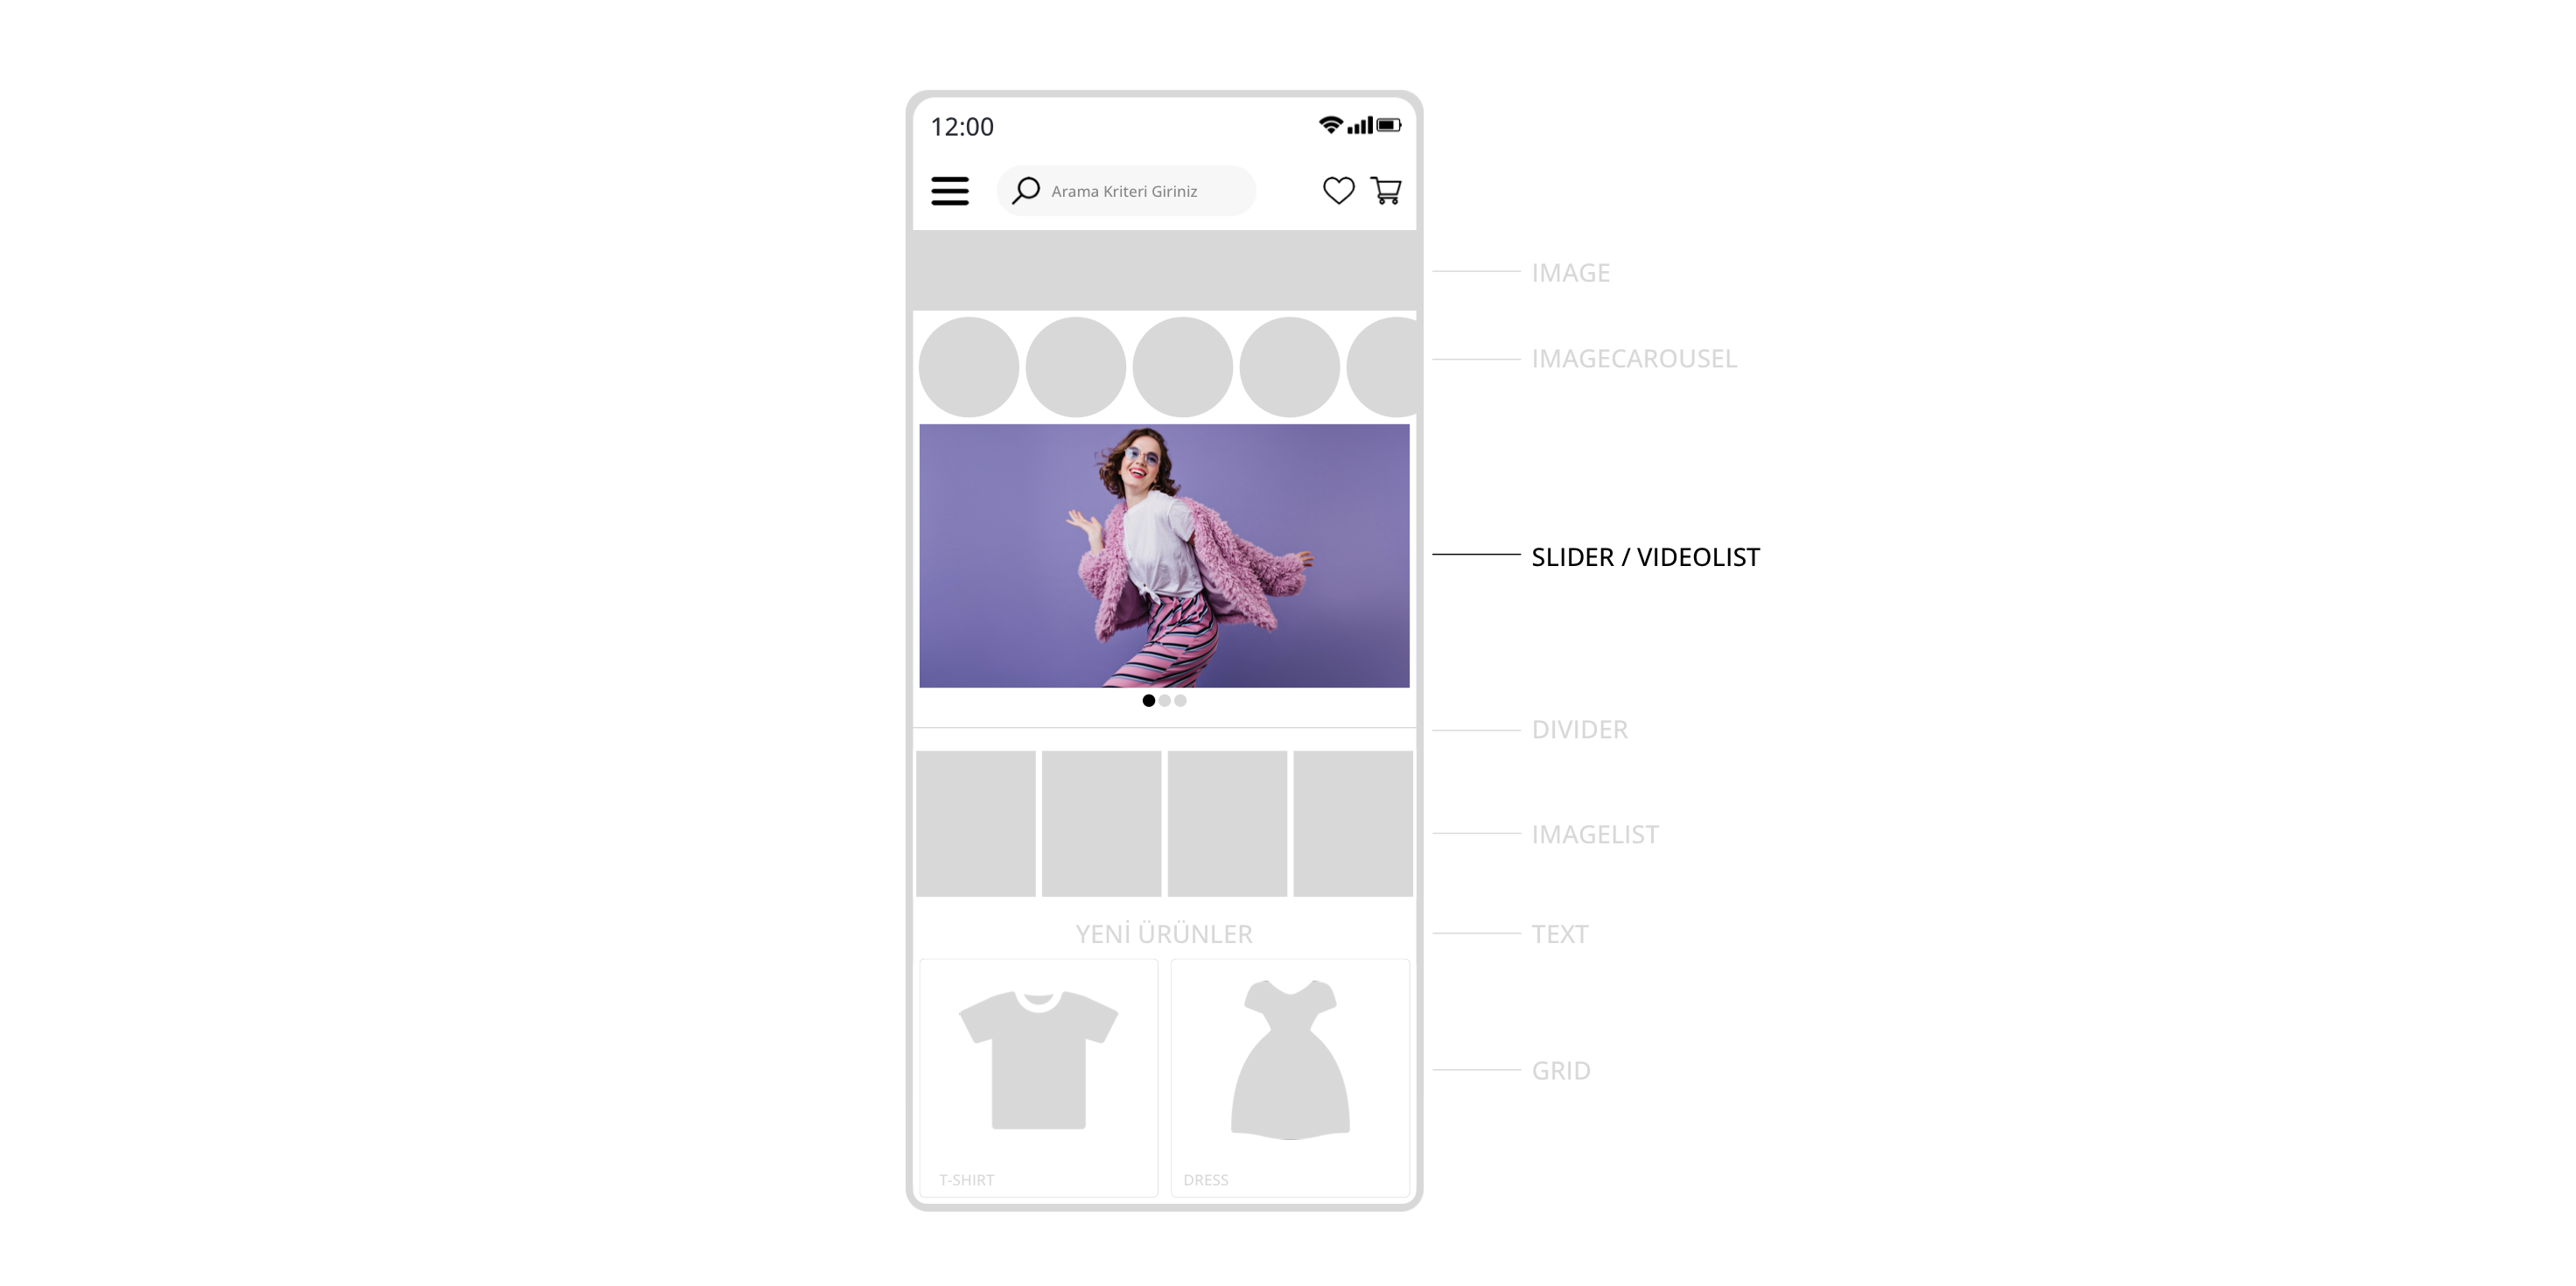
Widget | SLIDER
This widget allows you to add images by first uploading them to the Slides section in the Admin Panel under Design > Slides. When adding the SLIDER widget, enter the id value of the created slide.
The images added through the Slides section will move horizontally in SLIDER.
To find the Slide ID value, note the numeric value at the end of the URL of the page where the slide is located.
- Click the Add Widget button.
- Select the SLIDER widget type.
- Enter the Slide ID value in the id field.
- Click the Save button.

If you want to add a redirect to the image, enter type value in the Type field and id in the url field when adding the image to Slides.
For optimal image quality, set the height percent value correctly.
Example to calculate Height Percent:

Output Example:
Widget | DIVIDER
With this widget, you can add a divider between any widget types.
- Click the "Add Widget" button.
- Select the DIVIDER widget type.
- Enter the Height value in pixels (Example: for 10px, height:10).
- Click the Save button.

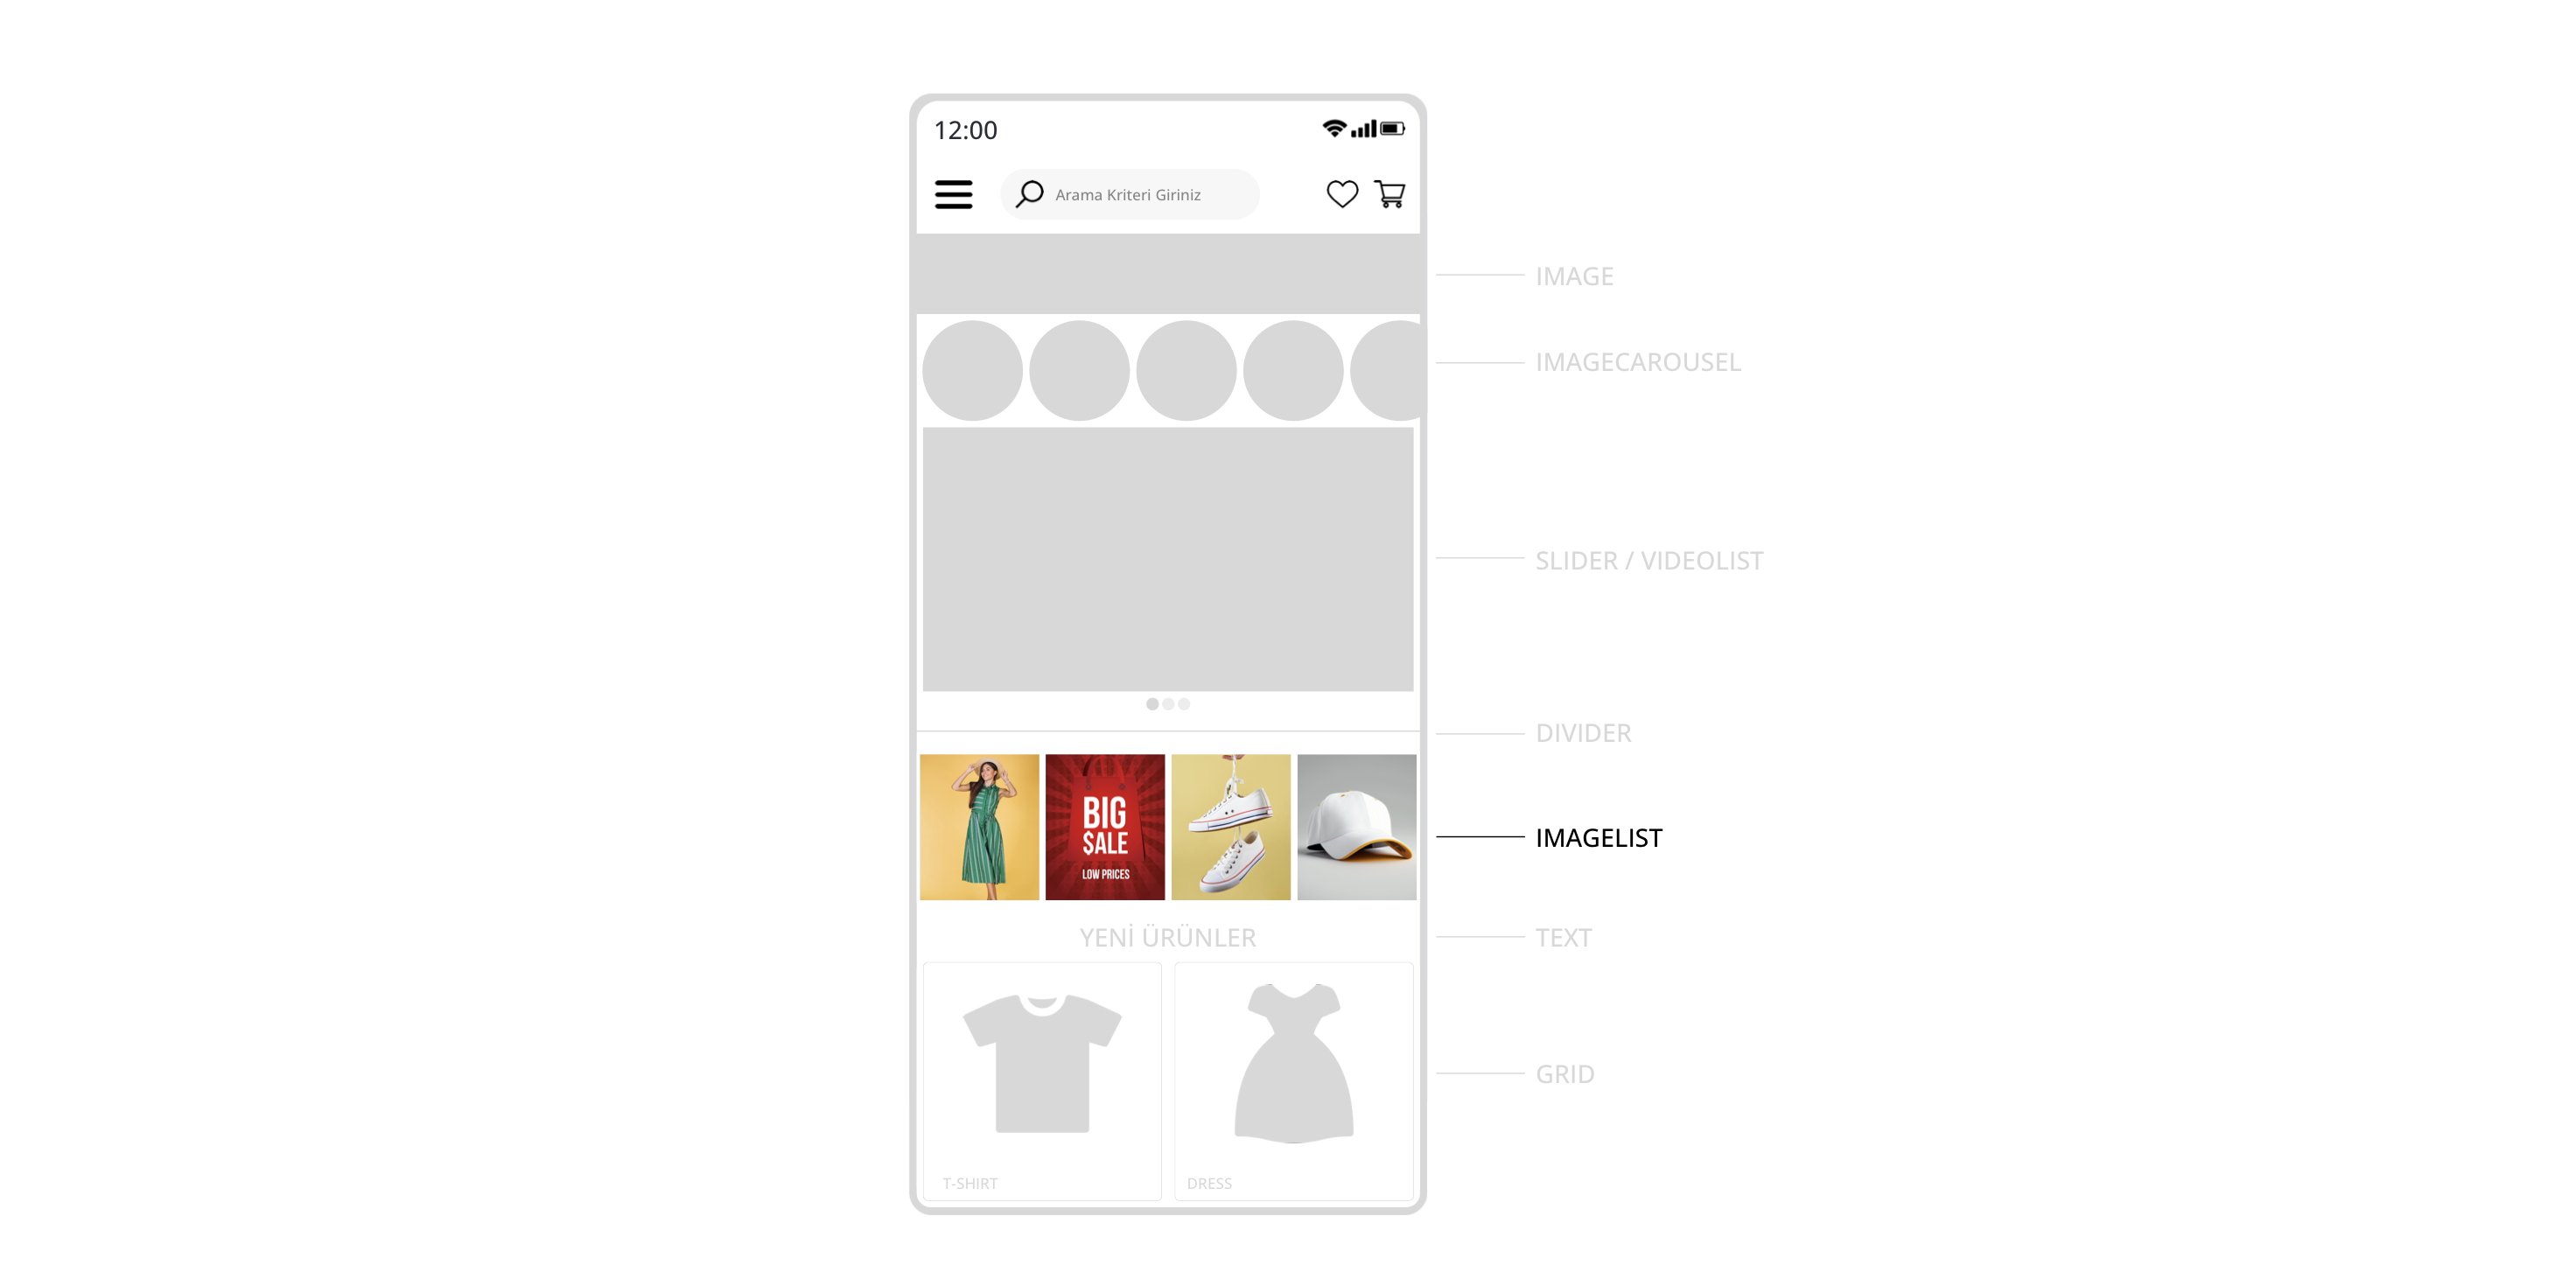
Widget | IMAGELIST
With this widget, you can easily add images to your mobile application.
- Click the "Add Widget" button.
- Select the IMAGE widget type.
- Click "Choose File" in the Url section to select the image file you want to upload.
- Click the Save button.
- Repeat the above four steps as many times as the number of images you want to upload.

Example:

If you want to link the uploaded image file, enter the id and type values.
For the best image quality, make sure to enter the correct height percent value.
Example of calculating Height Percent:

Output Example:
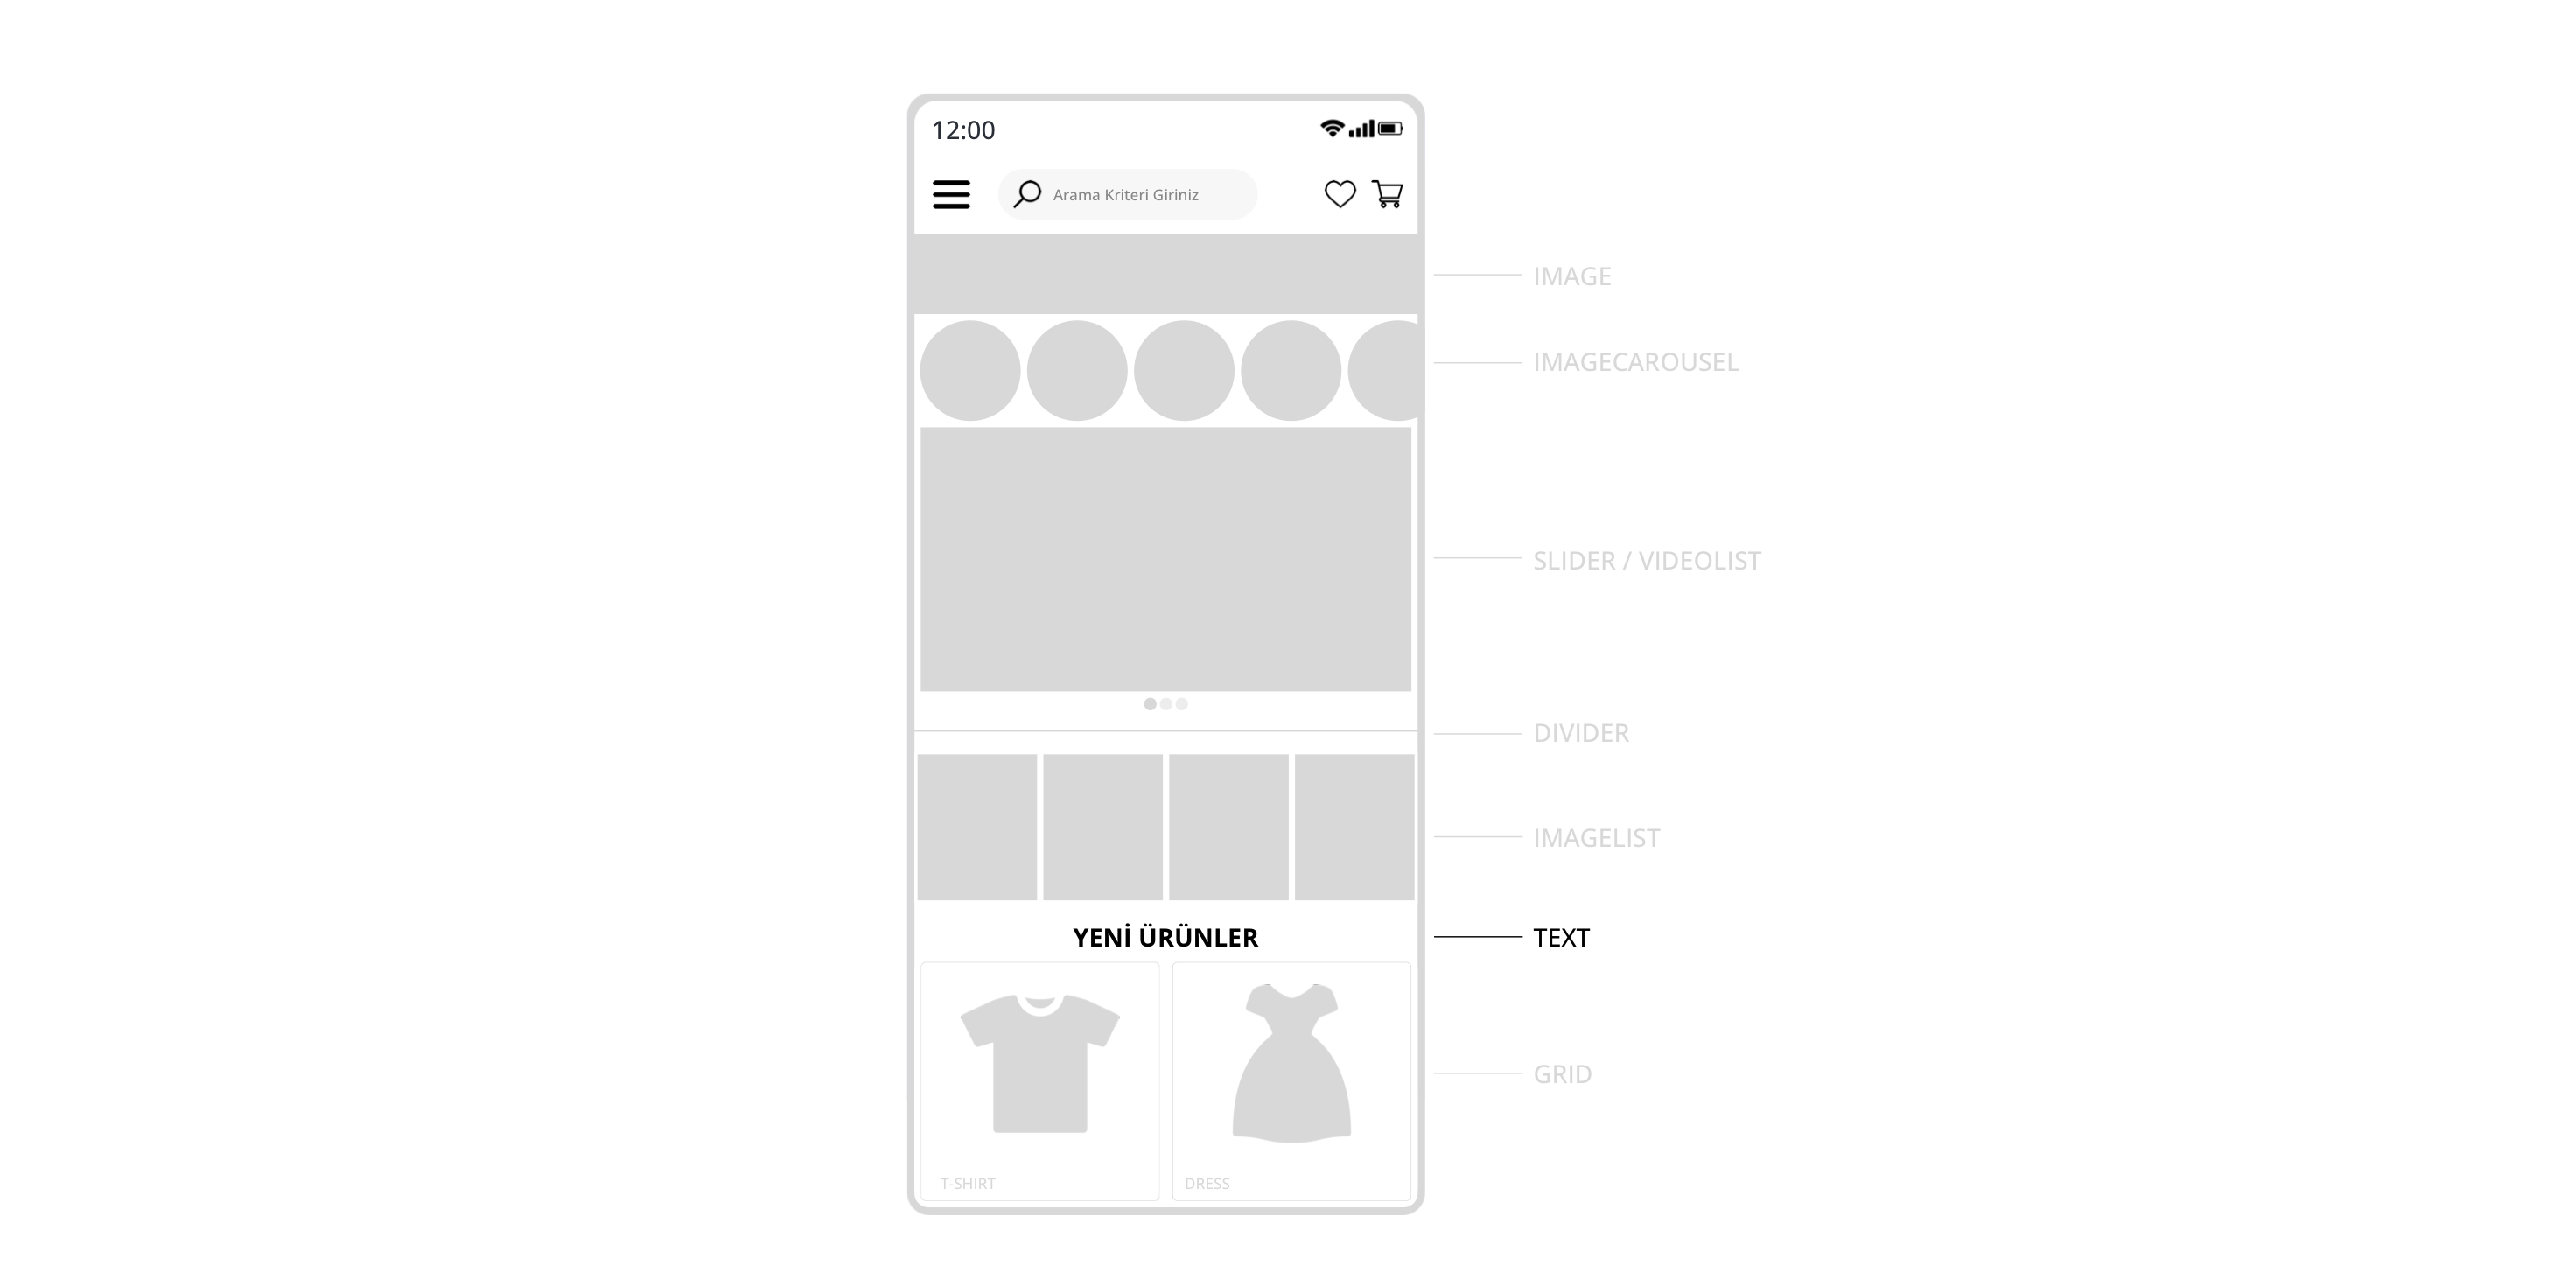
Widget | TEXT
With this widget, you can easily add any text to your mobile application.
- Click the "Add Widget" button.
- Select the TEXT widget type.
- Click "Choose File" in the Text section to select the image file you want to upload.
- Click the Save button.
Output Example:
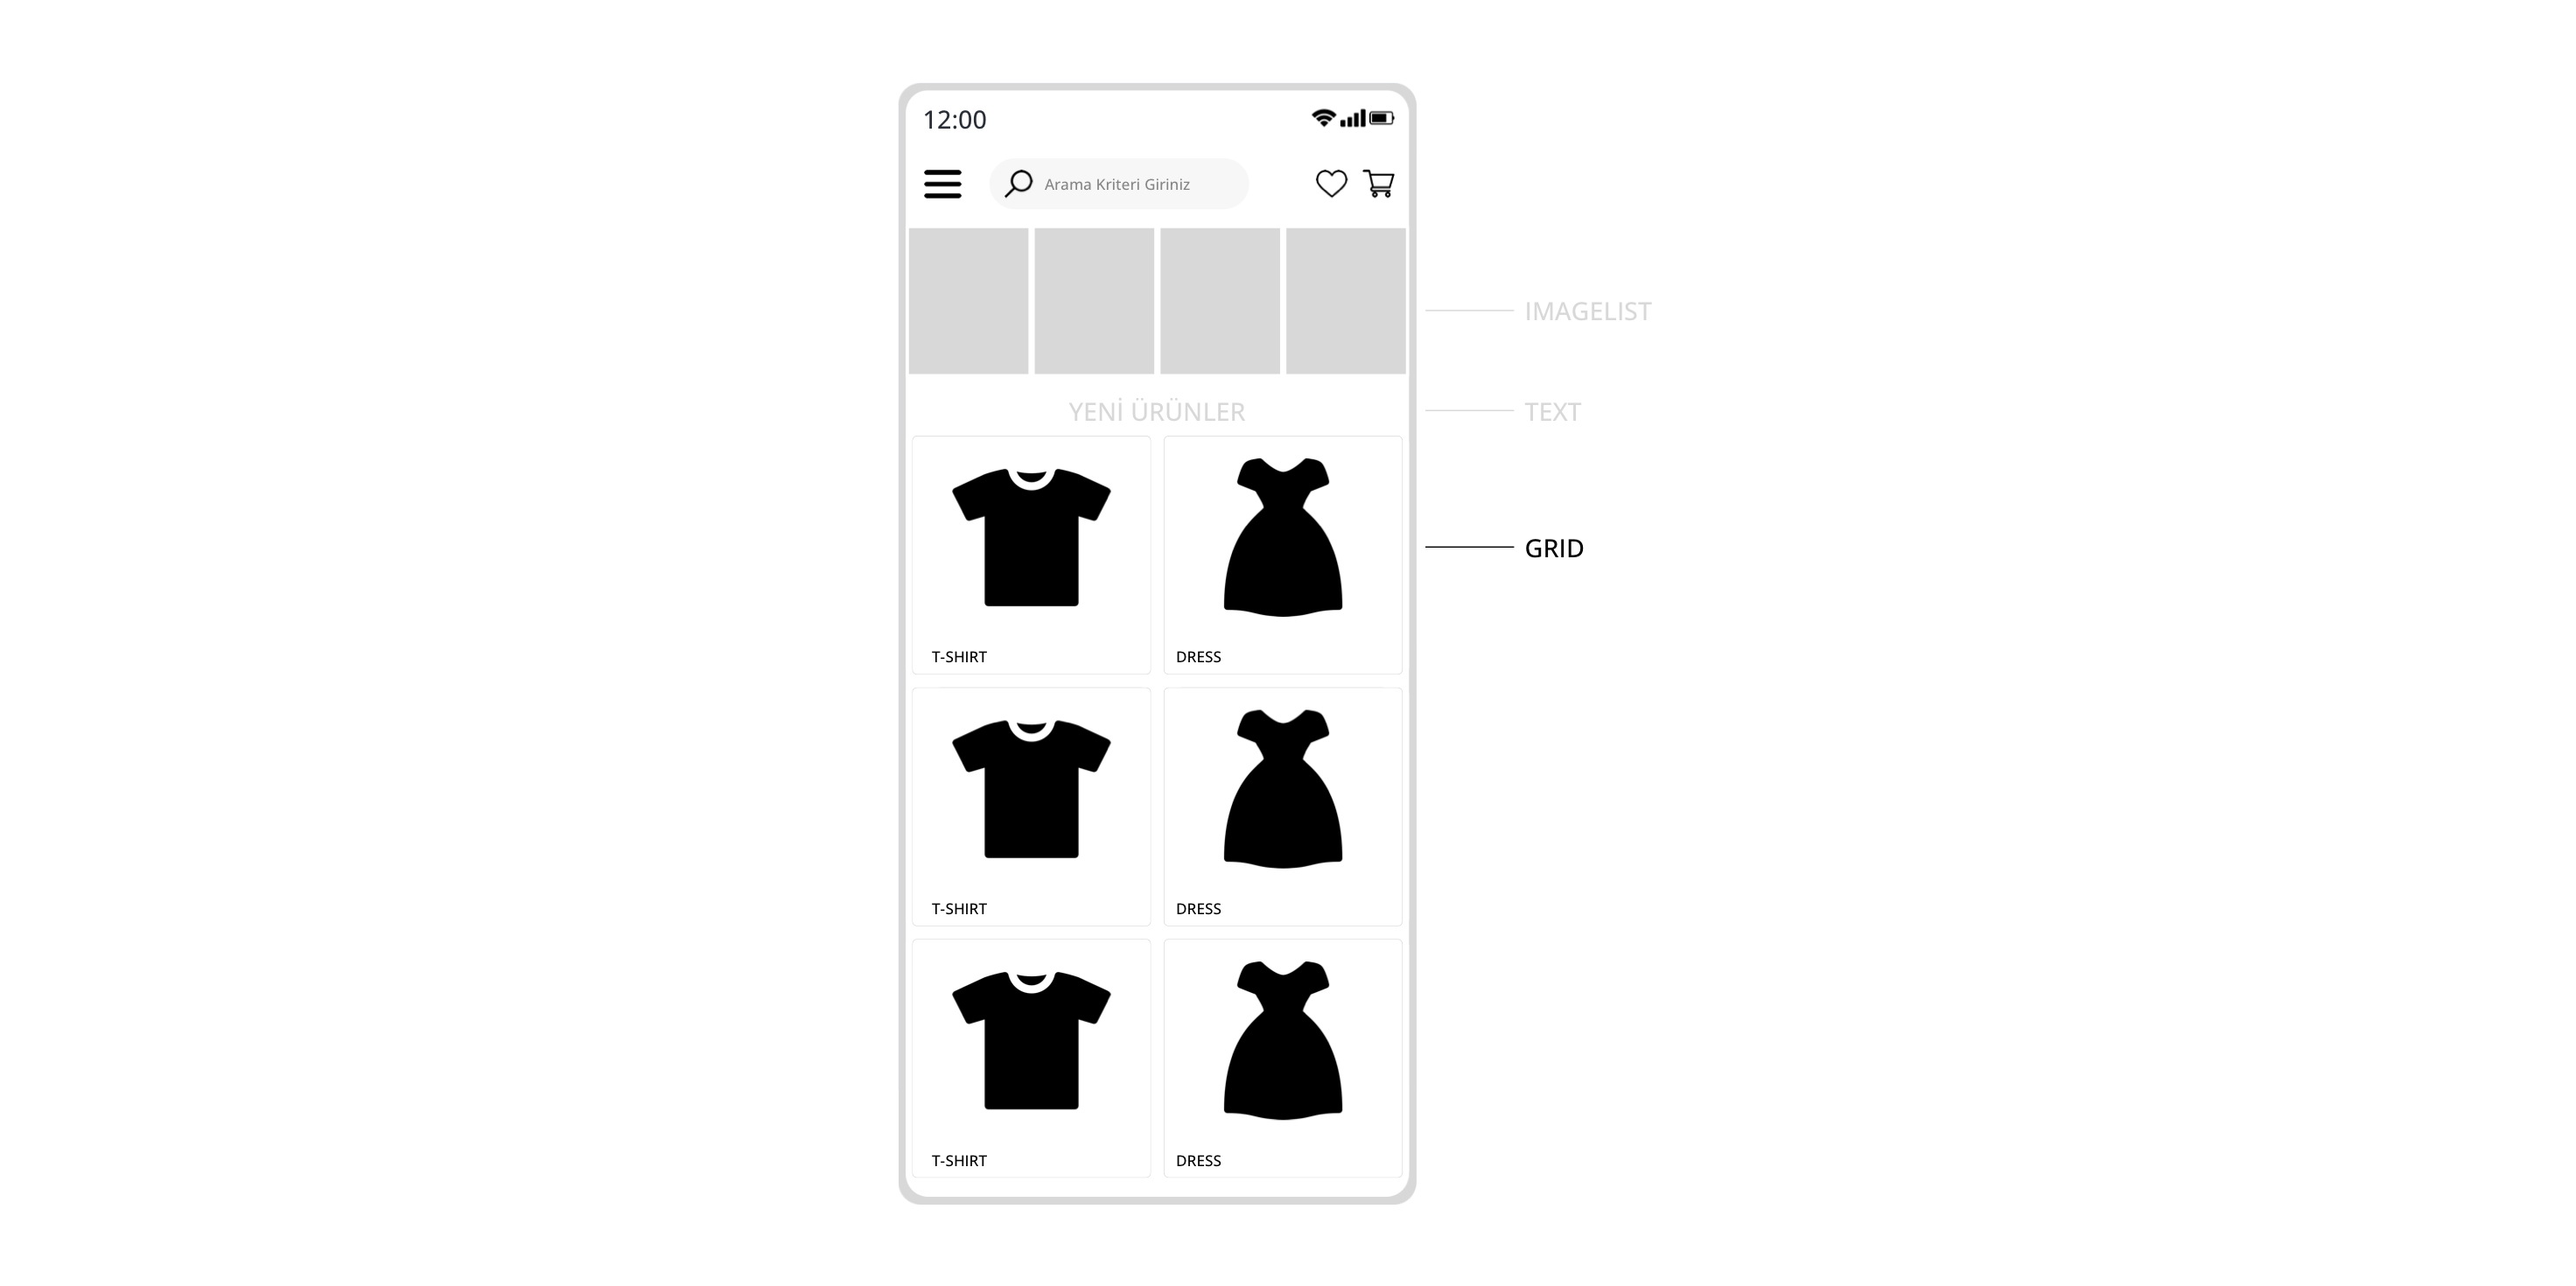
Widget | GRID
With this widget, you can easily add the products you added to serB2B in a 2-item display format to your mobile application.
- Click the "Add Widget" button.
- Select the GRID widget type.
- Enter the number of products to be displayed in the limit field (Example: 40).
- Define the display order by entering desc (descending) for showing products from the most recently added, or asc (ascending) for displaying from the first added product.
- Click the Save button.

Output Example:
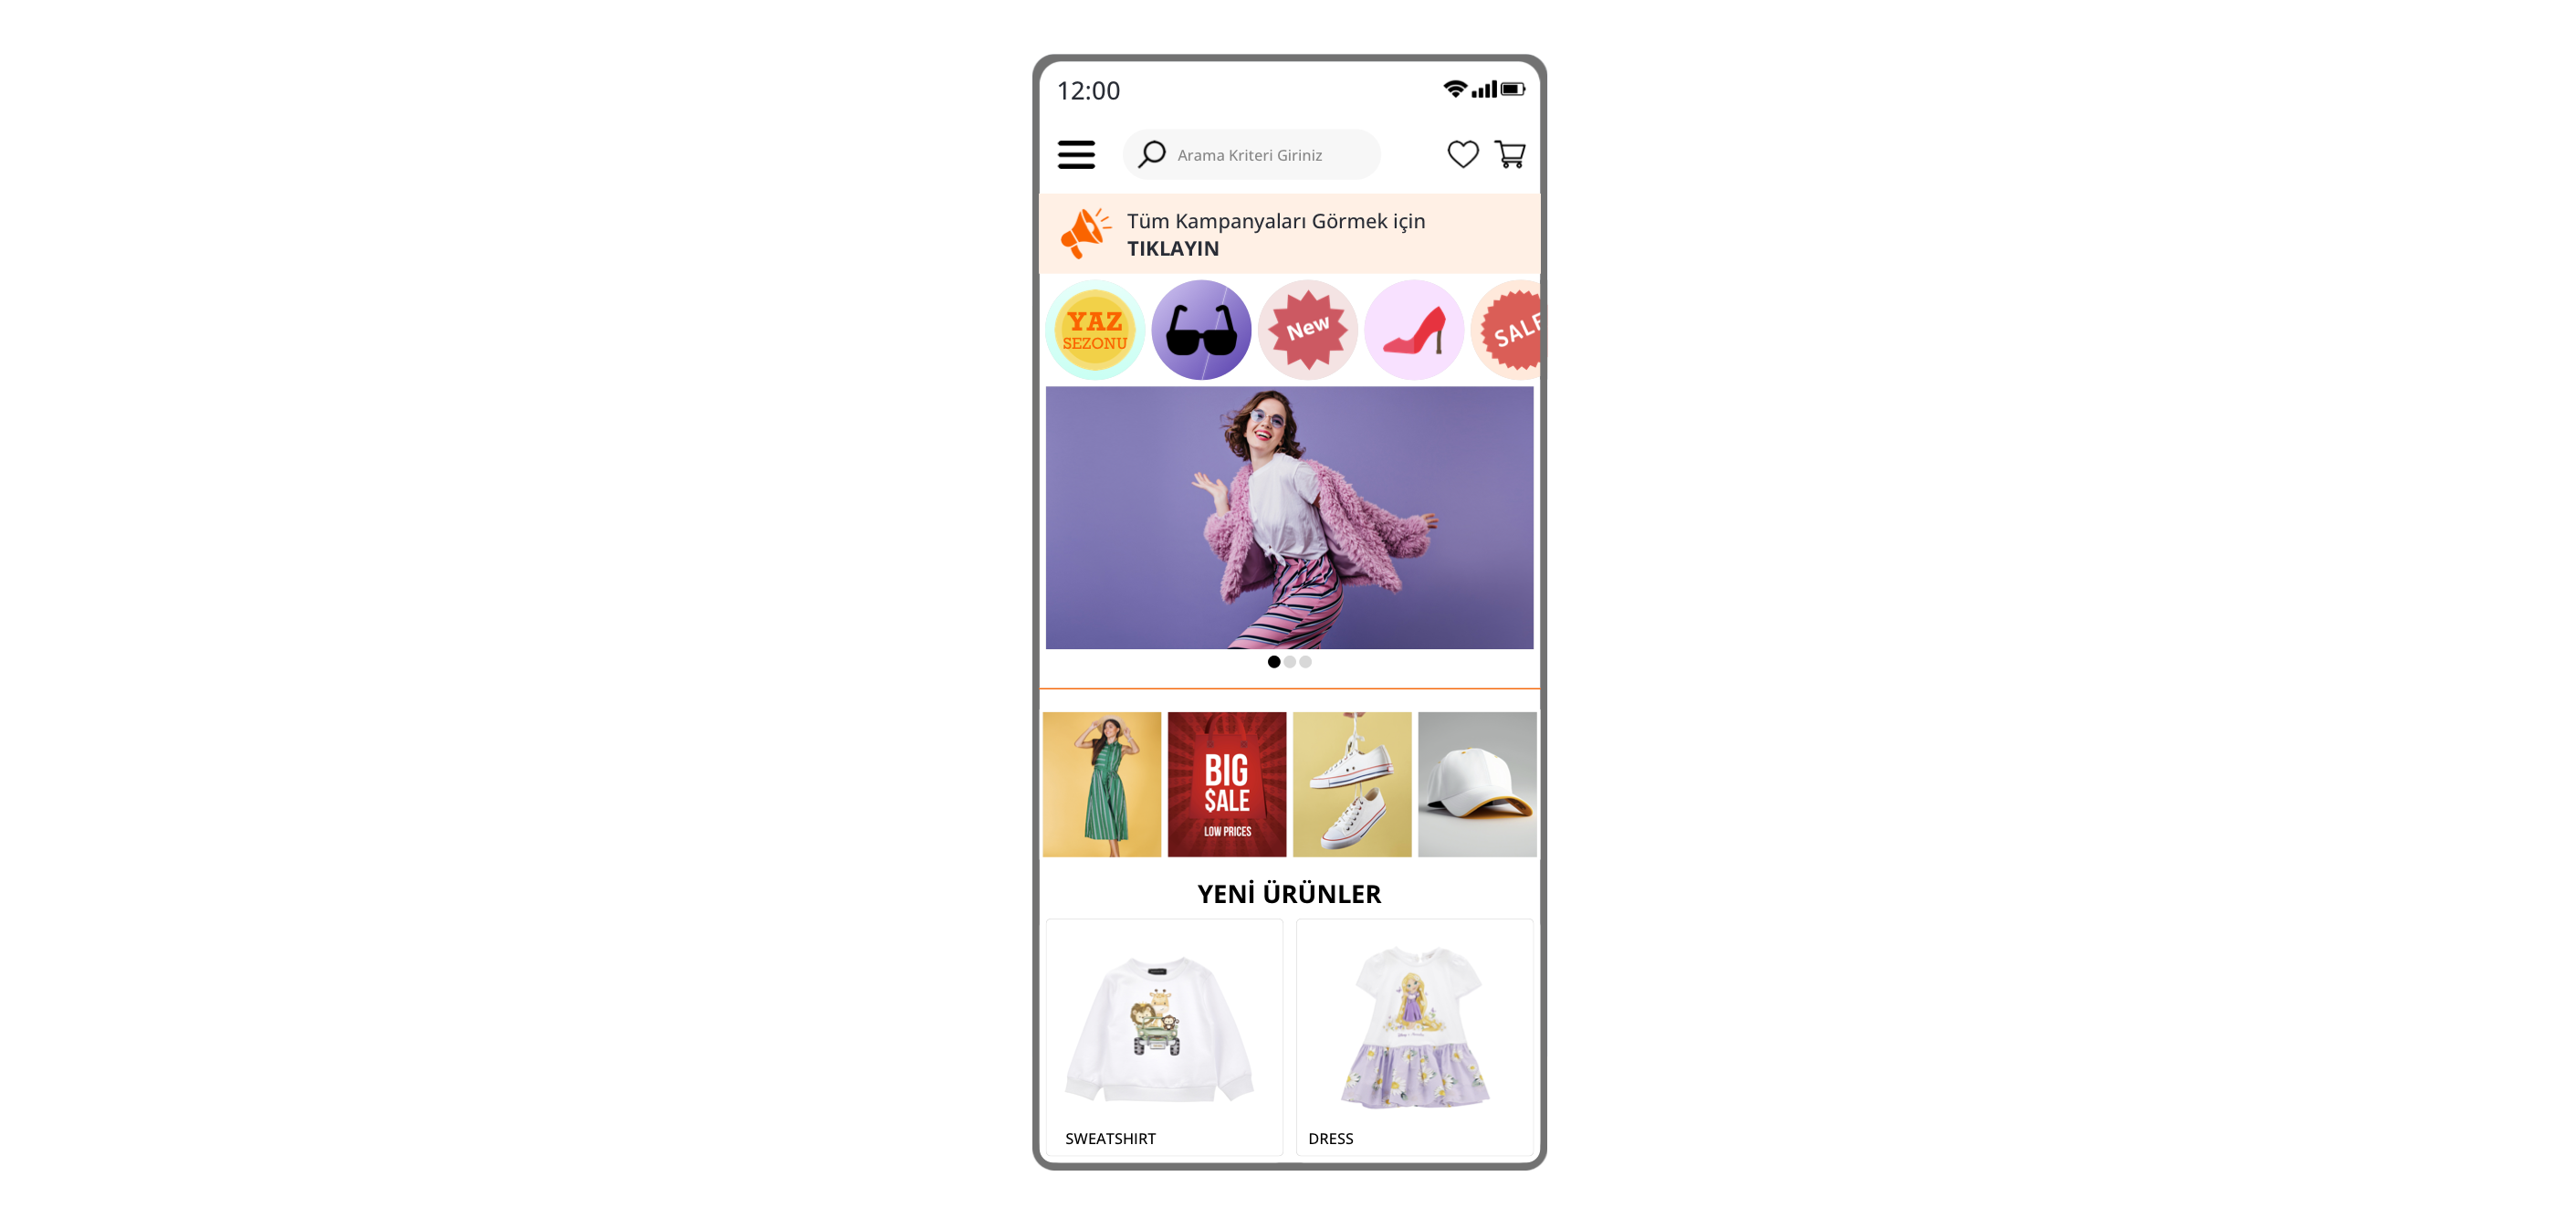
Your Mobile Application is Ready!
By following the steps above, the design of your serMobile PRO mobile application for one of the defined language options is now ready!
serMobile PRO | Design in Different Languages
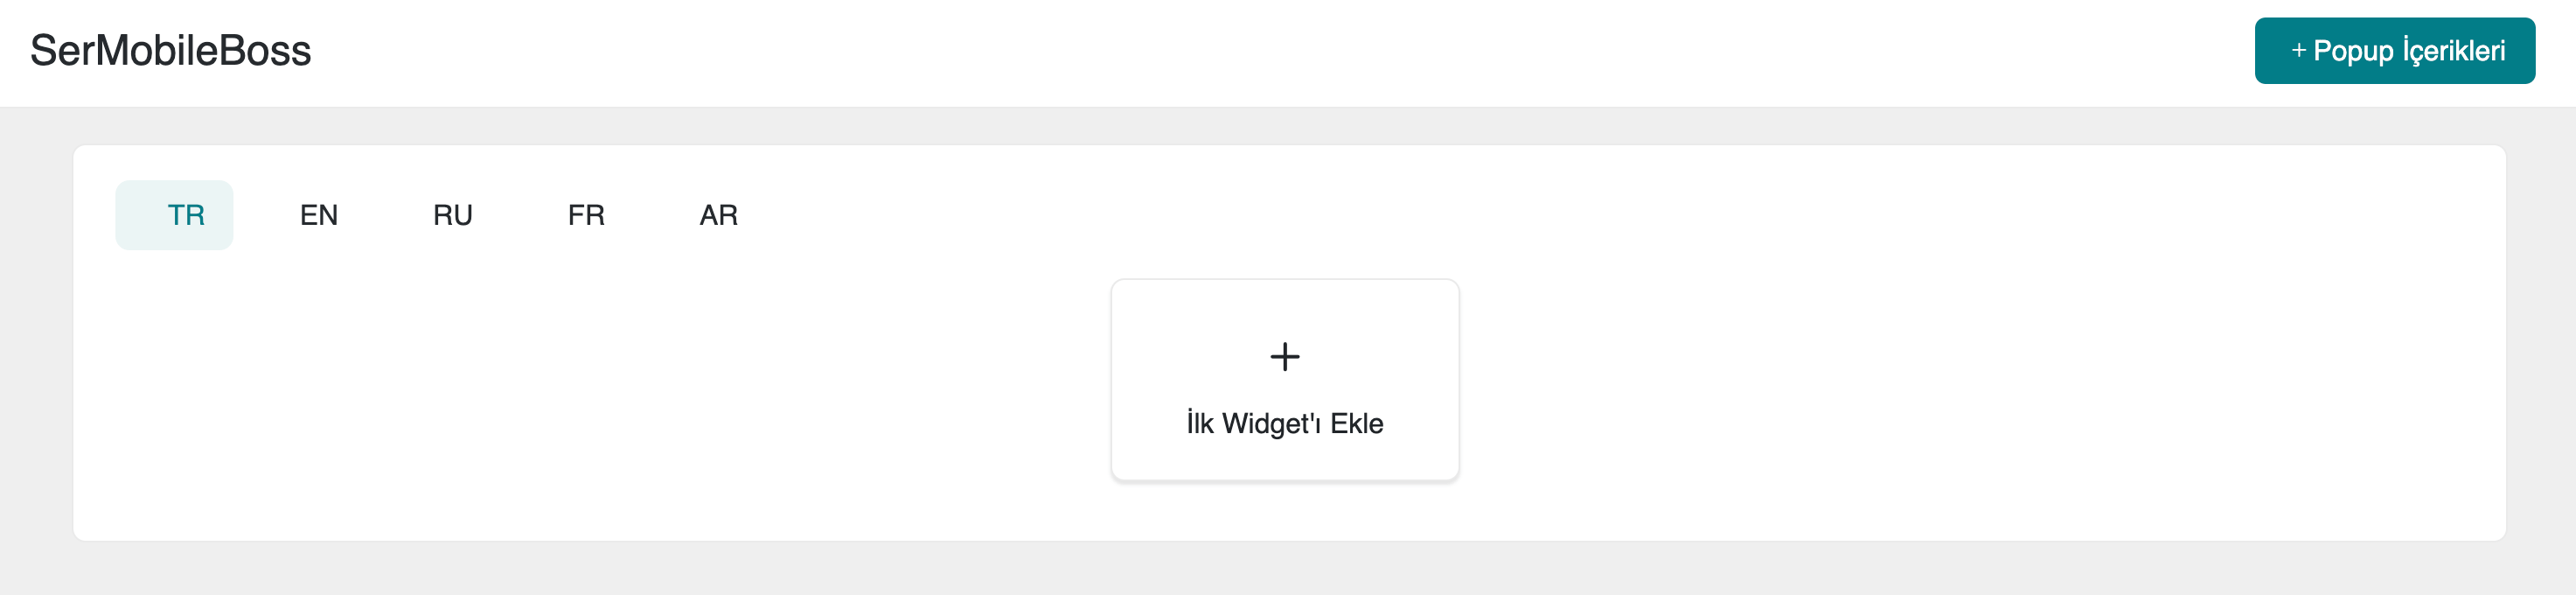
To design your mobile application in different languages, first select one of the defined language options from your serB2B system (Example: TR, EN, RU, FR, AR), and then add the widget types specific to that language. Complete your design by following the steps in the serMobile PRO | Homepage Design document.
For adding new languages and obtaining support, please contact us at [email protected].
Frequently Asked Questions (FAQ)
-
How can I add a new language to my serMobile PRO mobile application?
To add a new language to your serMobile PRO application, first ensure that the desired language is available in your serB2B system. Then, select the language from the language options and follow the instructions in the serMobile PRO | Home Page Design document to customize the design accordingly. For further assistance, you can contact support at [email protected].
-
What should I do if I encounter issues with widget display on my mobile app?
If you experience any issues with widget display, make sure the widget type and settings have been configured correctly. Double-check the image sizes, height percentages, and product limit values in the GRID widget, and ensure all fields are filled out properly. If the issue persists, please contact our support team at [email protected] for assistance.
Related Resources
Contact and Support
If you encounter any issues or need assistance, please contact our support team. We will be happy to assist you as soon as possible.