serMobilePRO Notification Sending
You can create notifications with serMobilePRO to send announcements and notifications from the admin panel.
1. Bulk Notification Sending
The advanced features you can use when sending announcements and notifications in the serMobilePRO application are described below. These features enhance the visual appeal of your notifications while providing the ability to direct users straight to targeted content.
To access this tab; Admin Panel > Marketing > serMobilePro Notification
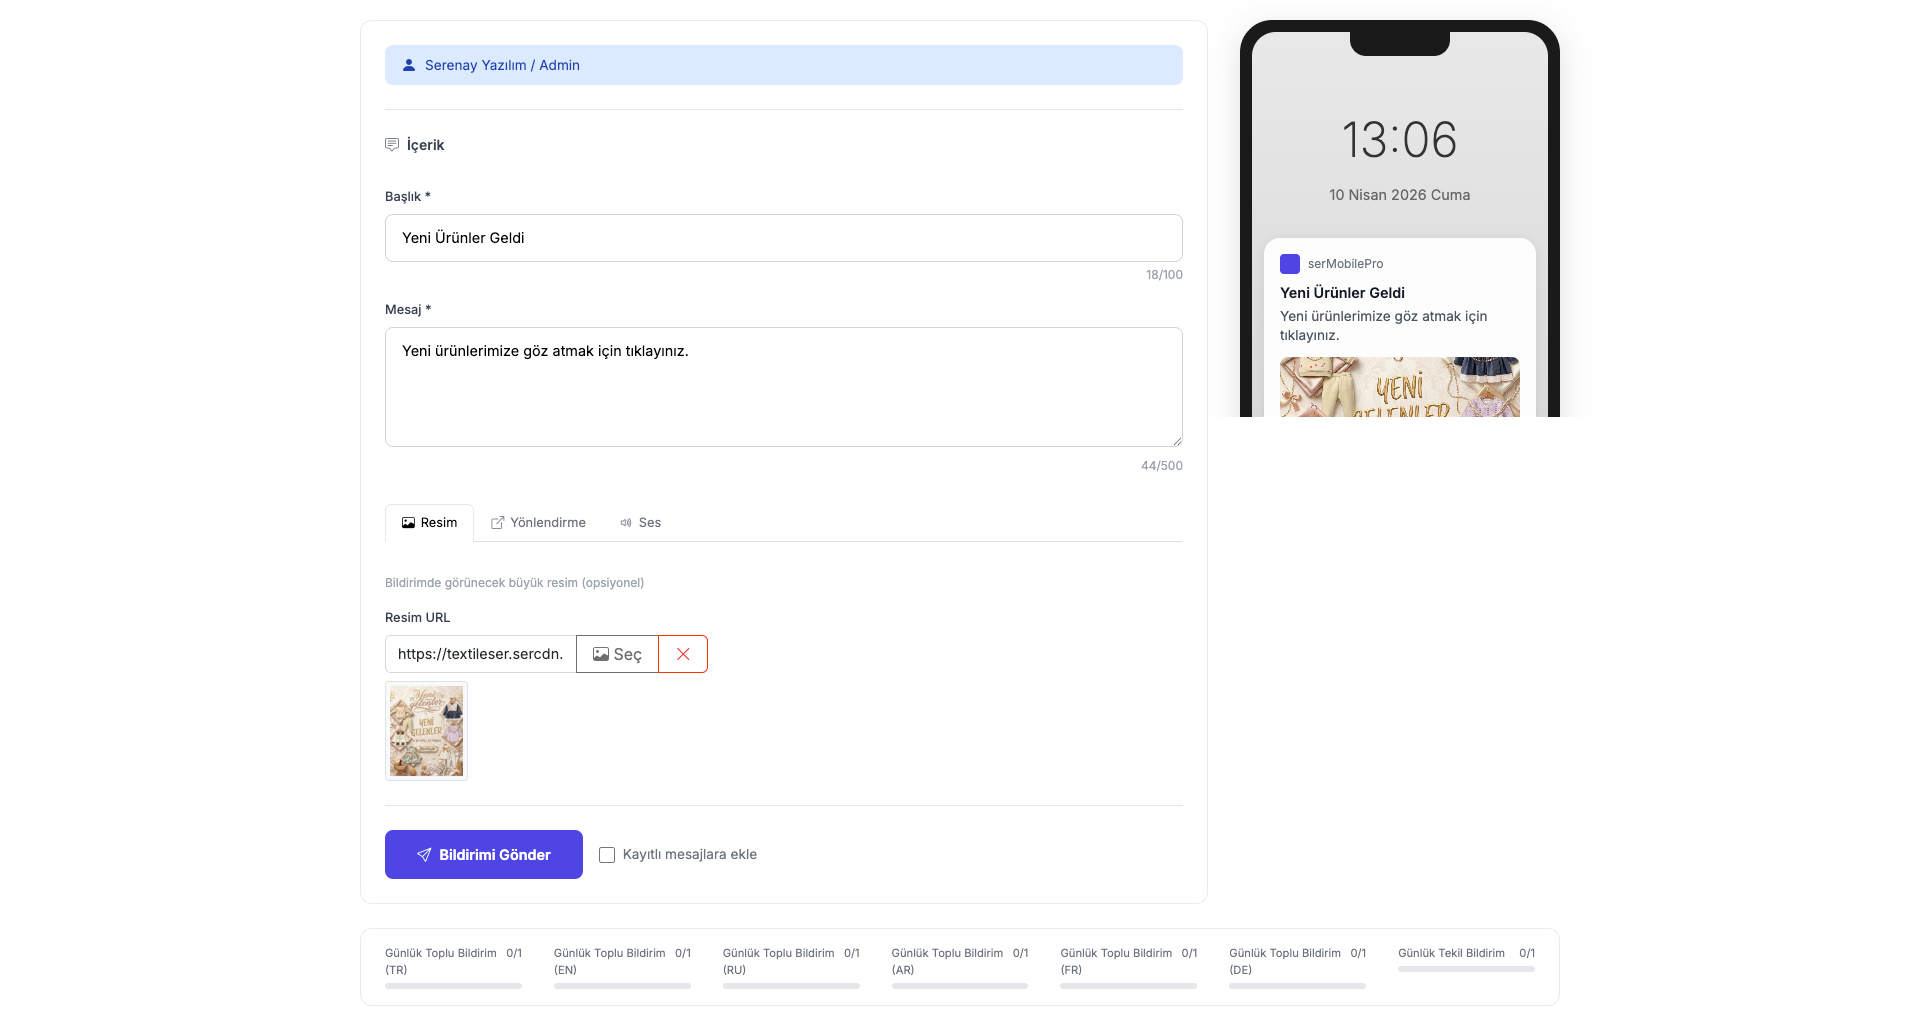
Notifications with Visual Content
serMobilePRO allows you to enrich your announcements and campaign notifications with images, not limiting them to text only. This feature aims to make your notifications more easily noticed by users and increase engagement rates.
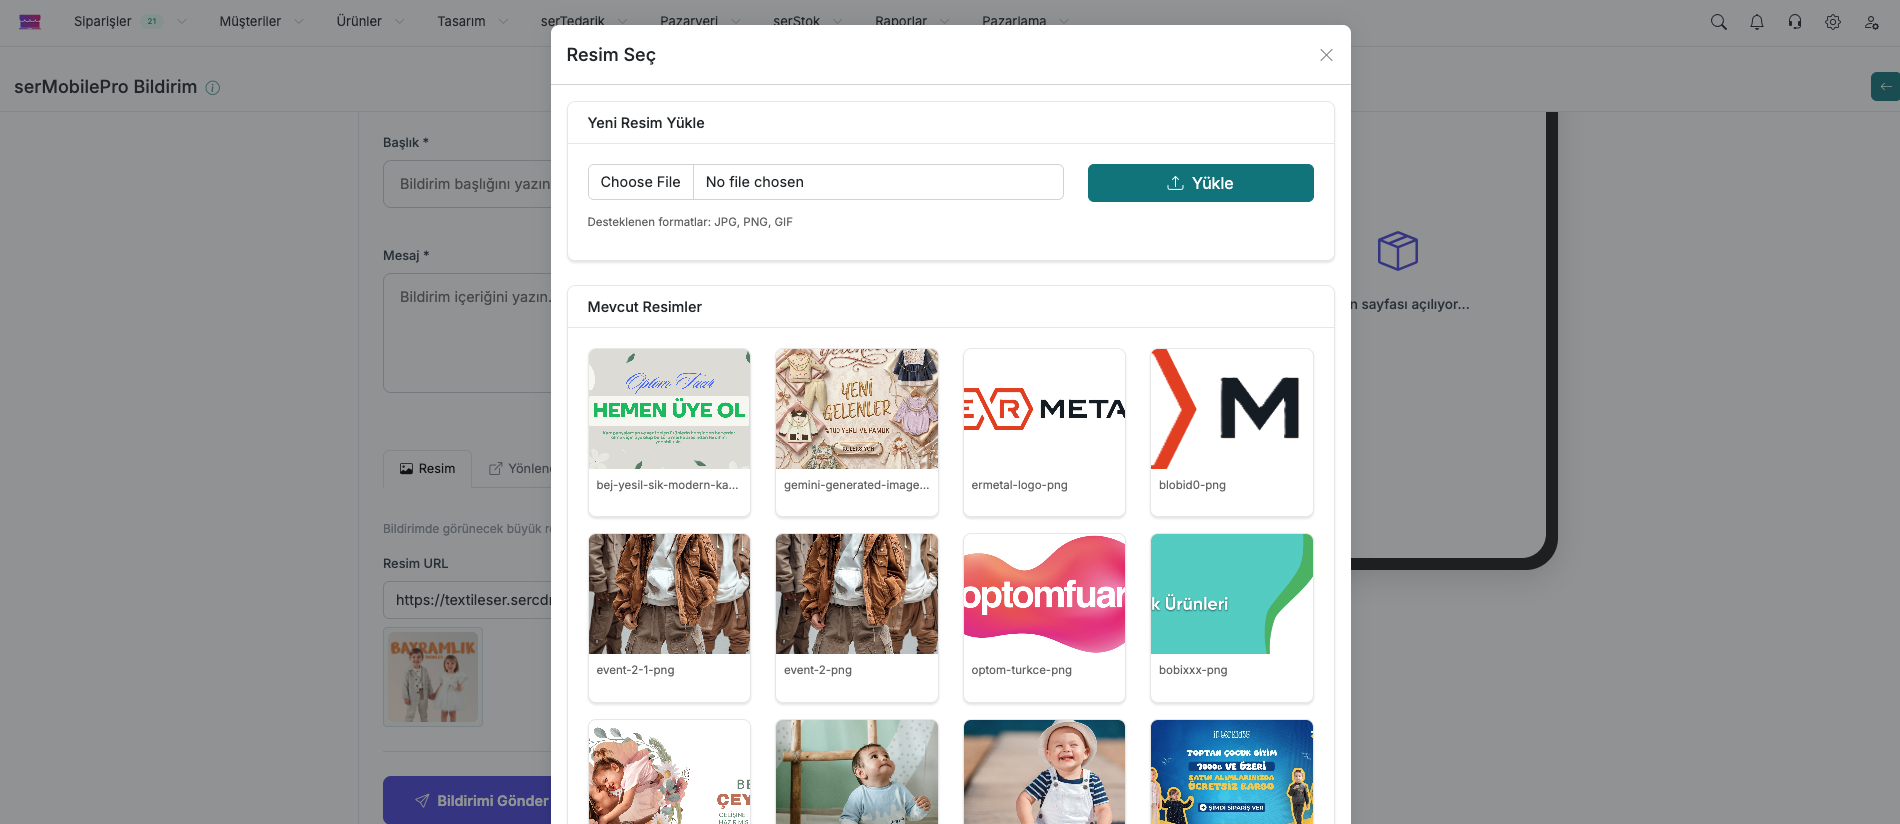
Usage
- When you create a new campaign or announcement, you can include relevant images in your notification. To do this, click the Select button located below the "Image URL" field to upload your image. When users receive the notification, they will also see the image you added along with your message.
Direct Product / Category Redirect Feature
This feature ensures that when users click on notifications, they are redirected directly to a specific product page. This way, an immediate purchase or browsing experience can be offered directly from your campaign notifications.
- Configuration Steps:
- Set the Notification Type option to Product.
- Enter the ID of the product you want to redirect to in the Target ID field. This ID is the unique identifier of the product in the database.
- Enter the product name in the Target Name field. This field is used for informational purposes in the user interface.
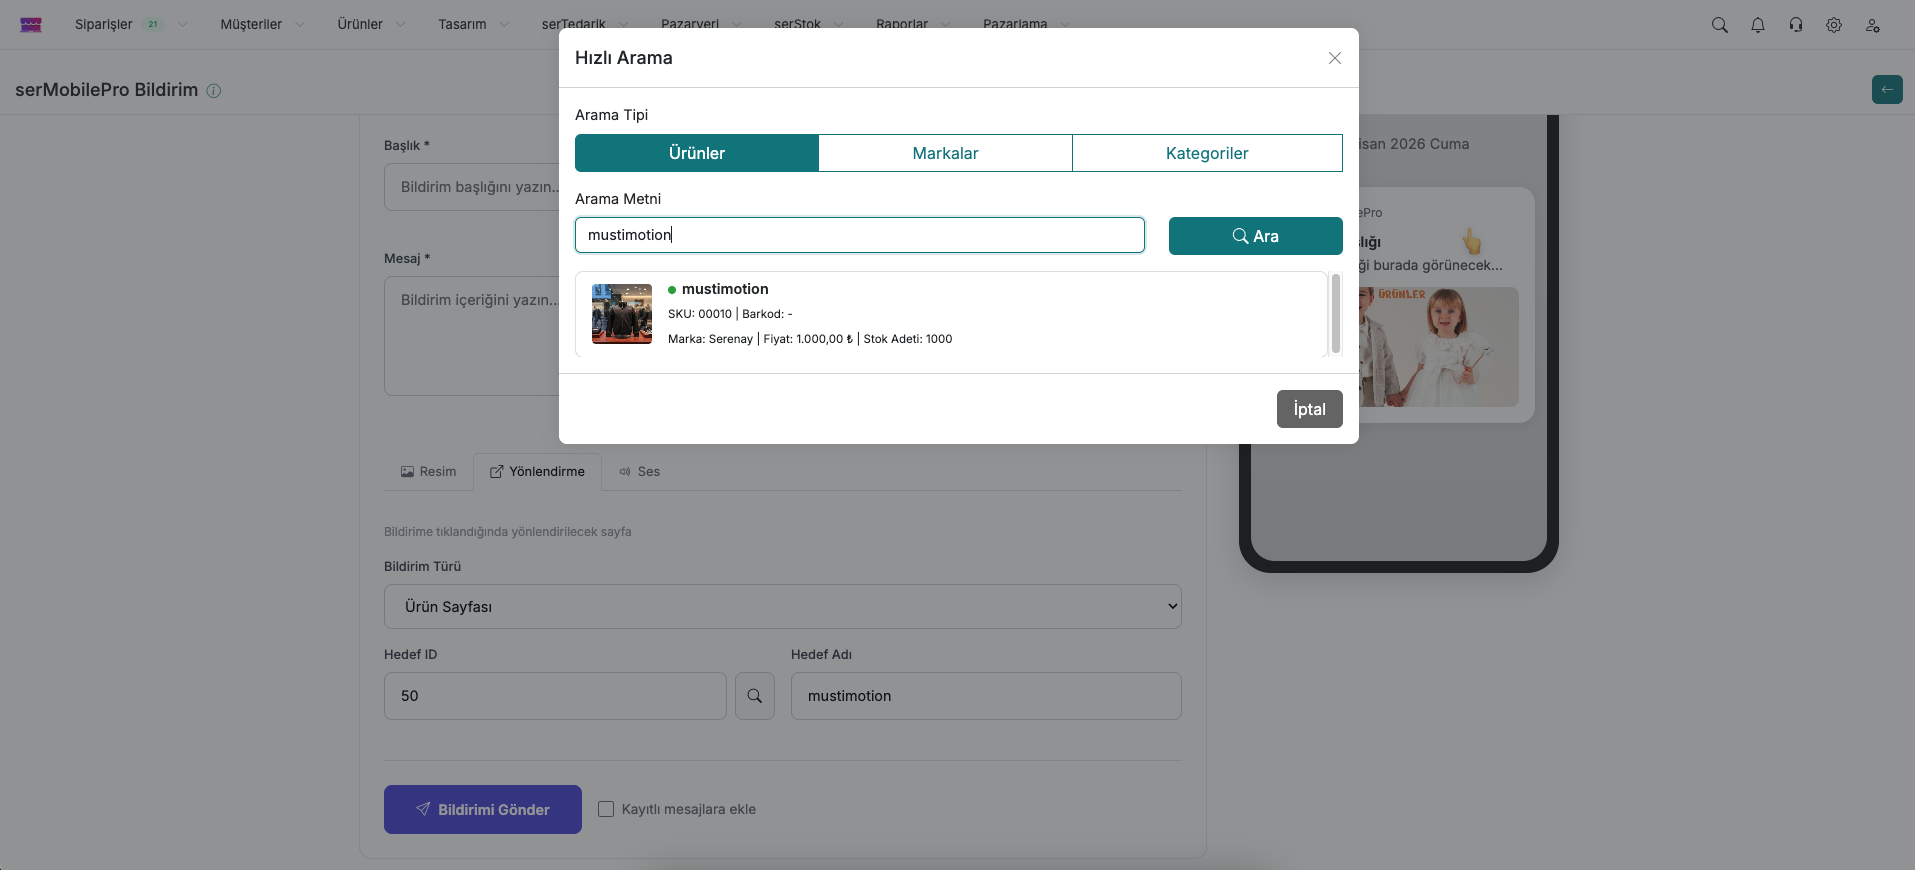
With this configuration, when users receive a campaign notification, they can reach the relevant product directly with a single tap. This both improves the user experience and has the potential to increase the conversion rates of your campaigns.
2. Usage Video
3. Individual Customer Notification Sending
There is the ability to send a notification directly to a specific customer. This feature is ideal for customer-specific announcements or personalised communications.
Step 1
- Click on the "Customers" tab from the top menu in the admin panel to view the list of all your registered customers.
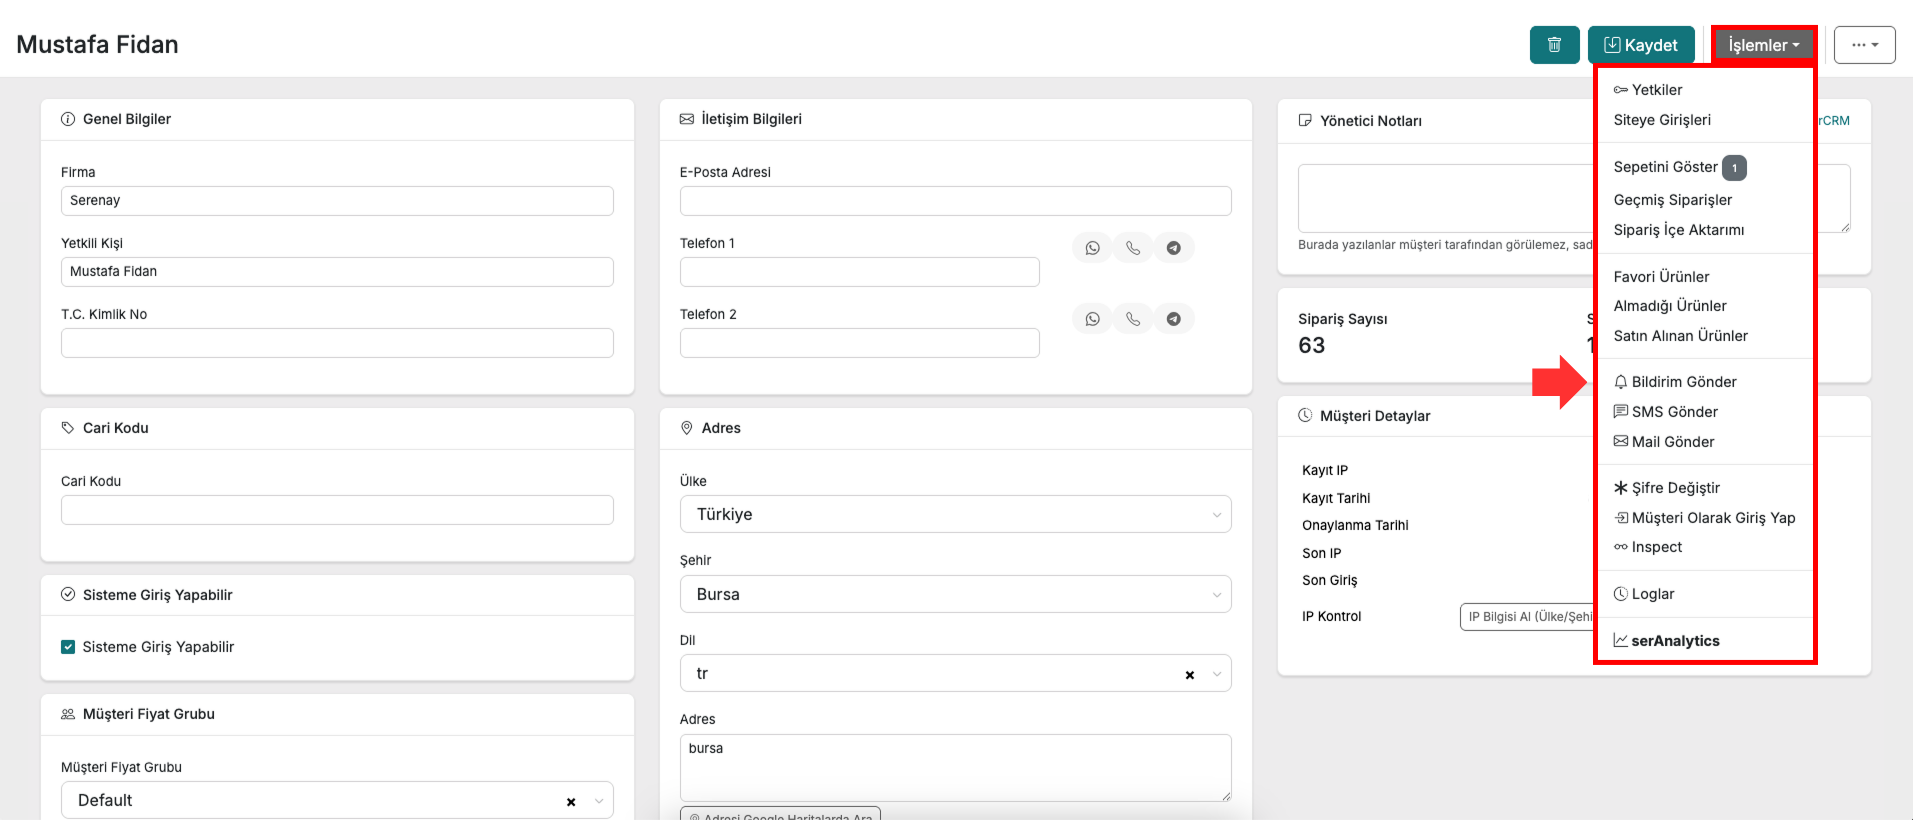
Step 2
- Find the customer you want to send a notification to from the list and click on them to go to the relevant customer detail page.
- Click the "Actions" button located in the top right corner of the customer detail page. From the options menu that opens, select the "Send Notification" option.
Step 3
- On the notification sending page that opens, enter the message and other relevant information you want to send specifically to the selected customer to create the notification.