Custom Fields
The Custom Fields feature allows serB2B users to define additional fields specific to their business in various modules such as product, customer, order, product category, product brand, and user. This enables businesses to store custom information within the system and manage their processes with flexibility. The created custom fields automatically appear in filtering and search sections.
Custom Fields Configuration
1. Viewing Custom Fields
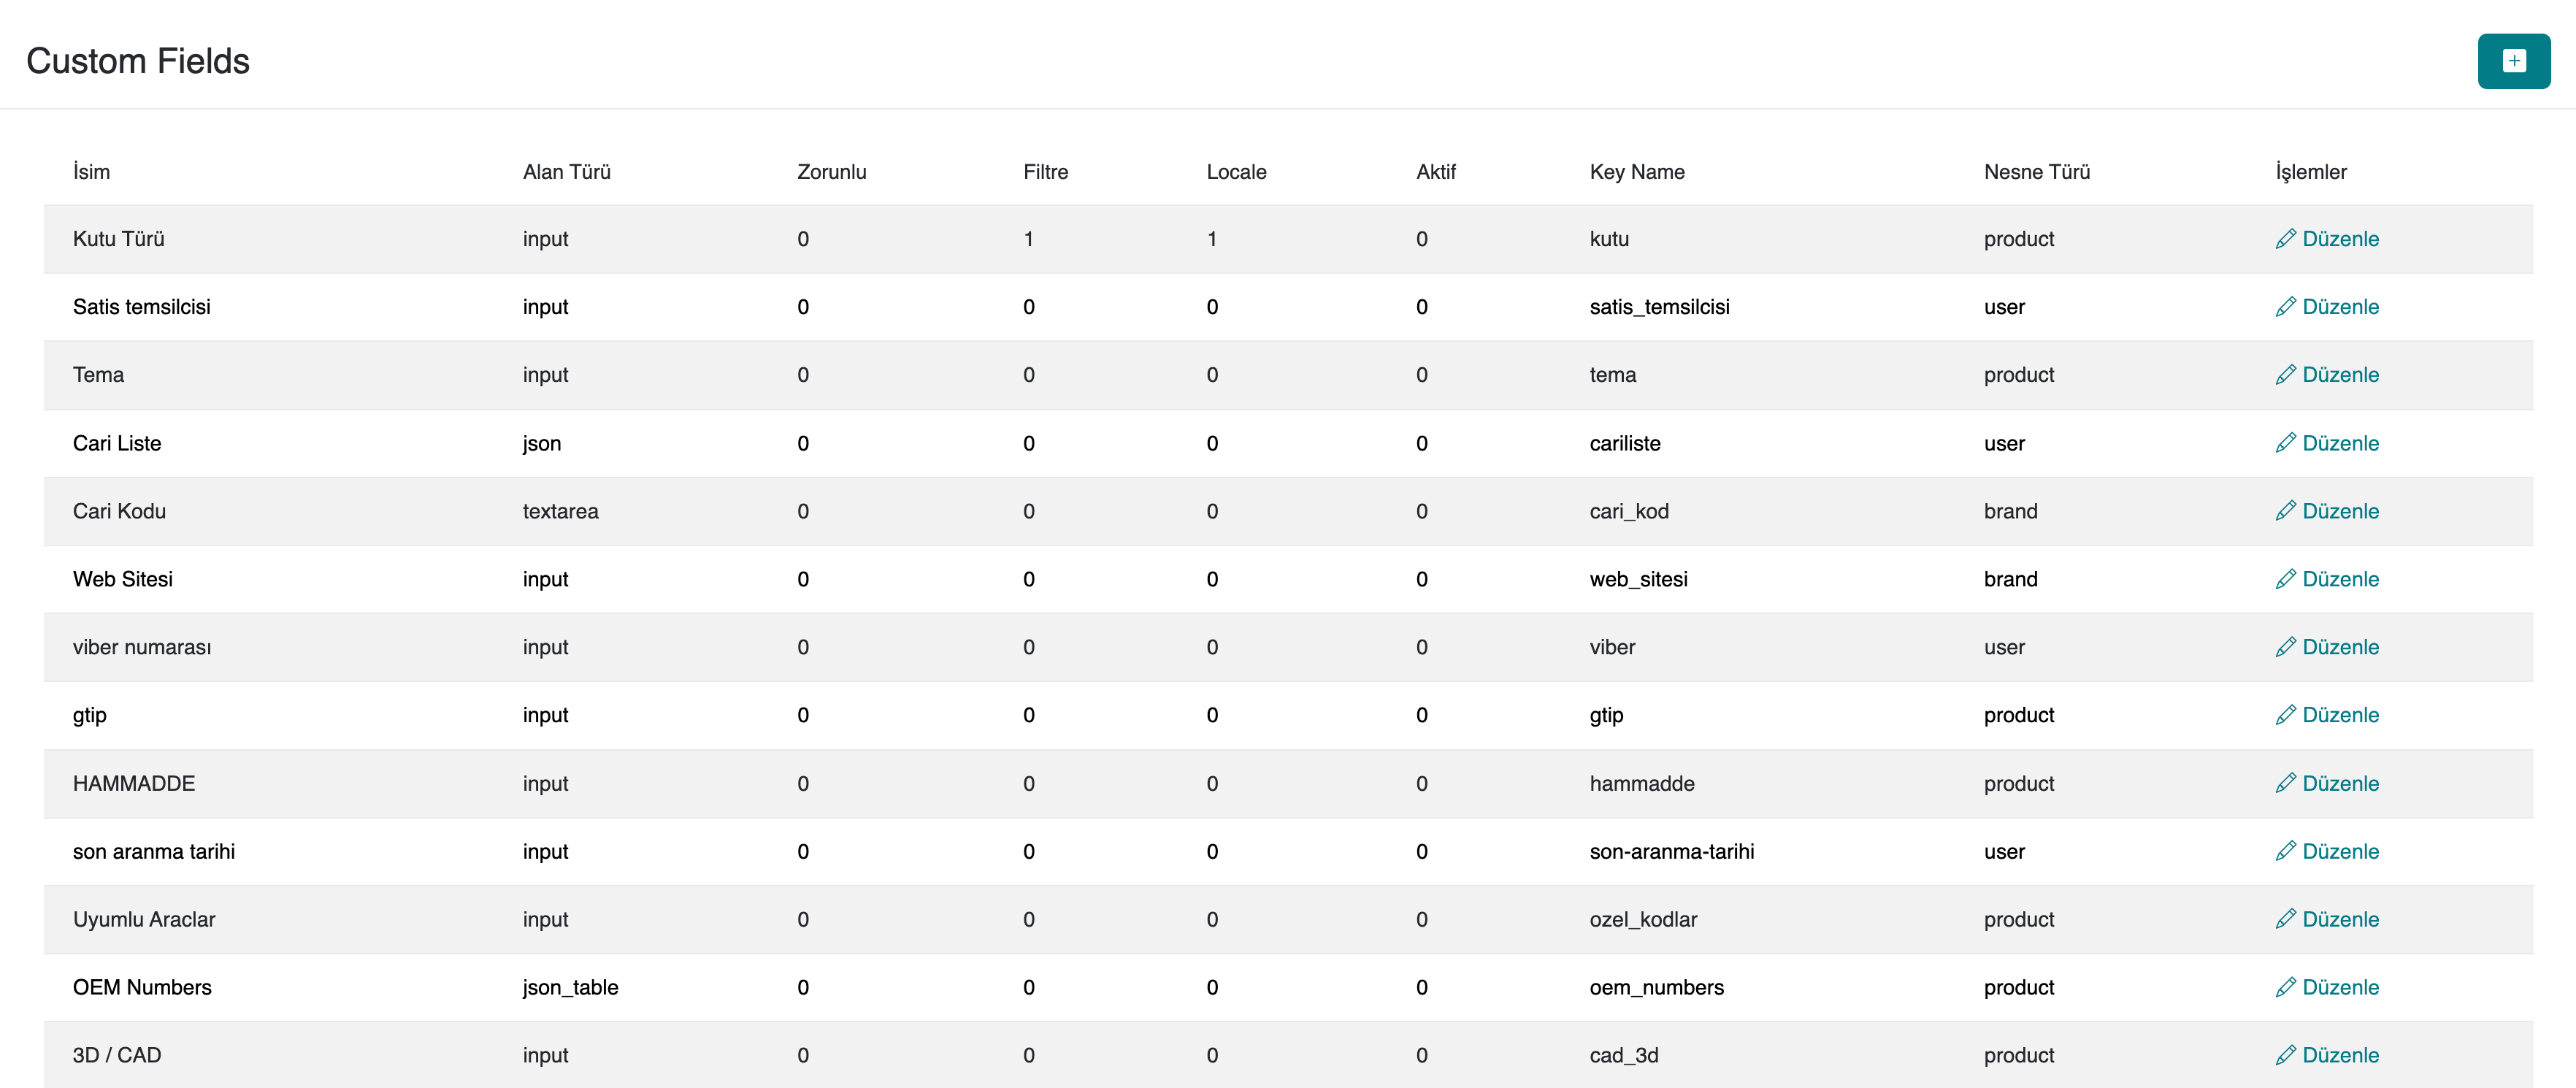
You can view existing custom fields by navigating to Settings > Custom Fields in the serB2B admin panel.
2. Creating a New Custom Field
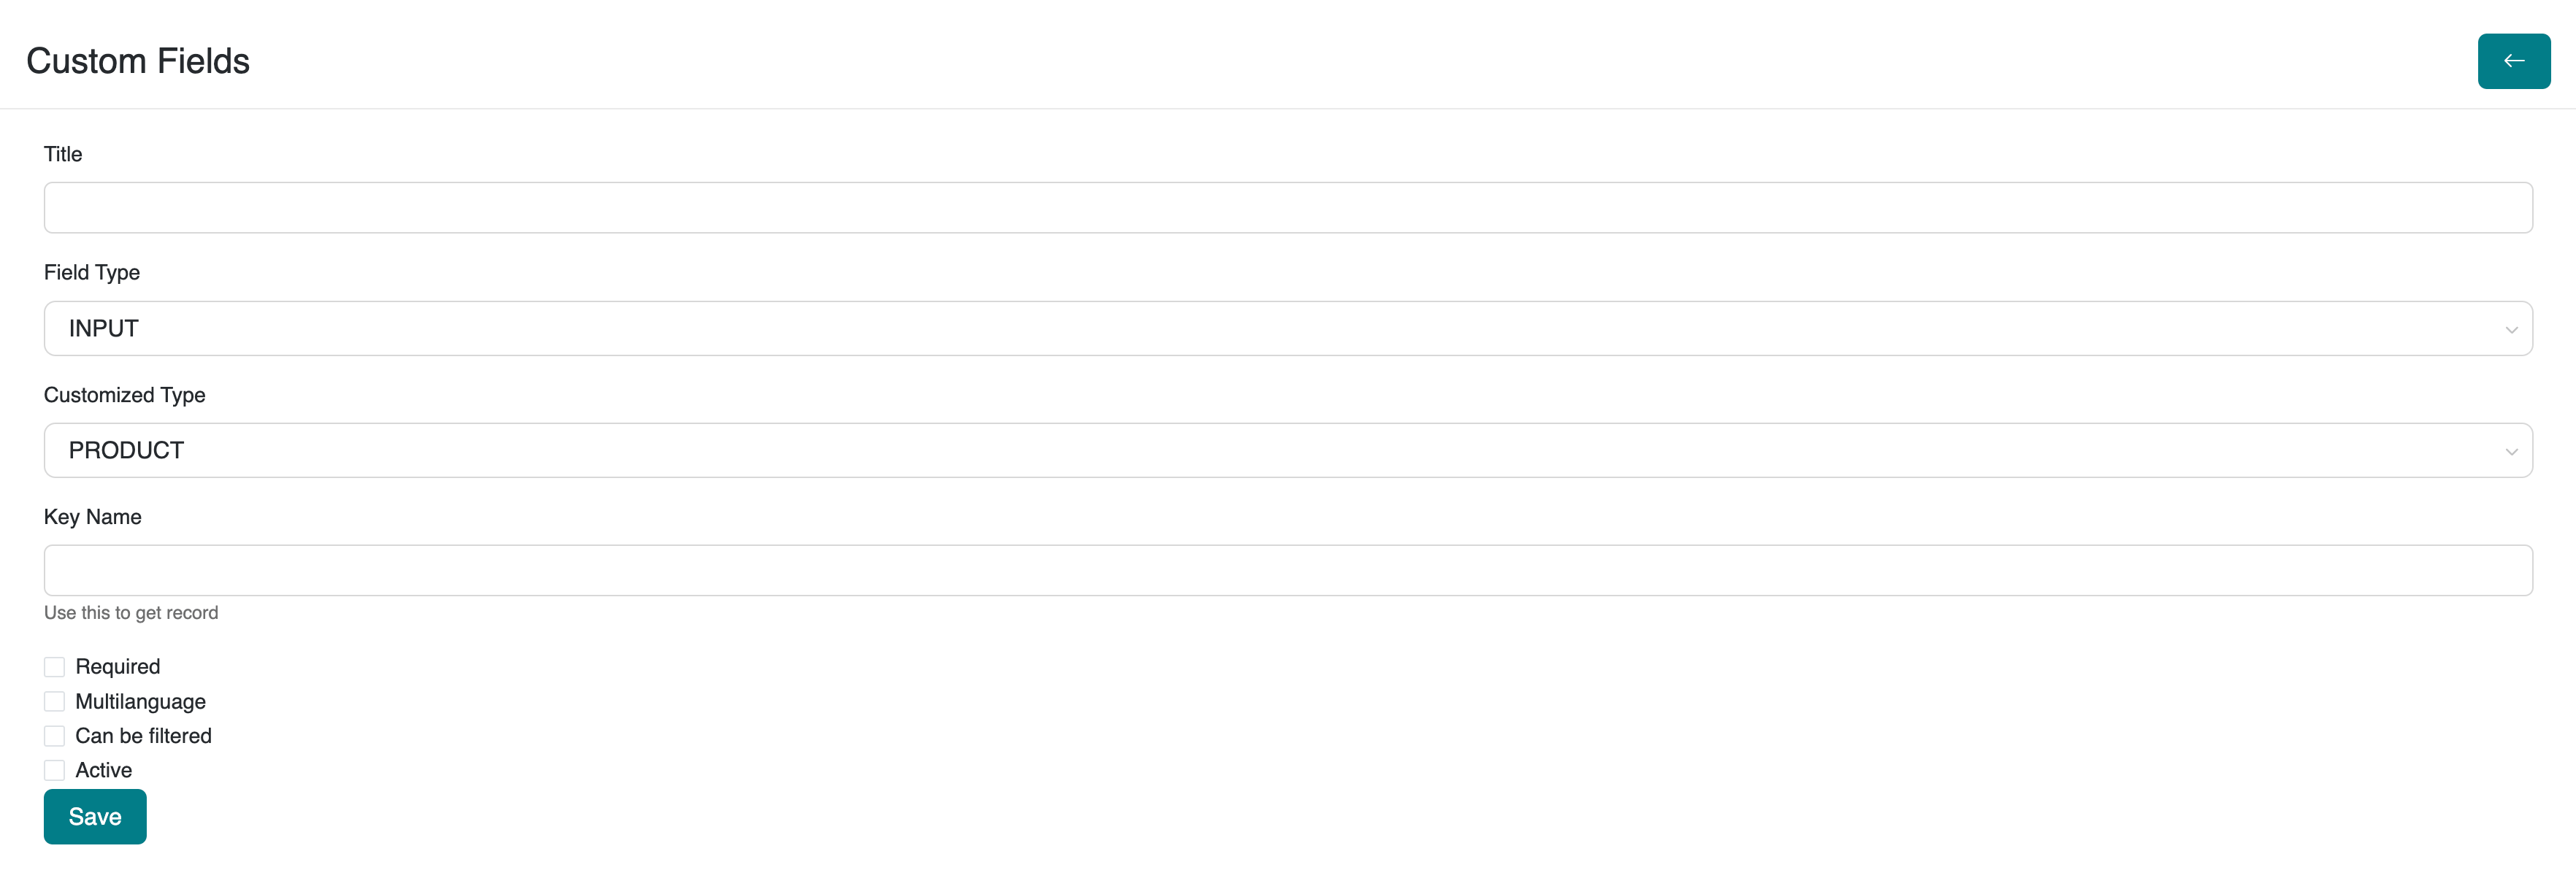
You can add a new custom field by clicking the + button located at the top right corner in Settings > Custom Fields.
Step-by-Step Guide
-
1. Enter Title
Enter the name of the custom field that will be displayed to users (e.g., "Warranty Period", "Product Code").
-
This field is required.
-
2. Select Field Type
From the dropdown, select the data type of your custom field:
-
INPUT: Single-line text input
-
TEXTAREA: Multi-line text area
-
FILE: File upload field
-
CHECKBOX: Checkbox
-
DATEPICKER: Date selector
-
SELECT: Dropdown list (options entered manually)
-
JSON: JSON formatted data
-
JSON_TABLE: Table format with multiple fields
-
-
2.1. Define Table Fields (Only for
JSON_TABLE)If you selected JSON_TABLE as the Field Type, enter the table field definitions in JSON format.
-
Example:
[{"name":"expiry_date","type":"date"},{"name":"warranty_period","type":"input"}] -
2.2. Enter Selectable Field Values (Only for
SELECTandJSON_TABLE)If Field Type is SELECT or JSON_TABLE, enter selectable values one per line.
-
Example:
Red
Blue
Green -
3. Select Customized Type
Choose which object the custom field will be assigned to.
-
Options:
-
PRODUCT
-
CATEGORY
-
BRAND
-
USER
-
ORDER
-
-
4. Enter Key Name
Enter the system key name for technical use and data access.
-
Example:
warranty_periodorcustom_note -
5. Mark as Required (Optional)
If this field must be filled, check the Required box. The user will not be able to leave this field empty.
-
6. Enable Multi-Language Support (Optional)
If you want to store content in multiple languages, check the Multilanguage box. This allows entering different values for each language.
-
7. Enable Filtering (Optional)
If you want this field to be used in filtering screens (product/order), check the Can be filtered box. This enables advanced filtering options.
-
8. Activate the Field
To make the field visible and usable, check the Active box. Inactive fields are hidden.
-
9. Use in Member Registration (Only for
USER)If the field type is USER and you want it to appear in the registration form, check the Use in Registration box.
-
10. Save
After completing all fields, click Save to finish.
3. Editing Custom Fields
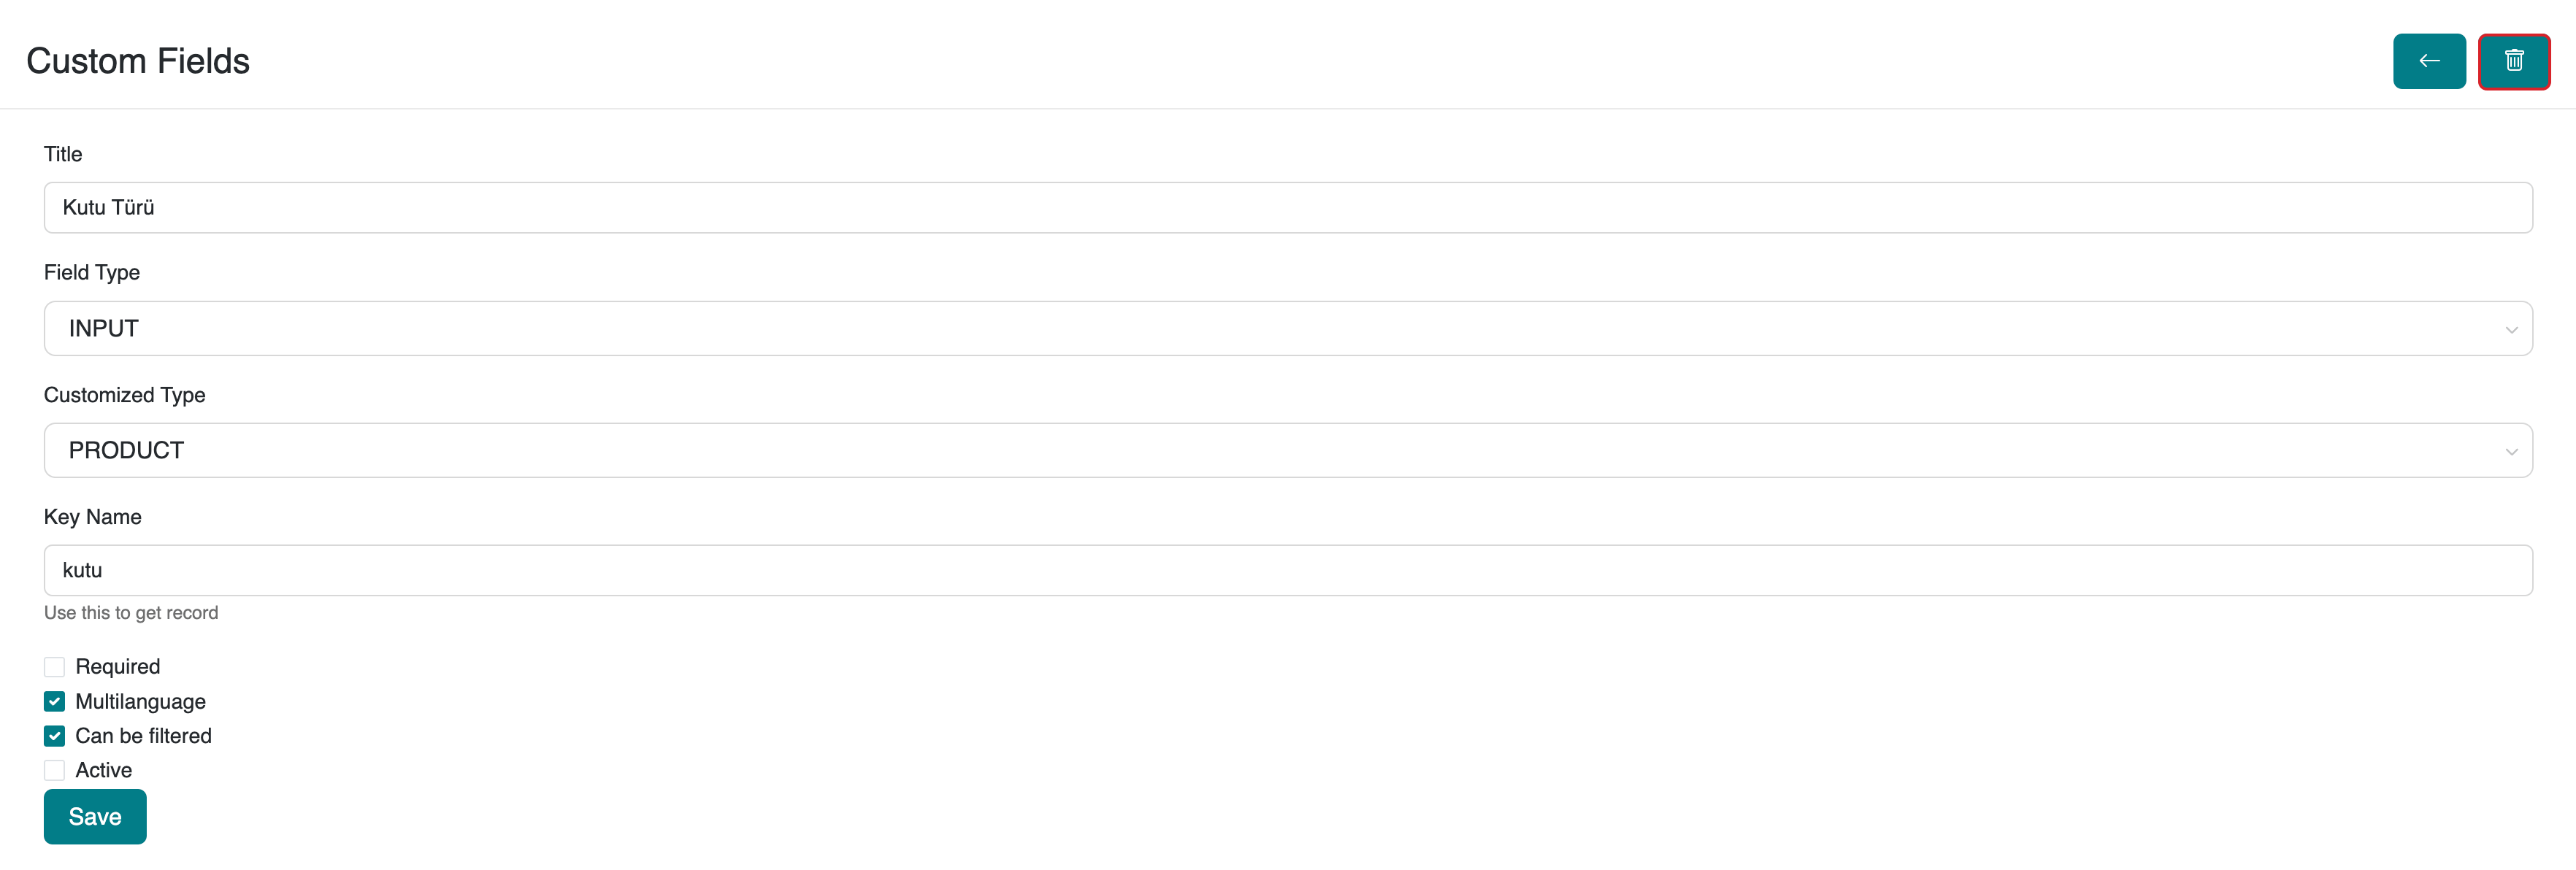
You can view and edit existing or newly created custom fields by navigating to Settings > Custom Fields in the serB2B admin panel. Click the Edit button on the relevant field row to make updates.
4. Deleting Custom Fields
You can view and delete existing or newly created custom fields by navigating to Settings > Custom Fields in the serB2B admin panel. Click the Edit button on the field row you want to delete. Then, click the ![]() icon at the top right corner of the page and confirm the deletion.
icon at the top right corner of the page and confirm the deletion.
Defined custom fields automatically appear and become usable in the relevant modules. They are also available in search and filter screens, allowing for detailed queries.
Advantages
-
Enables creating business-specific data structures.
-
Allows flexible definitions with various data types.
-
Provides detailed analysis opportunities in filtering and reporting processes.
-
Supports adding fields to the registration form (for the user object).
-
Suitable for multi-language businesses thanks to multi-language support.
Frequently Asked Questions (FAQ)
-
1. What do the field types mean?
INPUT: Single-line text input
TEXTAREA: Multi-line text area
FILE: File upload field
CHECKBOX: Checkbox
DATEPICKER: Date selector
SELECT: Dropdown list
JSON: JSON data format (for advanced configurations)
JSON_TABLE: JSON table (contains multiple fields) -
2. What is multi-language support?
Fields with multi-language enabled allow entering content in multiple languages within the system.
-
3. Where do custom fields used in registration appear?
Custom fields assigned to
USERobjects and marked as "Use in Registration" appear on the registration form.
Resources
Contact
For any questions or support requests, feel free to contact our support team. We are happy to assist you.