Tax Lists
The serB2B e-commerce system supports applying different tax rates based on the type of products being sold. This document explains how to create and manage custom tax lists to ensure compliance with tax regulations during order processes. You can easily define, modify, and assign specific tax rates to product groups within the system. This ensures accurate and quick tax calculations, improves the customer experience, and guarantees legal compliance.
Configuring Tax List Settings
1. Viewing Default Tax Lists
Go to the administrator panel of your serB2B system and navigate to Settings > Tax List to view the default tax lists.

2. Creating a New Tax List
To create a new tax list in your serB2B system, access the administrator panel, go to Settings > Tax List, and click on the + icon in the top-right corner.

Step-by-Step Guide
- Define Tax List Name: Assign a name for the tax list (e.g., "VAT 10%").
- Enter Tax Value: Specify the tax rate as a number (e.g., for a 10% tax rate, enter "10").
- Save: Click the Save button to complete the process.

3. Editing Tax Lists
To view and edit existing or newly created tax lists, go to the administrator panel of your serB2B system and navigate to Settings > Tax List. Then click the Edit button next to the tax list you wish to update.

Make the necessary changes in the opened form and save your updates.

4. Deleting a Defined Tax List
To delete an existing or newly created tax list, navigate to Settings > Tax List in your administrator panel. Click the Edit button next to the tax list you want to remove. Then, in the top-right corner of the page, click the ![]() icon and confirm the deletion.
icon and confirm the deletion.

Example Use Case: Increasing Product Taxes from 10% to 20%
Let’s assume we want to increase the applicable tax rate for products sold on the site from 10% to 20%. Here’s how to modify a product's tax rate and see how it impacts customers' carts if those products are already in their carts.
i. First, create a new Tax List with a 20% rate.
ii. Check one of the existing customer carts before assigning the new tax rate to products.

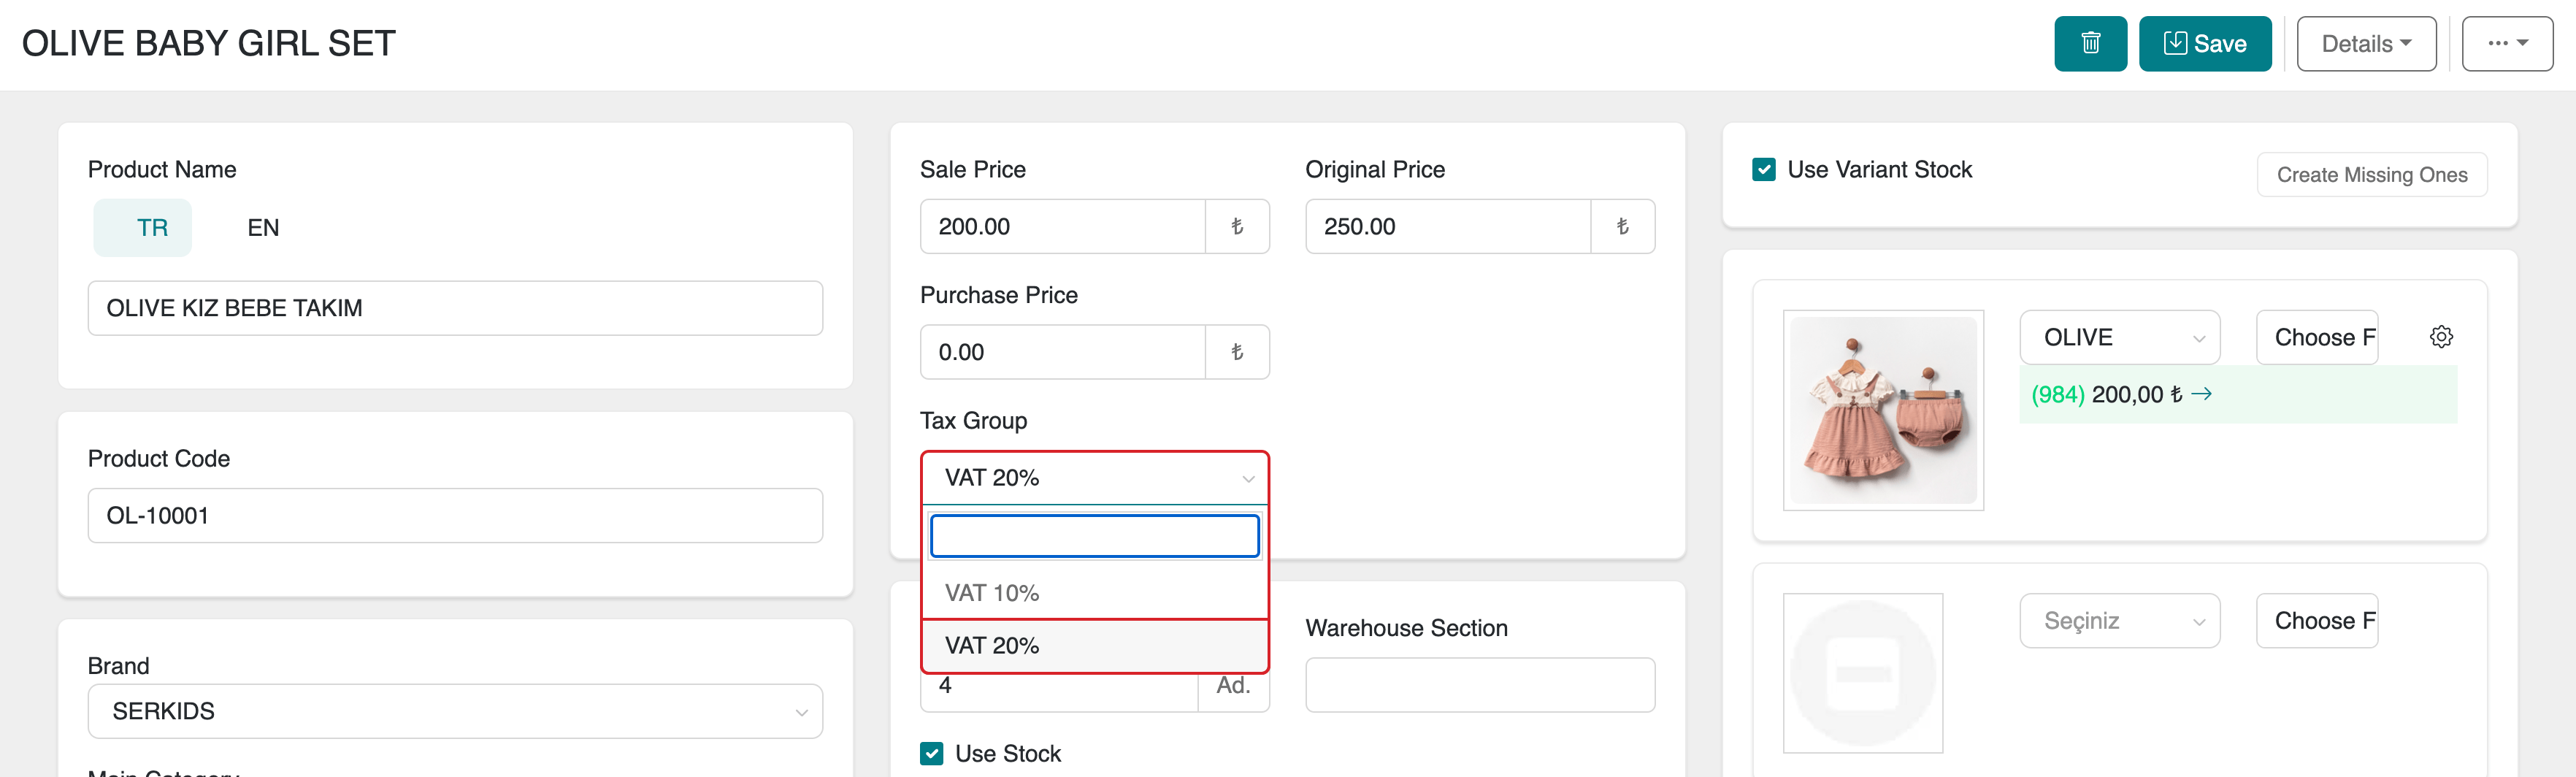
iii. Navigate to the product details page for the items you want to update. Select the newly created 20% tax rate and click Save to apply the changes.
iv. After updating the products, check a customer cart again.
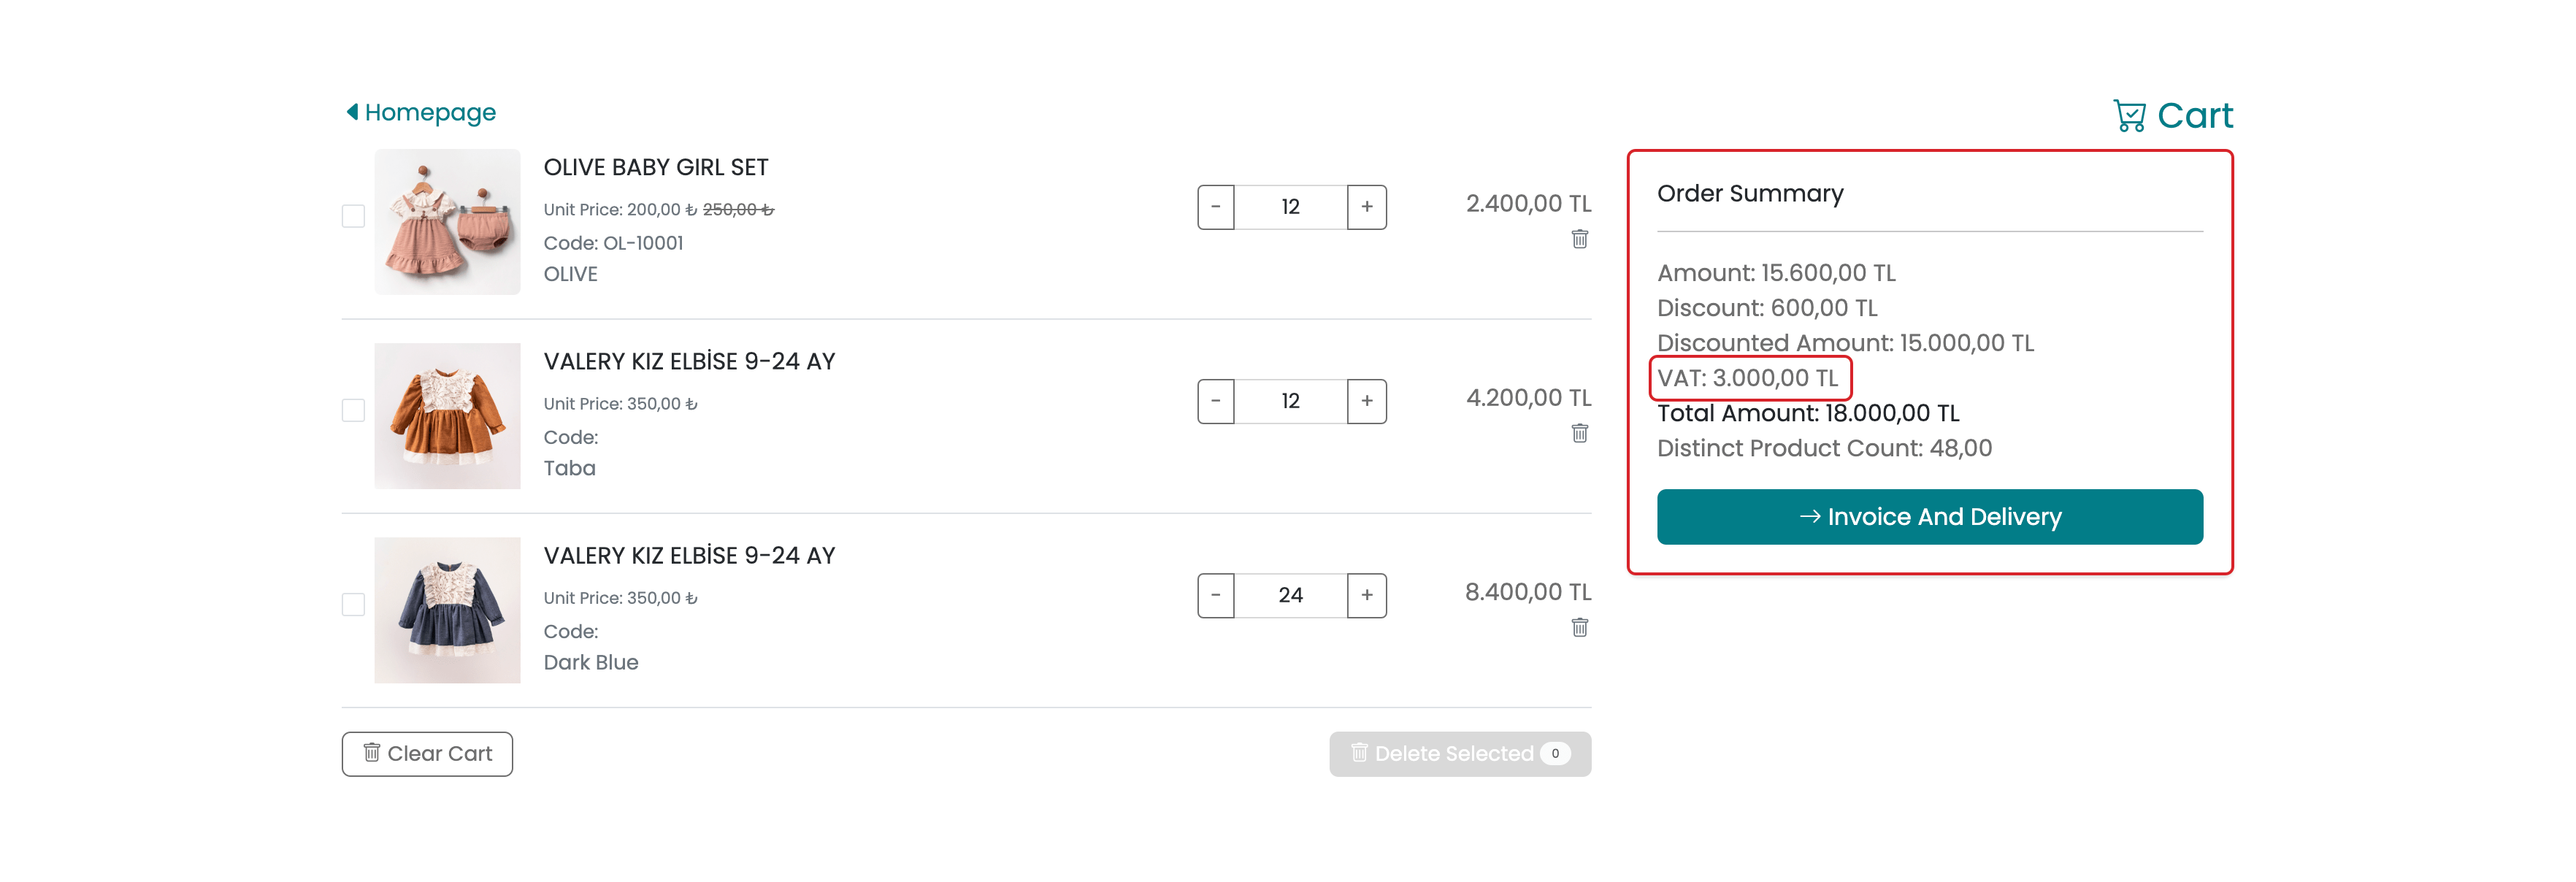
v. Result: Once the product tax rates are updated, all existing customer carts are automatically adjusted to reflect the new rates.
To update taxes for multiple products at once, go to the Products > Products section in the serB2B administrator panel. Select the products, click on the Bulk Actions option from the action bar, and choose the desired tax group from the Tax Group menu.
For detailed information about the action bar, refer to the Action Bar Guide.

Frequently Asked Questions (FAQ)
-
How can I create separate tax lists for different product groups?
Navigate to Settings > Tax List in the administrator panel. Click the + icon in the top-right corner to create a new tax list. You can list and save tax rates for each product group separately (e.g., 18% for electronics, 8% for books).
-
Will updating a product's tax rate affect customer carts?
Yes, the system is dynamic. When you update a product's tax rate, the change automatically applies to new orders and existing customer carts. You can refer to the example use case section for a detailed explanation.
Resources
Contact
For any questions or support requests, feel free to contact our support team. We’re here to help!