Payment Settings
Short Description
This document allows you to easily configure bank virtual POS integrations via the serB2B system. Users can make payments quickly and securely with virtual POS systems of various banks. By following the steps outlined in this document, you can integrate your payment methods and manage your payment processes, offering customers different payment options to enhance their shopping experience.
Payment Gateway Settings (Virtual POS)
1. Viewing Installed Virtual POS Systems
To view the virtual POS options added to your serB2B system, go to Settings > Payment Settings and list them.

2. Adding a New Virtual POS
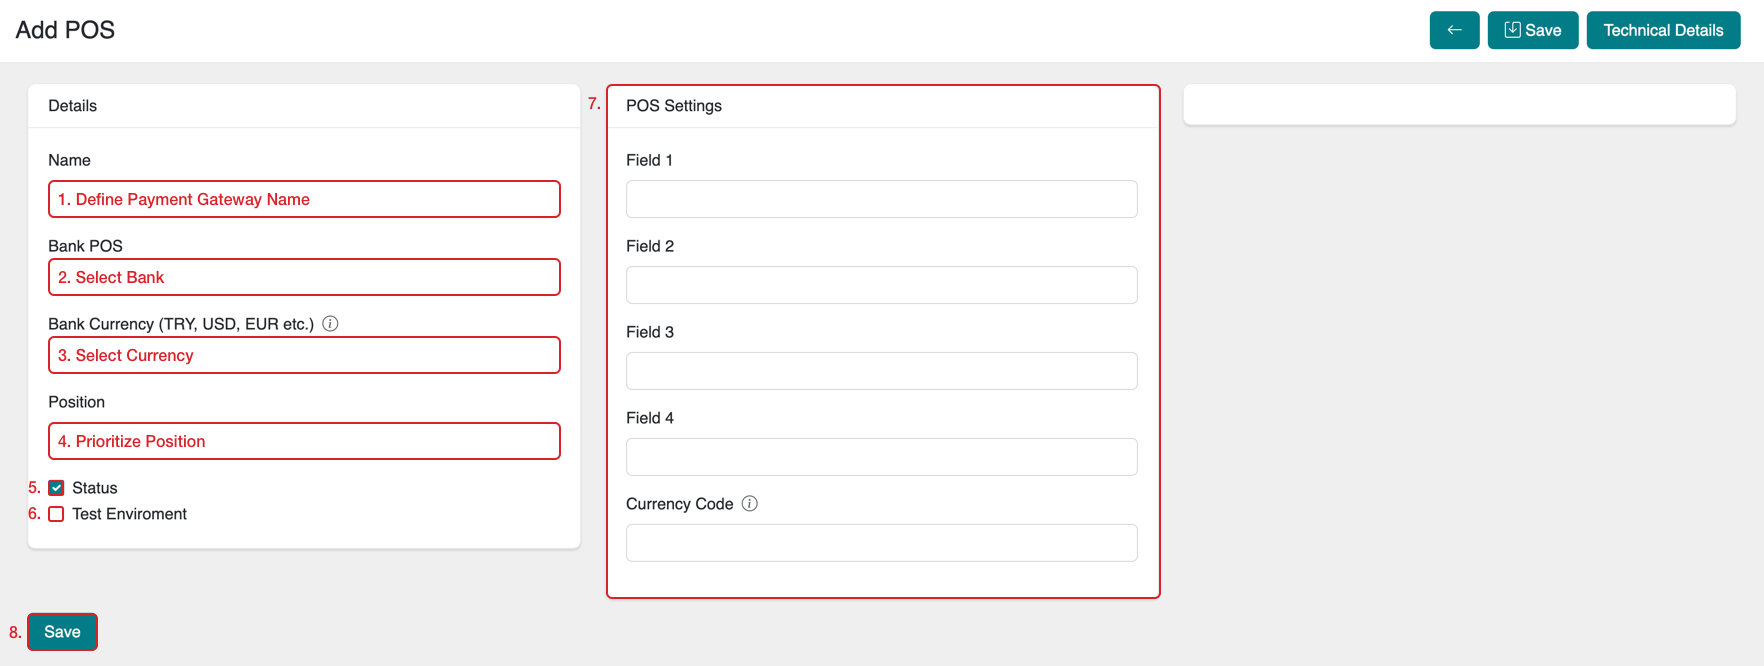
To add a new payment type to your serB2B system, go to Settings > Payment Settings, click the + icon in the top right corner, and follow the steps below.

Step-by-Step Guide
- Choose the Virtual POS Name: Enter the name of the virtual POS that your customers will see.
- Select a Bank: Choose a bank from the list of available banks in the serB2B system.
- Select the Currency for Payments: Choose the currency in which you will receive payments through your virtual POS (e.g., TL, USD, EUR).
- Enter the Position Number: Specify the priority order for the bank to appear in your payment options (e.g., "1" gives the highest priority).
- Status: Set the virtual POS to active or inactive, depending on whether you want to make it available to customers or not.
- Test Environment (Optional): Check this option if you are using test environment information provided by your bank.
- Enter POS Settings: Fill in the required POS Settings (Field 1, Field 2, Field 3, Field 4, and Currency Code) for the selected bank. You will see these details after choosing your bank.
- Save: After entering all the information, click the "Save" button to complete the process.
The Test Environment is a platform that allows payment integrations to be tested before going live. Banks provide businesses with a test environment that simulates real transactions without actual money transfer.
Test environments are used for:
- Integration Testing: To verify if the virtual POS integration is functioning correctly.
- Transaction Simulation: To test payment processes and detect any issues without completing real transactions.
- Payment Process Verification: To check if payment data is being correctly received and the transactions proceed as expected.
You can access the test environment using the test username, password, and API keys provided by your bank. Since no real transactions occur, businesses can resolve issues without risking live customer data.
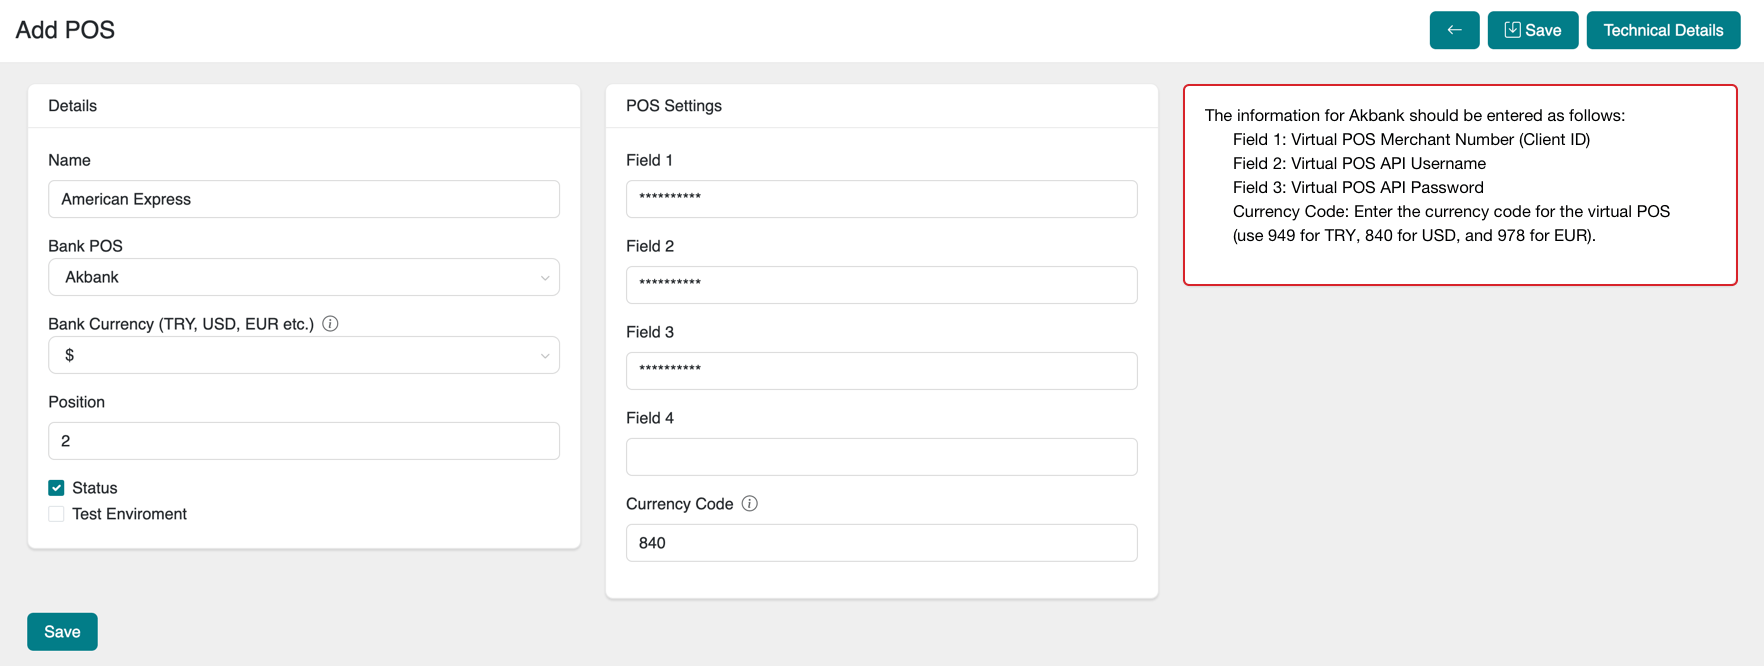
The POS settings required in the POS Settings section may vary by bank. After selecting the bank in the Bank POS section, you will see the necessary POS settings automatically on the right.
For example, after selecting Akbank, you will see the required POS Settings to fill in:
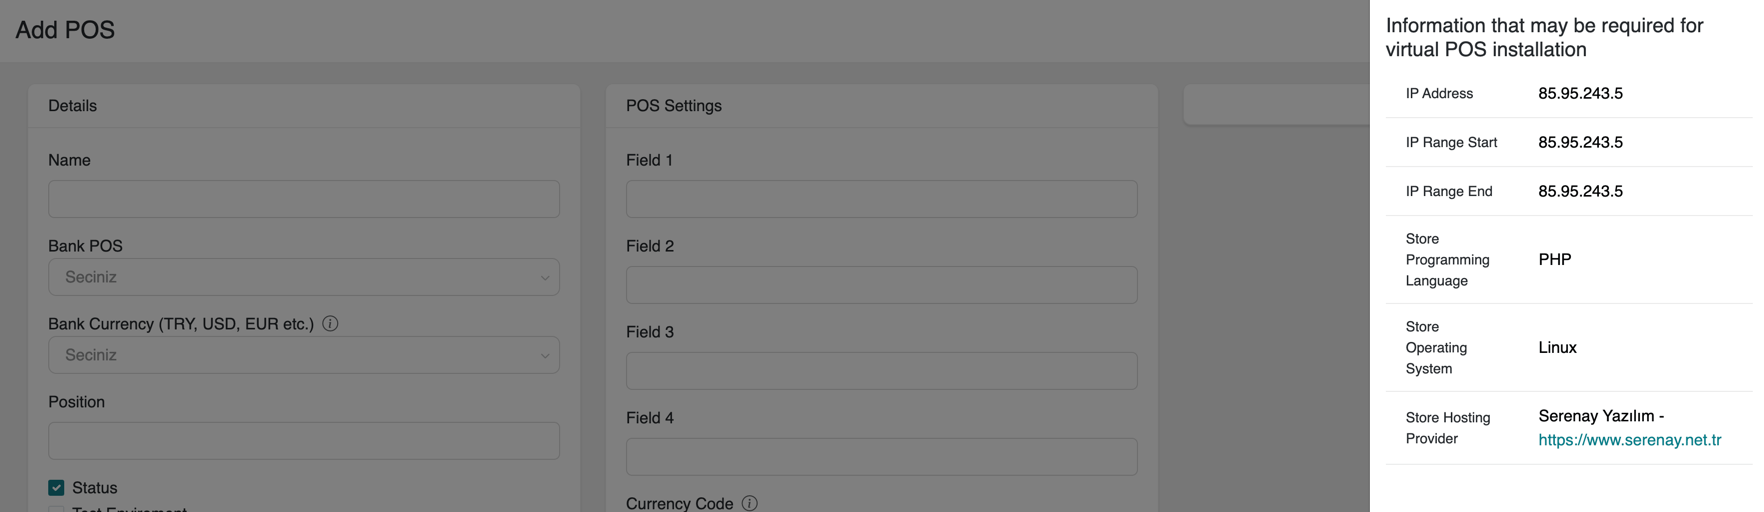
If your bank requests technical details during the virtual POS application process, click the Technical Details button in the top right corner of the Add New Virtual POS screen and provide the necessary details according to your bank's requirements.

Technical Details:
The details in the image are examples. Share the correct technical details from your system with your bank.
If you wish to receive payments in USD, EUR, or other currencies from abroad, contact your bank representative to activate the option for receiving payments in foreign currencies. Additionally, request the Currency Code for the specific currency from your bank.
Then, simply enter the Currency Code in the appropriate field.
2. Configuring Installment Settings
To configure single payment/installment settings for your bank virtual POS in the serB2B system, go to your admin panel Settings > Payment Settings and follow the steps below.
Step-by-Step Guide
- Click the Installment Management section of the relevant bank.
- Click the + icon in the top right corner of the Installments section.

- Enter the Name and Installment Count and click the Save button to complete the process.
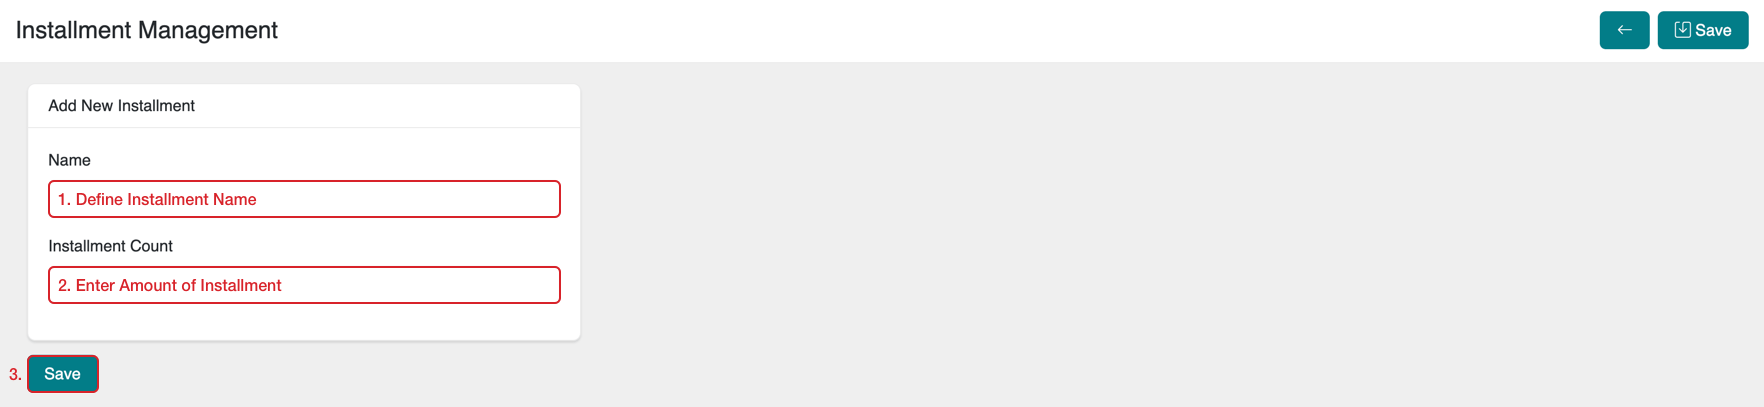
For single payment transactions, enter 0 (zero) in the Installment Count field.
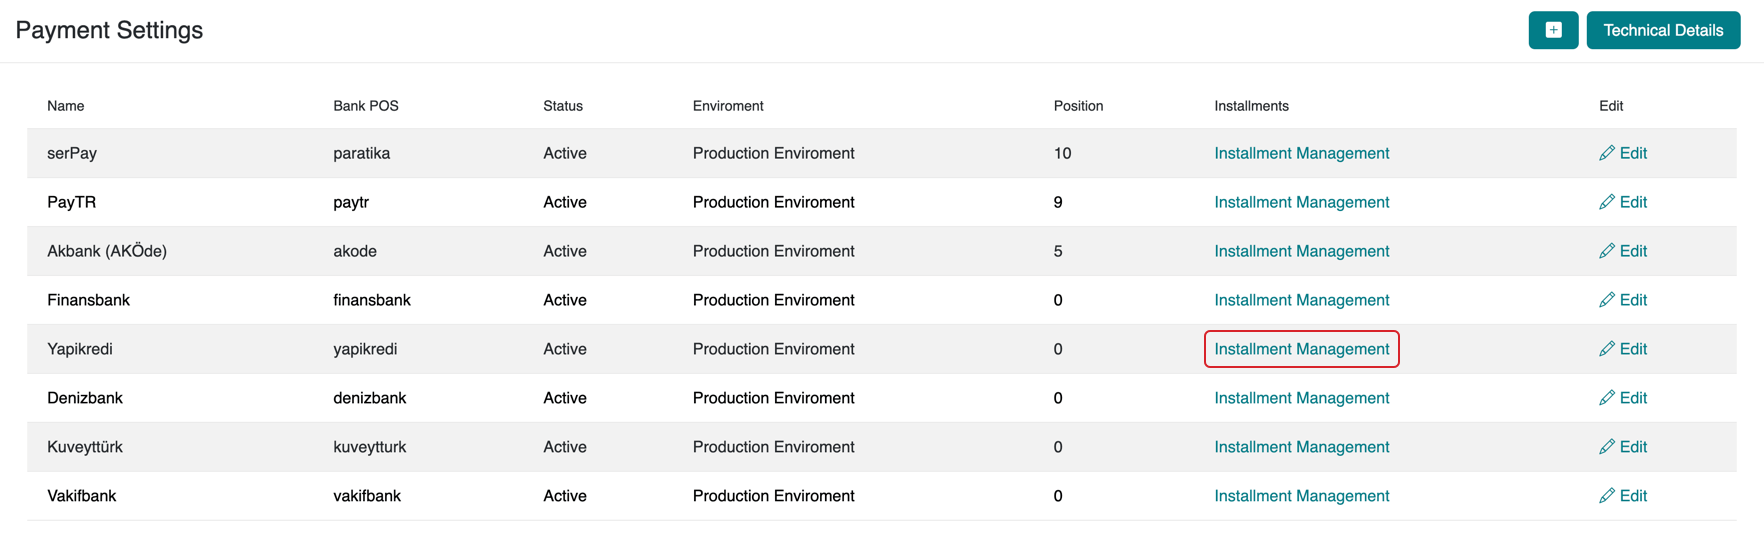
To view all installment options of a defined bank, go to Settings > Payment Settings and click the Installment Management section of the relevant bank.

The information in the image above is just an example. Please check the Installment Management section of your system's relevant bank for correct installment information.
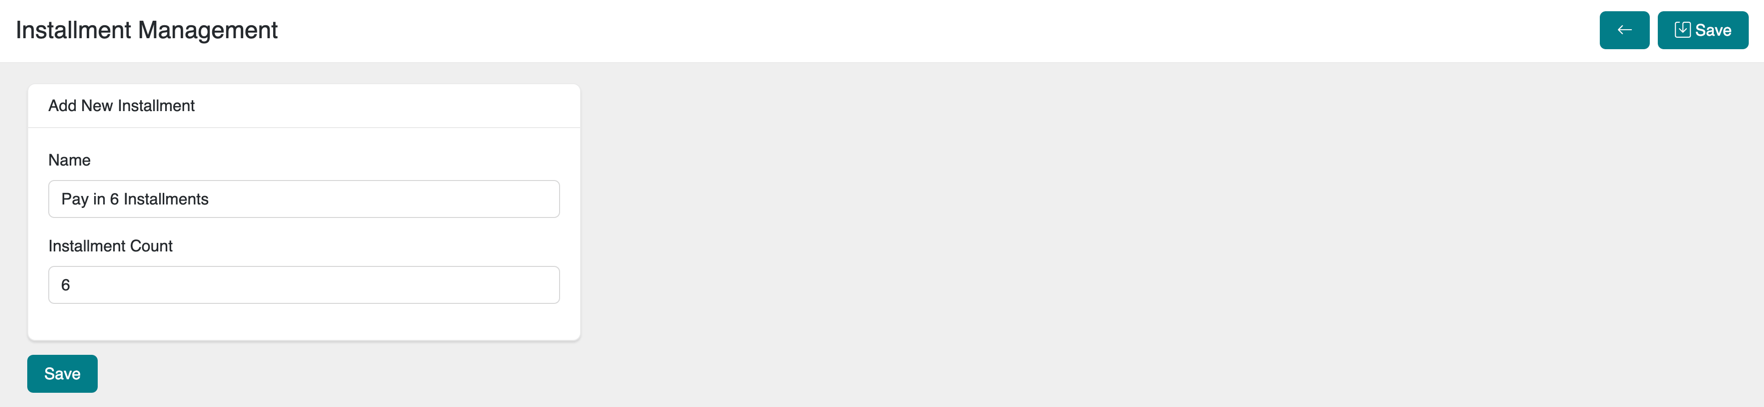
3. Example: Adding "Pay in 6 Installments"
To add the "Pay in 6 Installments" option to Yapı Kredi bank's virtual POS, follow the "Configure Installment Settings" steps as below.
i. Define the details in the form screen as follows.
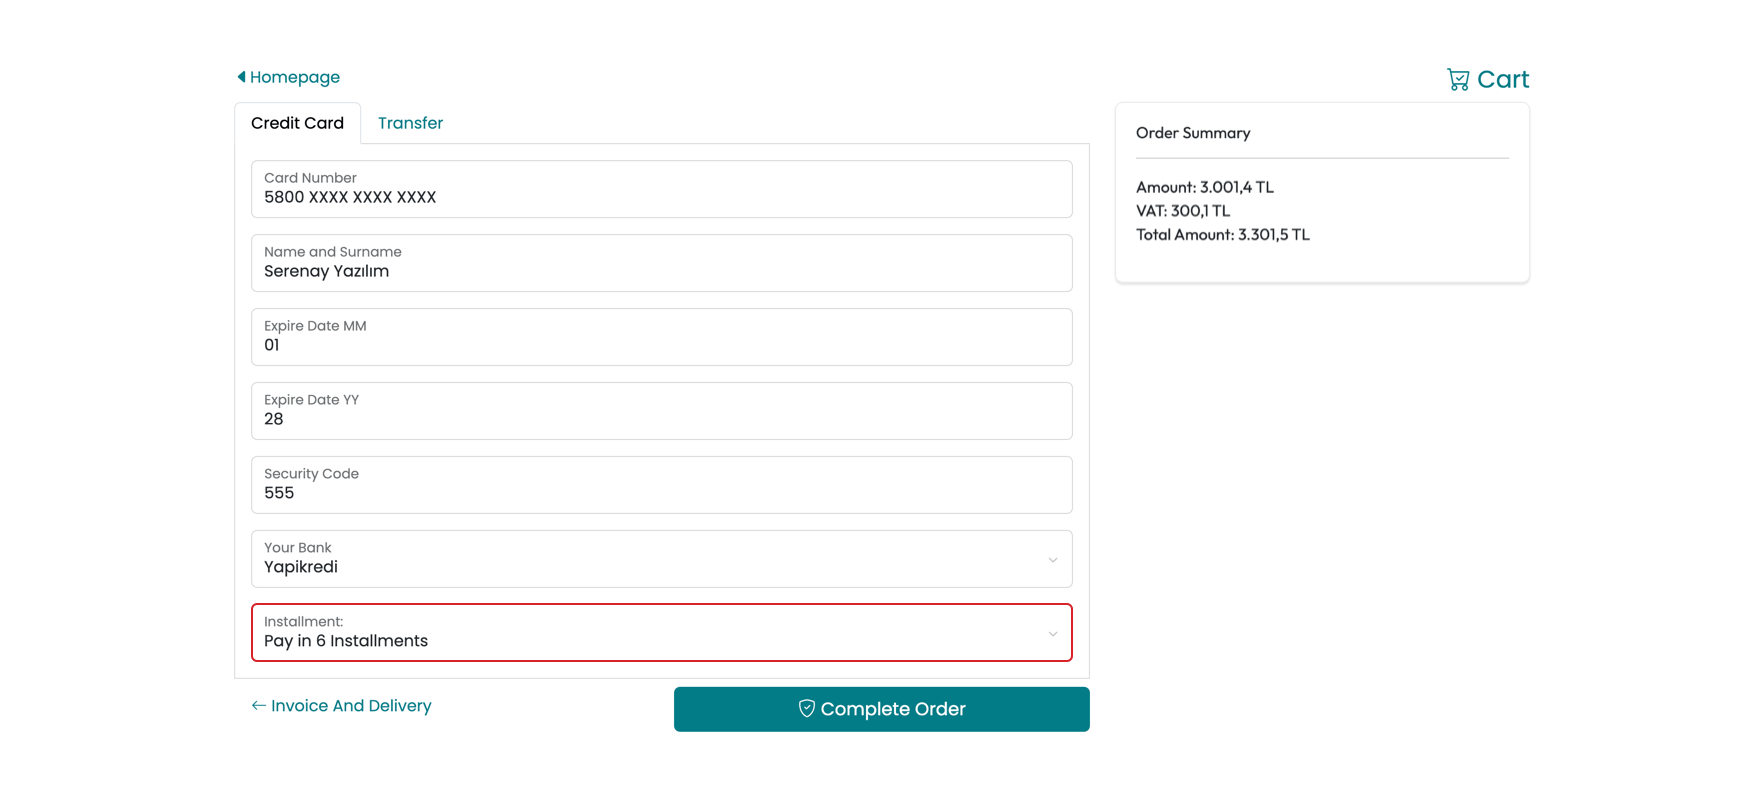
ii. View the created installment option in the Installment Management section.

iii. Output: Now, customers can make purchases using the credit card option, with the relevant installment option available.
4. Deleting a Defined Installment Option
To delete a bank's installment option in your system, go to Settings > Payment Settings and then go to the Installments section of the relevant bank. Click the Delete button next to the installment row you want to remove.

5. Deleting a Virtual POS
To delete a bank's Virtual POS in your system, go to Settings > Payment Settings and click the Edit button next to the relevant bank.

To complete the deletion, click the ![]() icon at the top right of the page and confirm.
icon at the top right of the page and confirm.

serPay Setup
To integrate instantly with all banks via serPay, follow the Add New Virtual POS steps and select paratika from the Bank POS list. Then, complete your process by following the Configure Installment Settings steps.
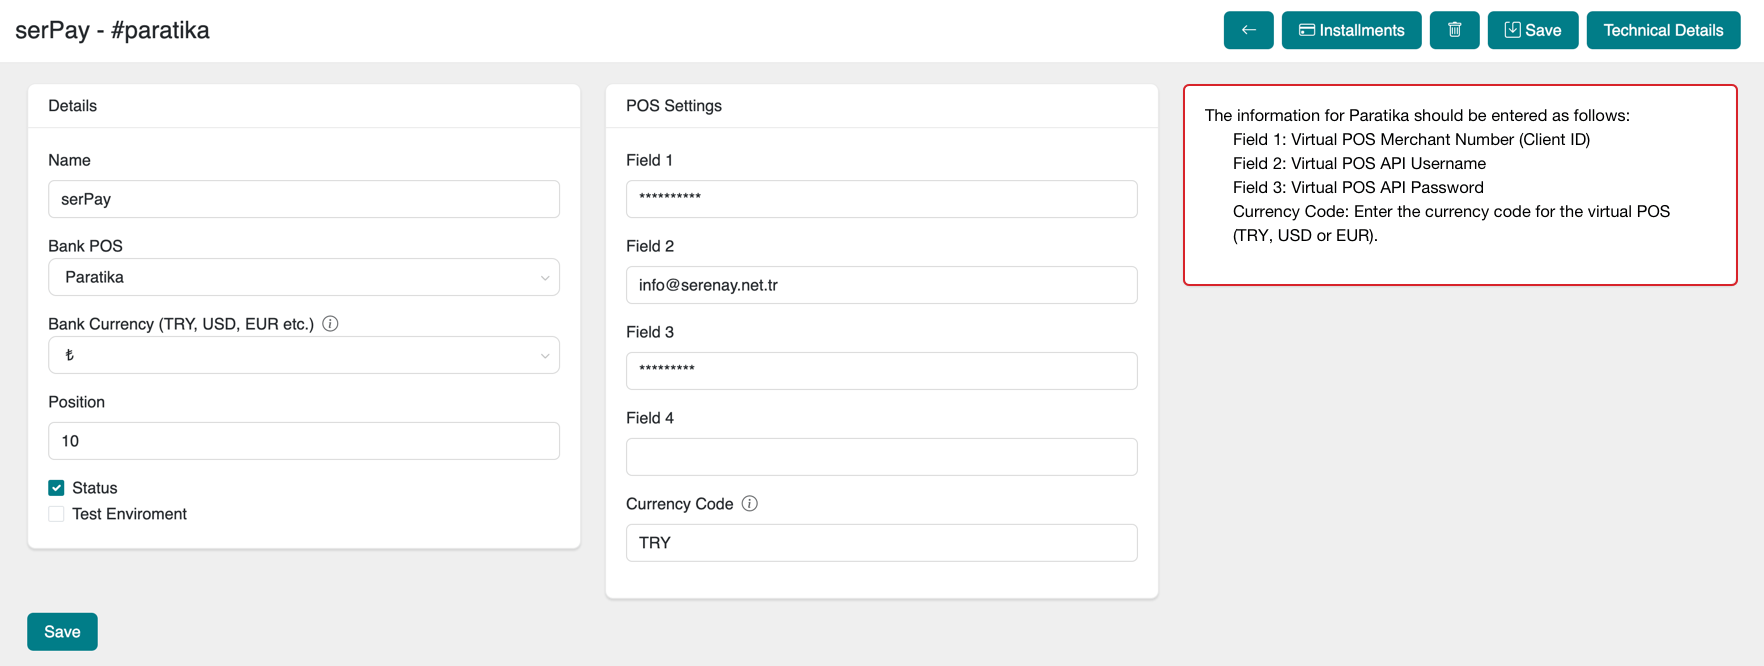
To access POS Settings for serPay (paratika), contact [email protected].
Errors After Virtual POS Setup
If you encounter an error after setting up a virtual POS in the serB2B system, send a screenshot of the error to [email protected].
Frequently Asked Questions (FAQ)
-
What is a Test Environment and how is it used?
The Test Environment is a platform used to test virtual POS integrations before going live. No real money is transferred; instead, transactions are simulated. By using the test environment, you can ensure the integration works properly.
-
I want to receive payments from abroad, what should I do?
To receive payments from abroad, contact your bank to enable the relevant foreign currency option. Then, request the Currency Code for that currency and enter it in the system.
-
How can I learn the virtual POS Settings for a bank?
The POS Settings for each bank is displayed in the system once you select the bank. If the information is missing or you face difficulties, contact your bank for the necessary technical details.
Resources
Contact
For any questions or support requests, feel free to reach out to our support team. We will be happy to assist you.