Payment Settings
This document allows you to easily configure bank virtual POS integrations through the serB2B system. Users can receive payments quickly and securely via the virtual POS systems of various banks. By following the steps in this document, you can integrate your payment methods and manage your payment processes. This enables you to offer customers a variety of payment options, making the shopping experience more efficient.
Virtual POS Settings
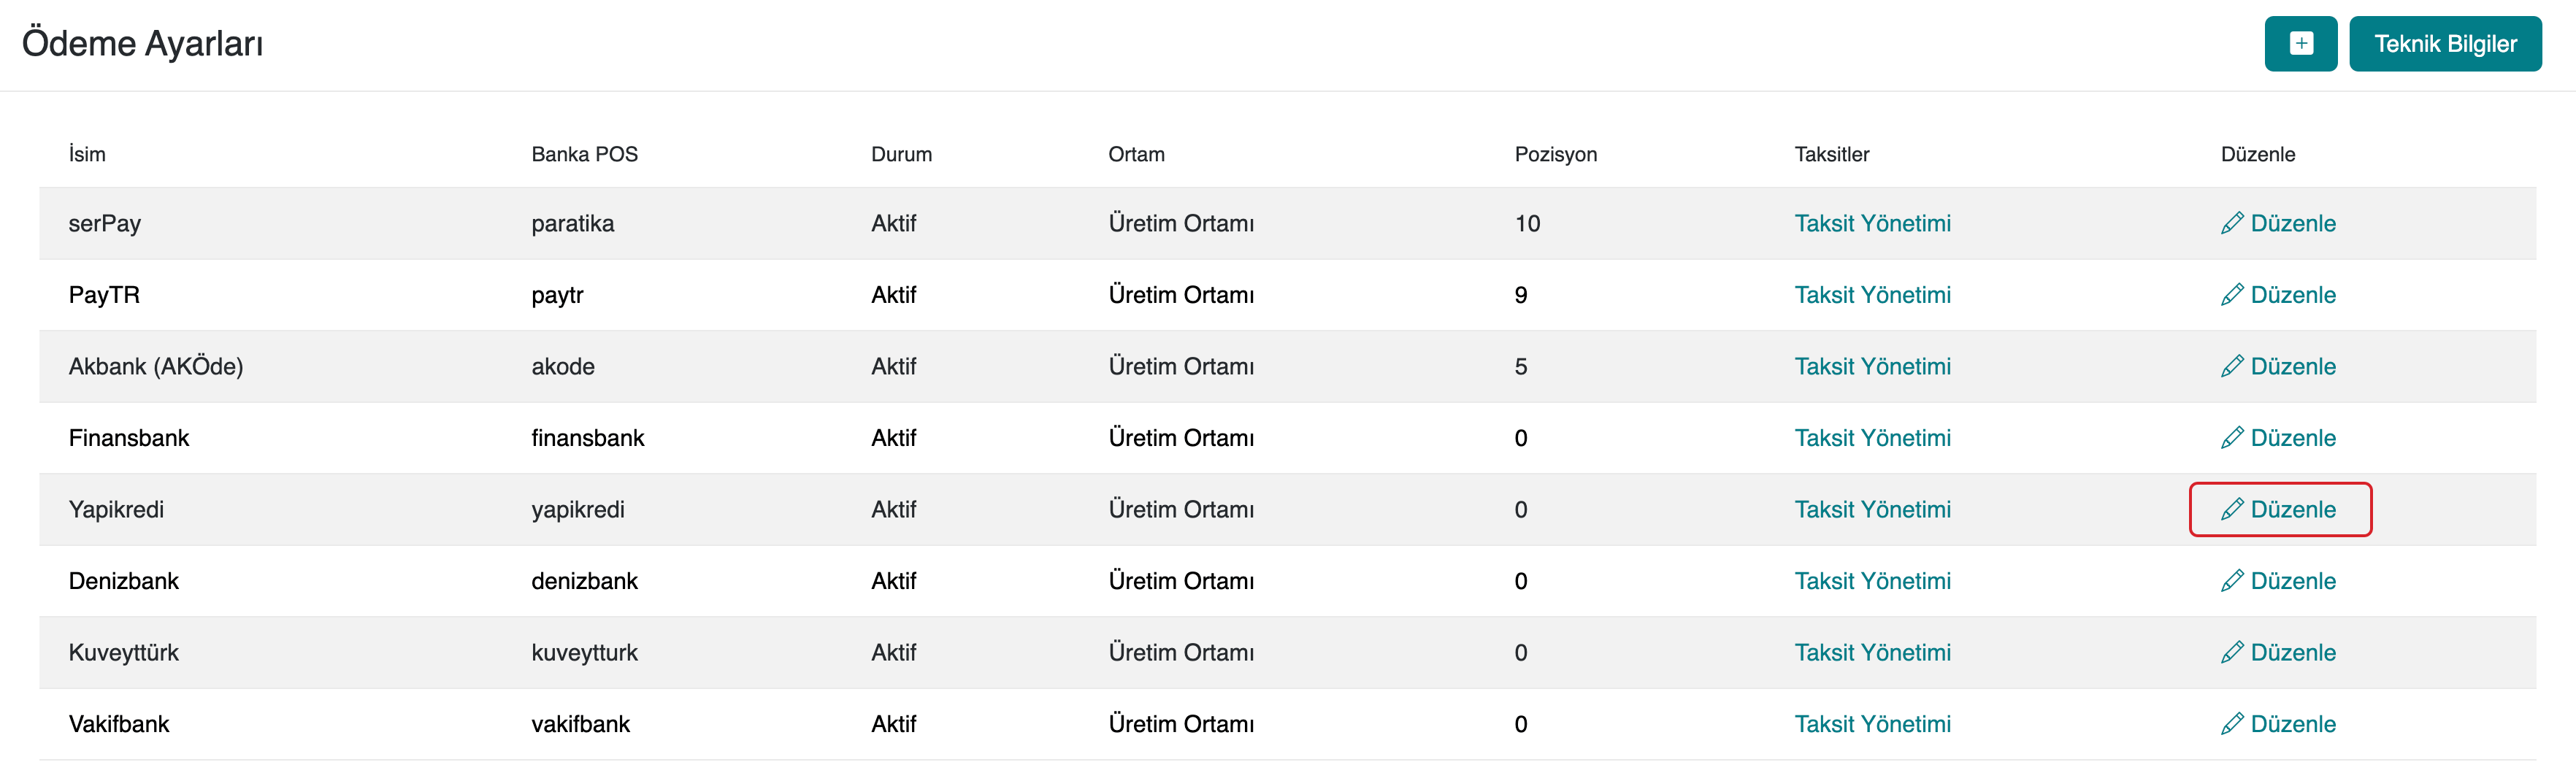
1. Viewing Installed Virtual POS Options
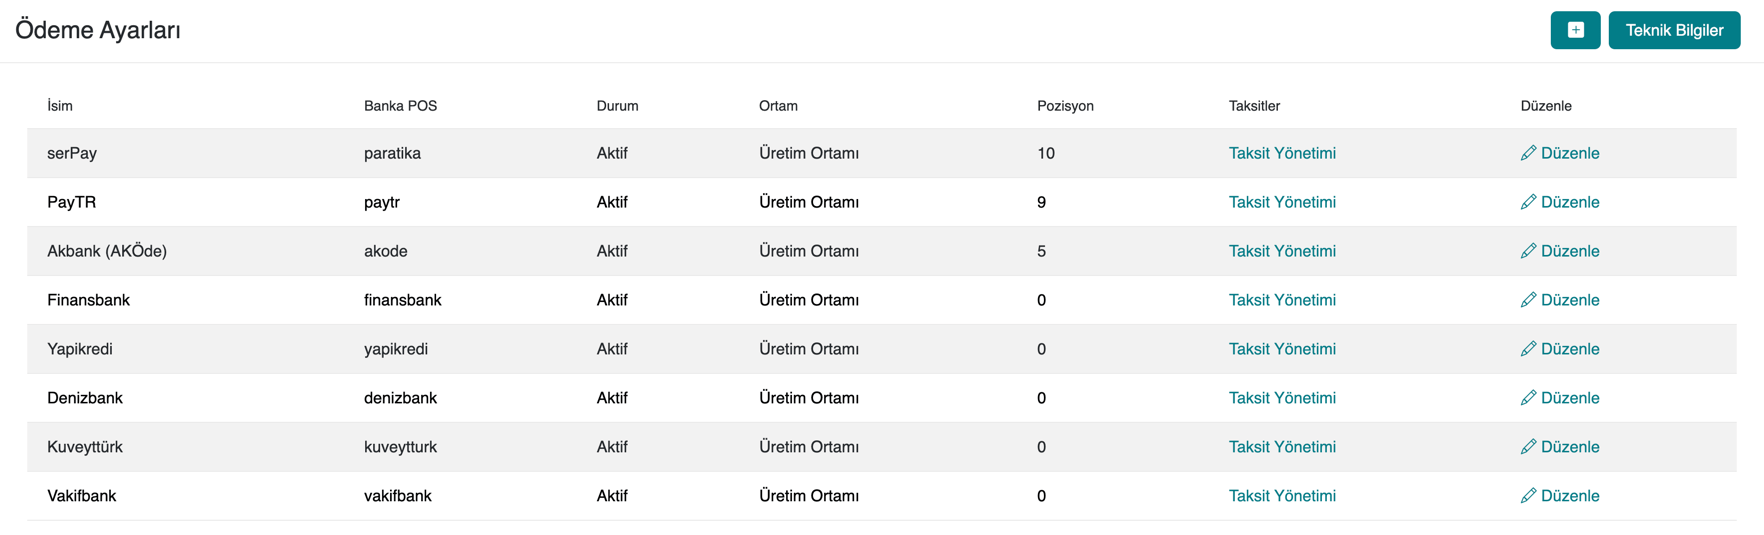
To view the virtual POS options you have added to your serB2B system, go to Settings > Payment Settings and list them.
2. Adding a New Virtual POS
To add a new payment method to your serB2B system, go to Settings > Payment Settings, click the + icon in the top-right corner, and follow the steps below.

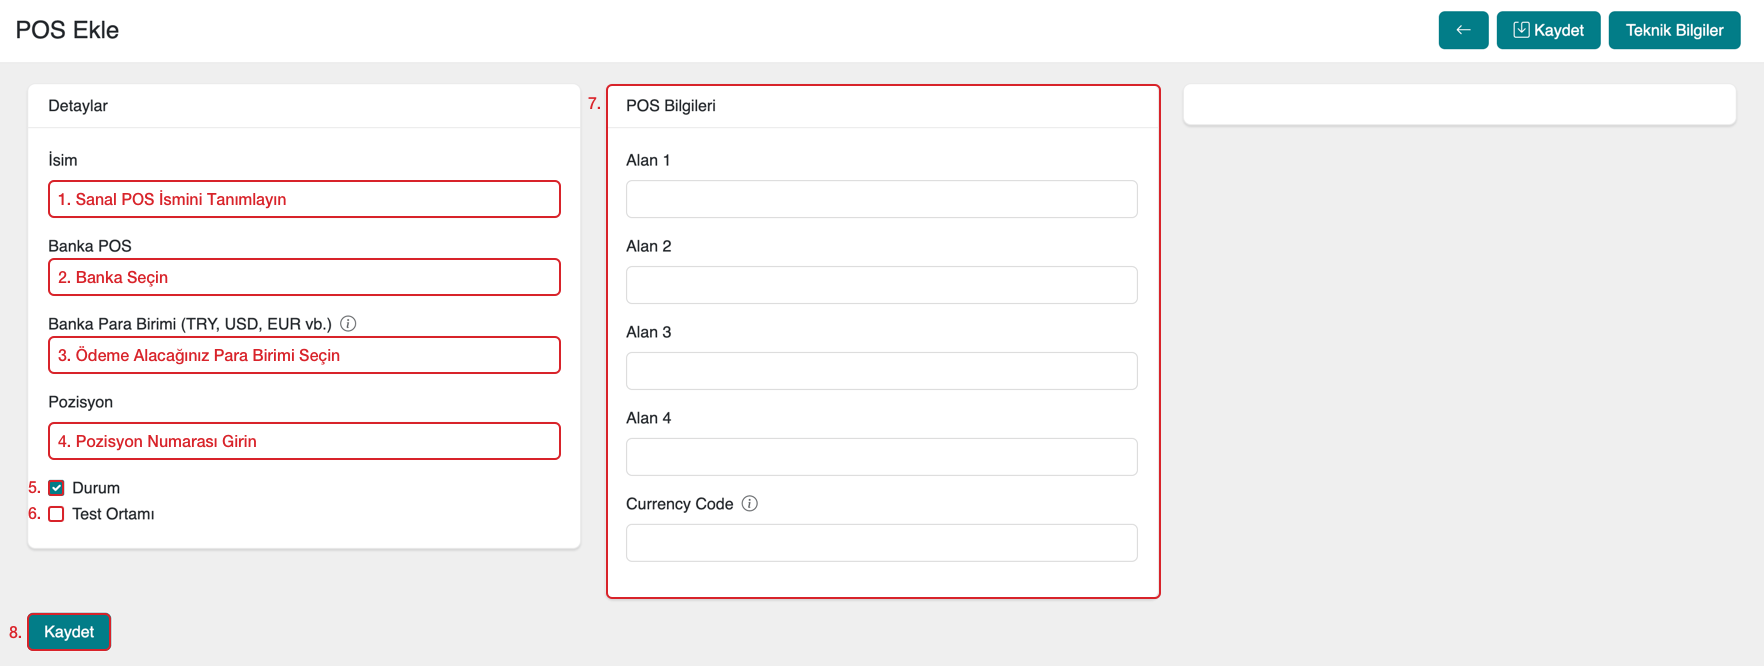
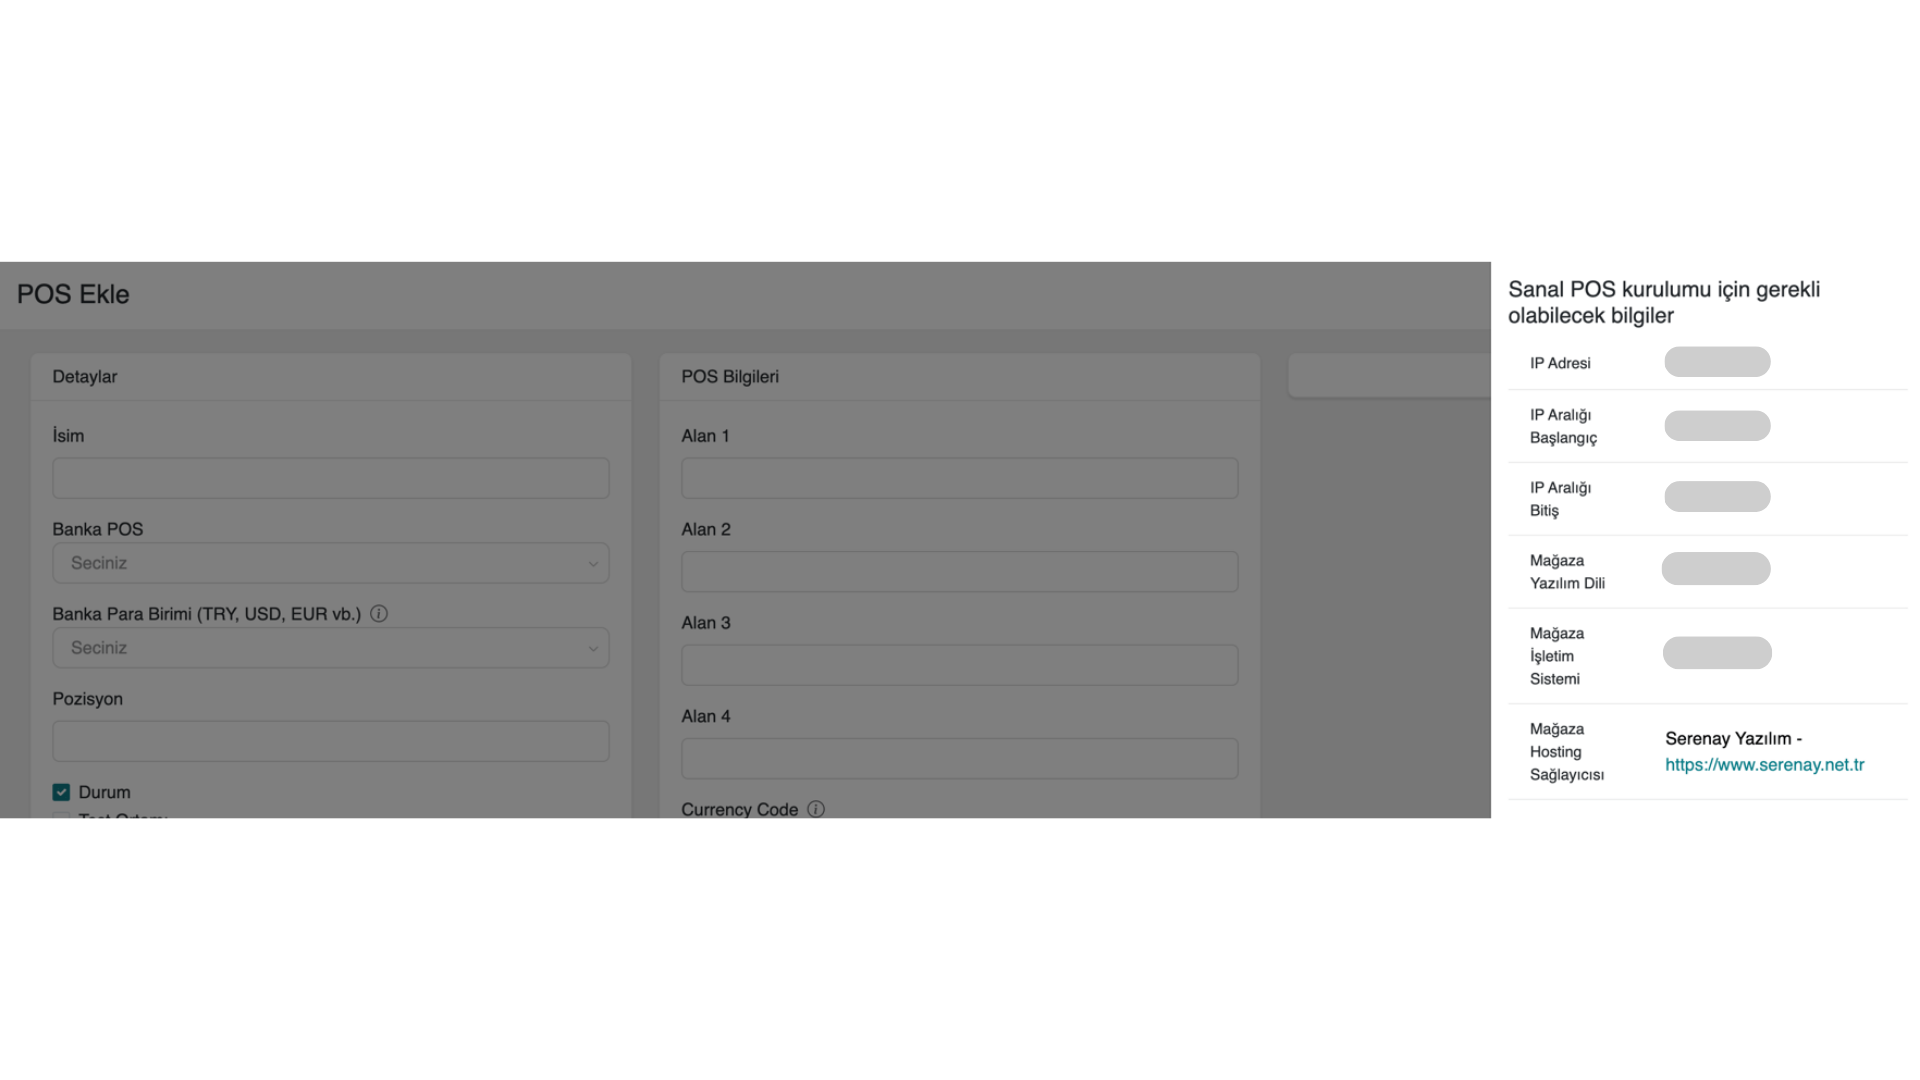
Step-by-Step Guide
- Set the Virtual POS Name: Enter the virtual POS name that your customers will see.
- Select a Bank: Choose one of the banks available in the serB2B system.
- Select the Payment Currency: Choose the currency in which you will accept payments through your virtual POS system (e.g. TRY, USD, EUR).
- Enter the Position Number: Enter a number based on which bank you want to appear first among the payment options for your customers. (For example, "1" gives the highest priority.)
- Status: Set this virtual POS as active or passive — that is, make it available to your customers or disable it.
- Test Environment (Optional): Check this option if you are using test environment credentials provided by your bank.
- Enter POS Details: Enter the required POS information for the selected bank (Field 1, Field 2, Field 3, Field 4, and Currency Code). You will be able to see what these fields are on the right side after selecting your bank.
- Save: After entering all the information, click the "Save" button to complete the process.
The Test Environment is a platform that allows payment integrations to be tested in a virtual environment before going live. Banks offer businesses that want to integrate new payment systems a test environment that simulates real transactions but does not involve actual money transfers.
The test environment is used for the following purposes:
- Integration Testing: To verify that the virtual POS integration is working correctly.
- Transaction Simulation: To test payment processes and identify issues without making real transactions.
- Payment Process Verification: To check whether payment information is being received correctly and whether transactions are proceeding as expected.
You can usually access the test environment using test usernames, passwords, and API keys provided by the banks. Since no real transactions are made, businesses can identify and resolve issues without putting live customers at risk.
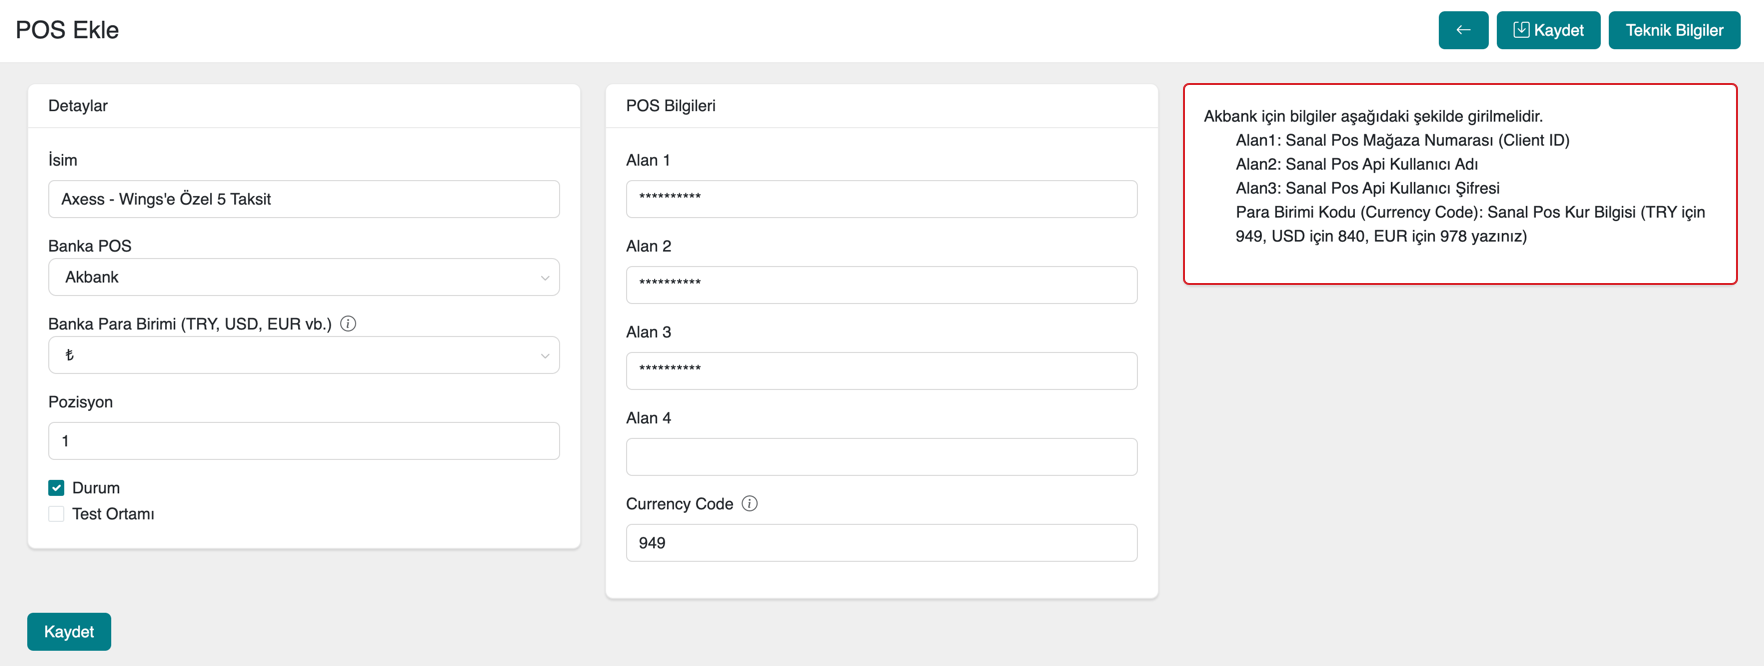
The data that needs to be entered in the POS Details section may vary from bank to bank. After selecting a bank in the Bank POS field, the POS details for that bank will automatically appear on the right side.
As an example, let's look at which information needs to be entered in the POS Details section when Akbank is selected:
Your bank may request Technical Information from you before integration during the virtual POS application process. To find out which technical information your bank requires, click the Technical Information button in the top-right corner of the Add New Virtual POS screen and share the required details with your bank as requested.

Technical Information:
The information in the image is for example purposes. Share the correct technical information from your own system with your bank.
If you want to accept payments in USD, EUR, or other currencies from abroad, contact your bank representative and have the international payment option activated. Also request the Currency Code value for the relevant currency from your bank.
Then simply enter the Currency Code value in the corresponding field.
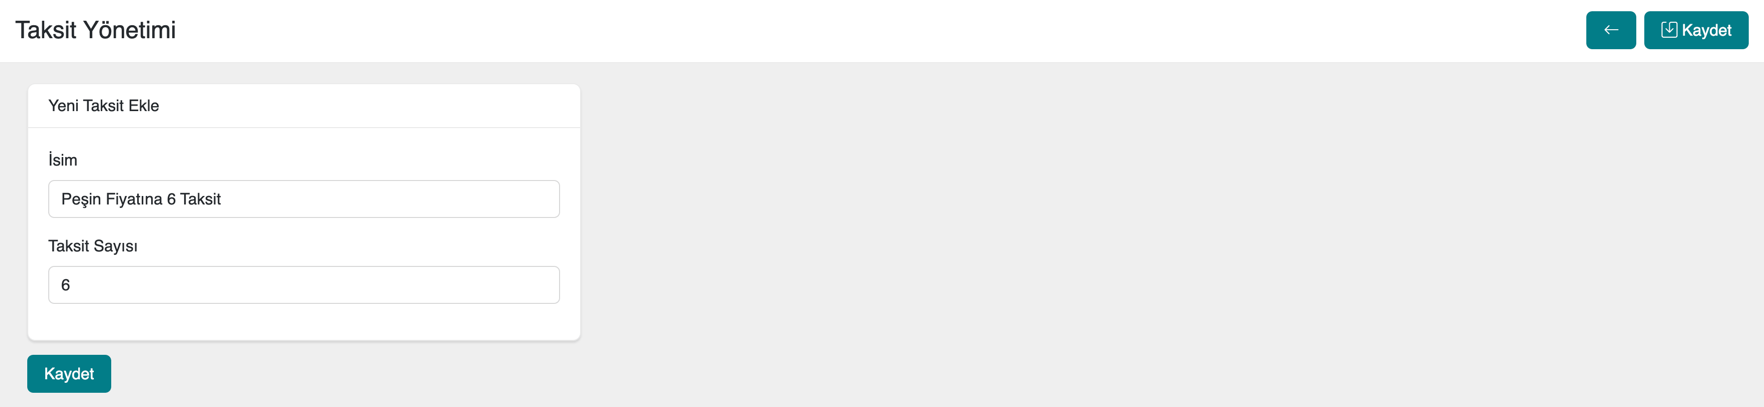
3. Example Application: Adding a "6 Installments at Cash Price" Option
Let's apply the "Installment Settings Configuration" steps as follows to add a "6 Installments at Cash Price" option to Yapı Kredi bank from the Virtual POS options defined in the system.
i. Enter the details in the form screen as shown below.
ii. View the installment option we created in Installment Management.

iii. Result: Customers can now complete purchases on our site using the relevant installment option under the Credit Card payment method.

4. Deleting a Defined Installment Option
To delete an installment option for a bank defined in your system, go to Settings > Payment Settings in the serB2B admin panel. Navigate to the Installments section of the relevant bank and click the Delete button on the right side of the installment row you want to remove.

5. Deleting a Virtual POS
To delete a Virtual POS for a bank defined in your system, go to Settings > Payment Settings in the serB2B admin panel, then click the Edit button on the right side of the relevant bank.
To complete the deletion, click the ![]() icon located in the top-right area of the page and confirm.
icon located in the top-right area of the page and confirm.

serPay Setup
To integrate instantly with all banks via serPay, follow the Add New Virtual POS steps and select paratika from the Bank POS list. Then follow the Installment Settings Configuration steps to complete the process.
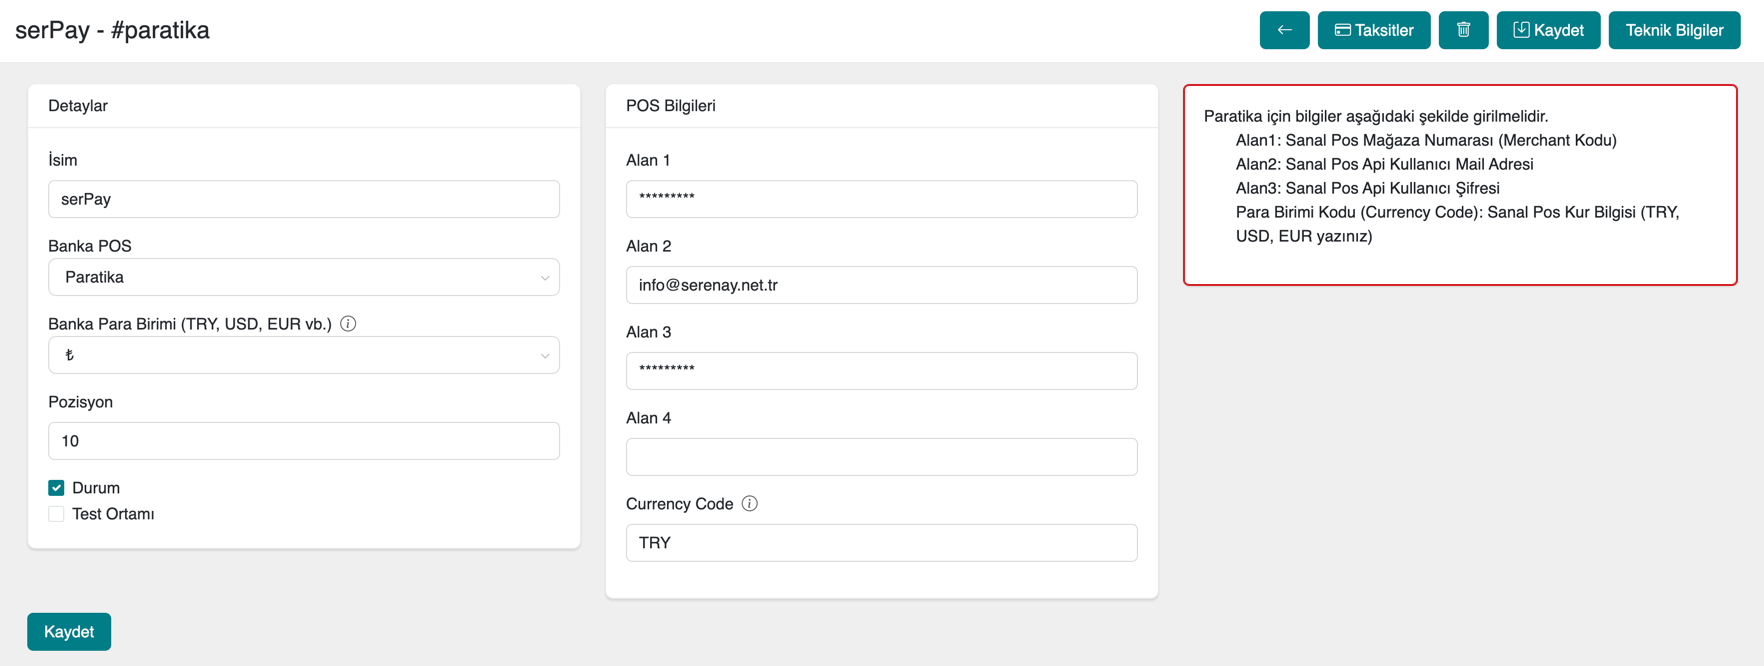
To access the information in the POS Details section for serPay (paratika), please contact [email protected].
Error After Virtual POS Setup
If you encounter an error after setting up a virtual POS in your serB2B system, you can send a screenshot of the error to [email protected].
Frequently Asked Questions (FAQ)
-
What is the Test Environment and how is it used?
The Test Environment is a platform used to test virtual POS integrations before going live. No real money transfers are made, but transactions are simulated. By using the test environment, you can ensure that the integration is working correctly.
-
I want to accept payments from abroad — what should I do?
To accept international payments, contact your bank and activate the relevant currency. Request the Currency Code from your bank and enter it in the system.
-
How can I find out the virtual POS details for a bank?
Your bank's POS details will appear on the right side when adding a virtual POS. However, you may need to contact the support team to get the correct technical information from your bank.
Resources
Contact
For any questions or support requests, please contact our support team. We will be happy to assist you.