İş Bankası Virtual POS
You can follow the steps below to complete the İş Bankası Virtual POS integration.
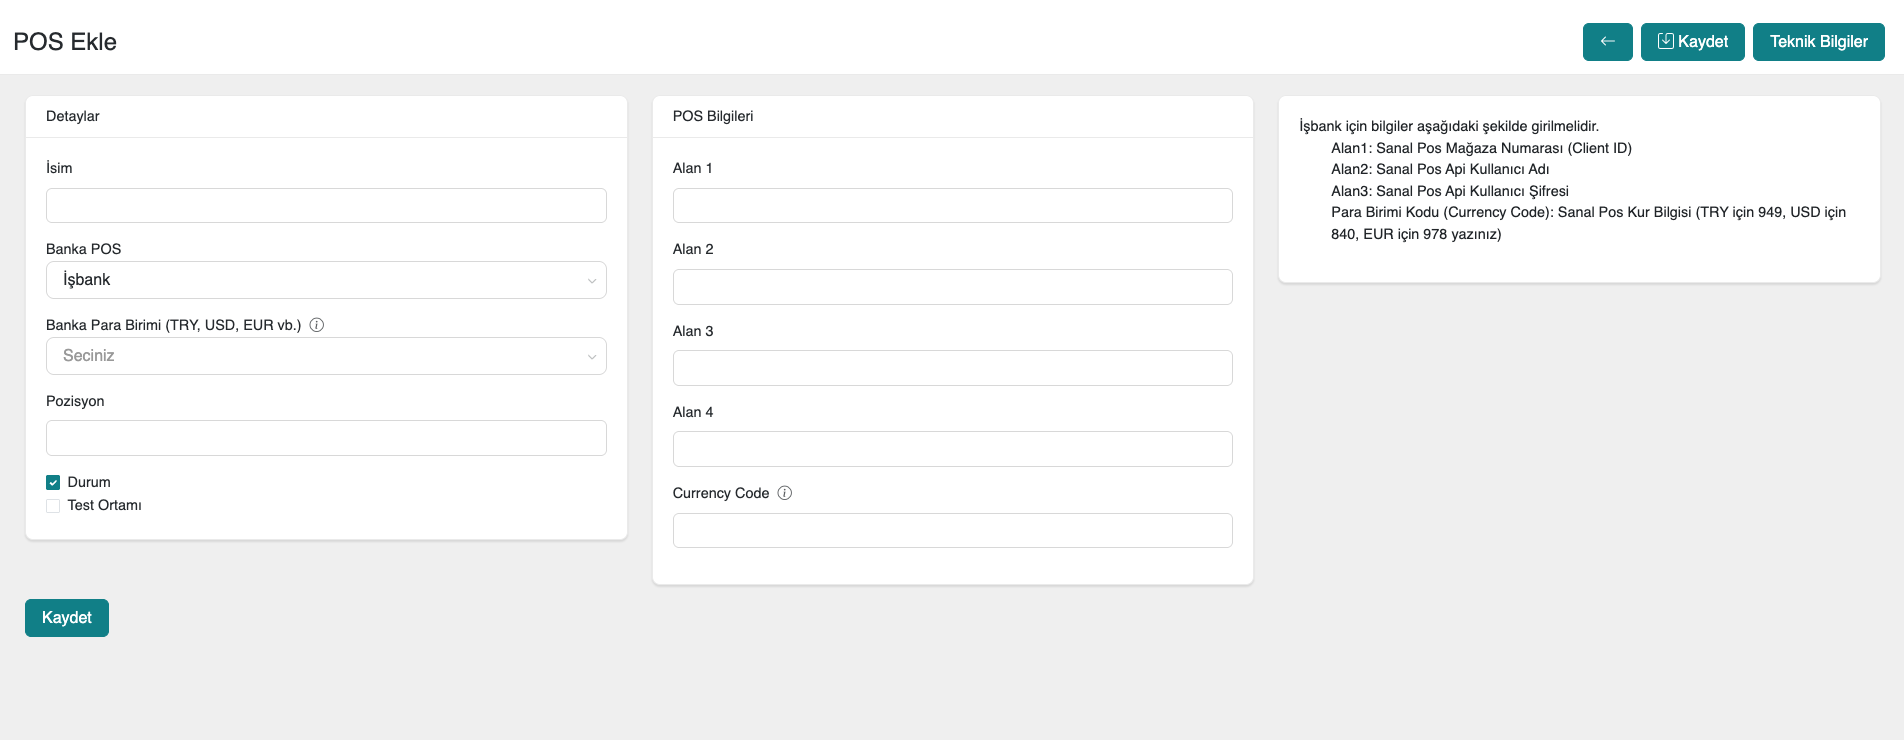
1. Defining a POS in the serB2B Panel
First, in the serB2B e-commerce admin panel, click on Settings > Payment Settings > + to be directed to the new virtual POS setup screen.
2. Obtaining the Required Information
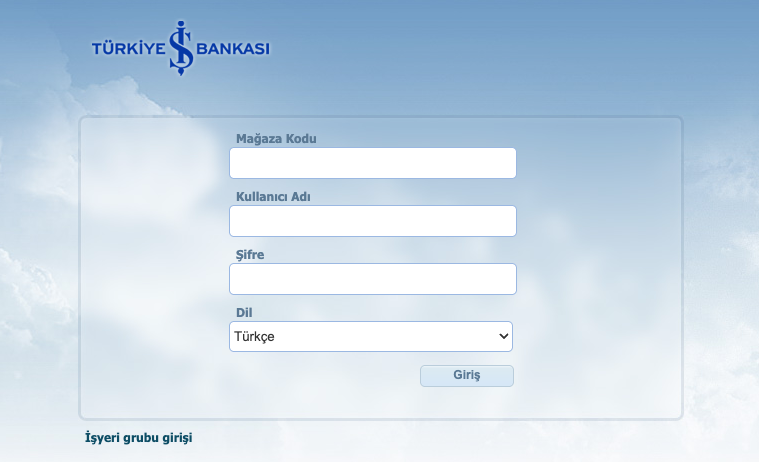
Next, you need to log in to the Türkiye İş Bankası Virtual POS Panel. Log in at https://sanalpos.isbank.com.tr/isbank/report/user.login.
After logging in to the bank panel, you need to obtain the following for integration with your serB2B site:
- Virtual POS Store Number (Client ID)
- Virtual POS API Username
- Virtual POS API User Password
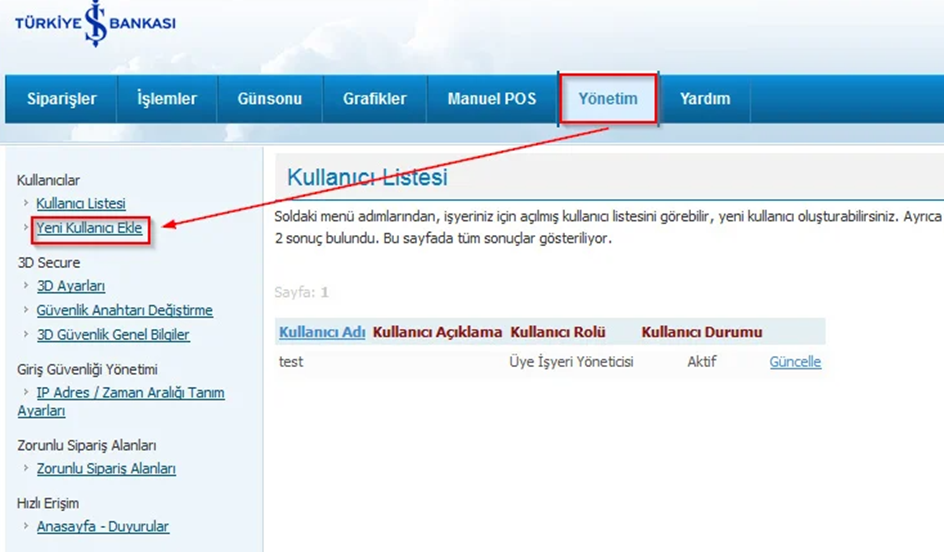
2.1. Steps to Follow in the İş Bankası Panel
- In the İş Bankası virtual POS panel, click the "Management" tab at the top and click "Add New User" from the left menu.
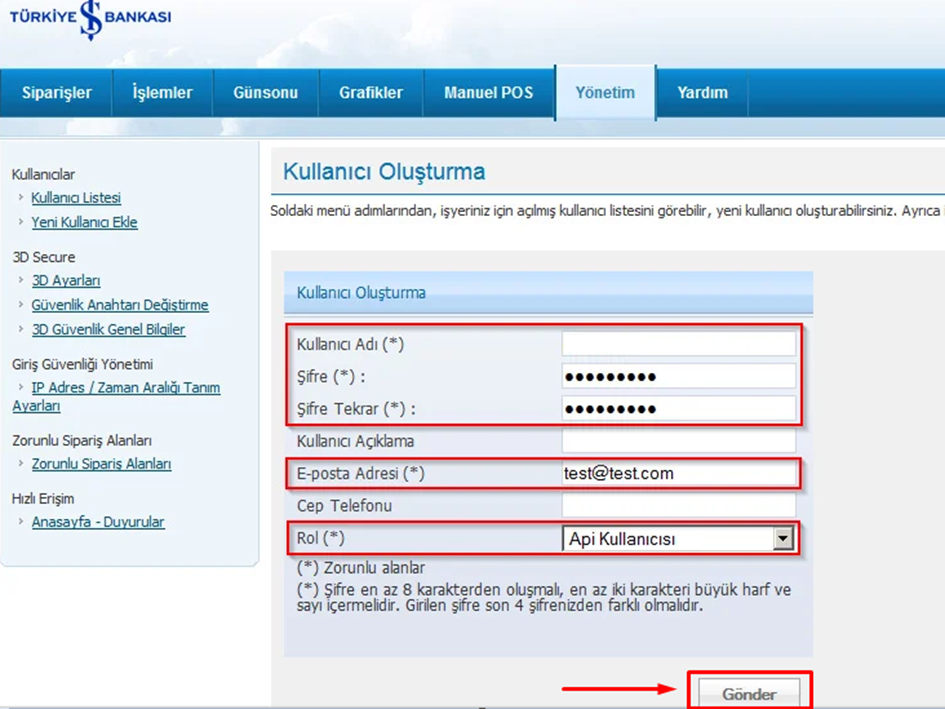
- On the screen that opens, the required information needs to be entered. Enter this information and then "API User" must be selected from the Role tab. After entering the user details, click the "Submit" tab at the bottom.
- After creating our API user, we need to create a security key. From the İş Bankası virtual POS panel screen, go to Management > Change Security Key to create a new Security Key. The most important step here is that the 3D settings must be set to 3D_PAY.
- If there is any other setting other than 3D_PAY, you must contact İş Bankası Virtual POS and have it changed to 3D_PAY. If it is not 3D_PAY, the integration will not work correctly.
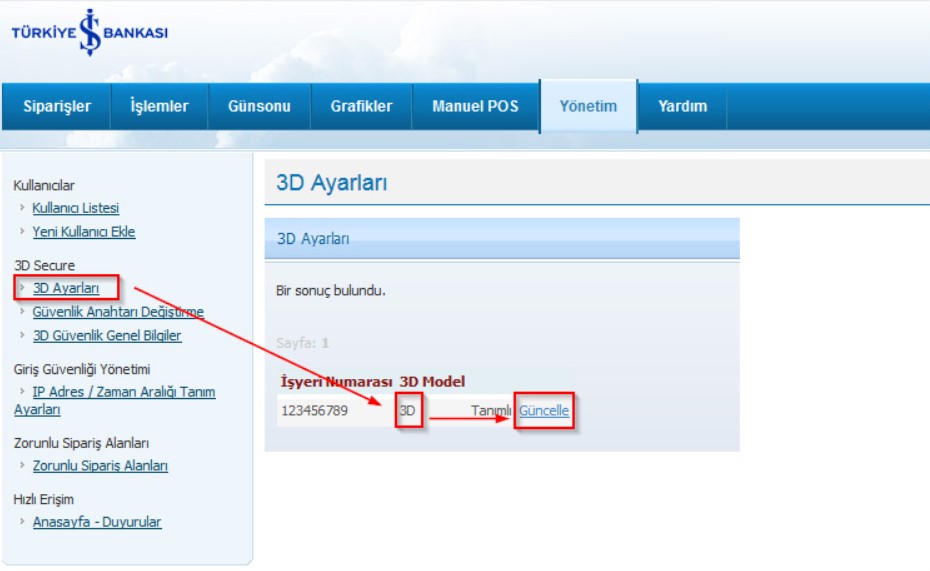
- Do not forget to save your 3D Security Key after you have finished. Now let's switch to the serB2B admin panel.
2.2. Steps to Follow in the serB2B Panel
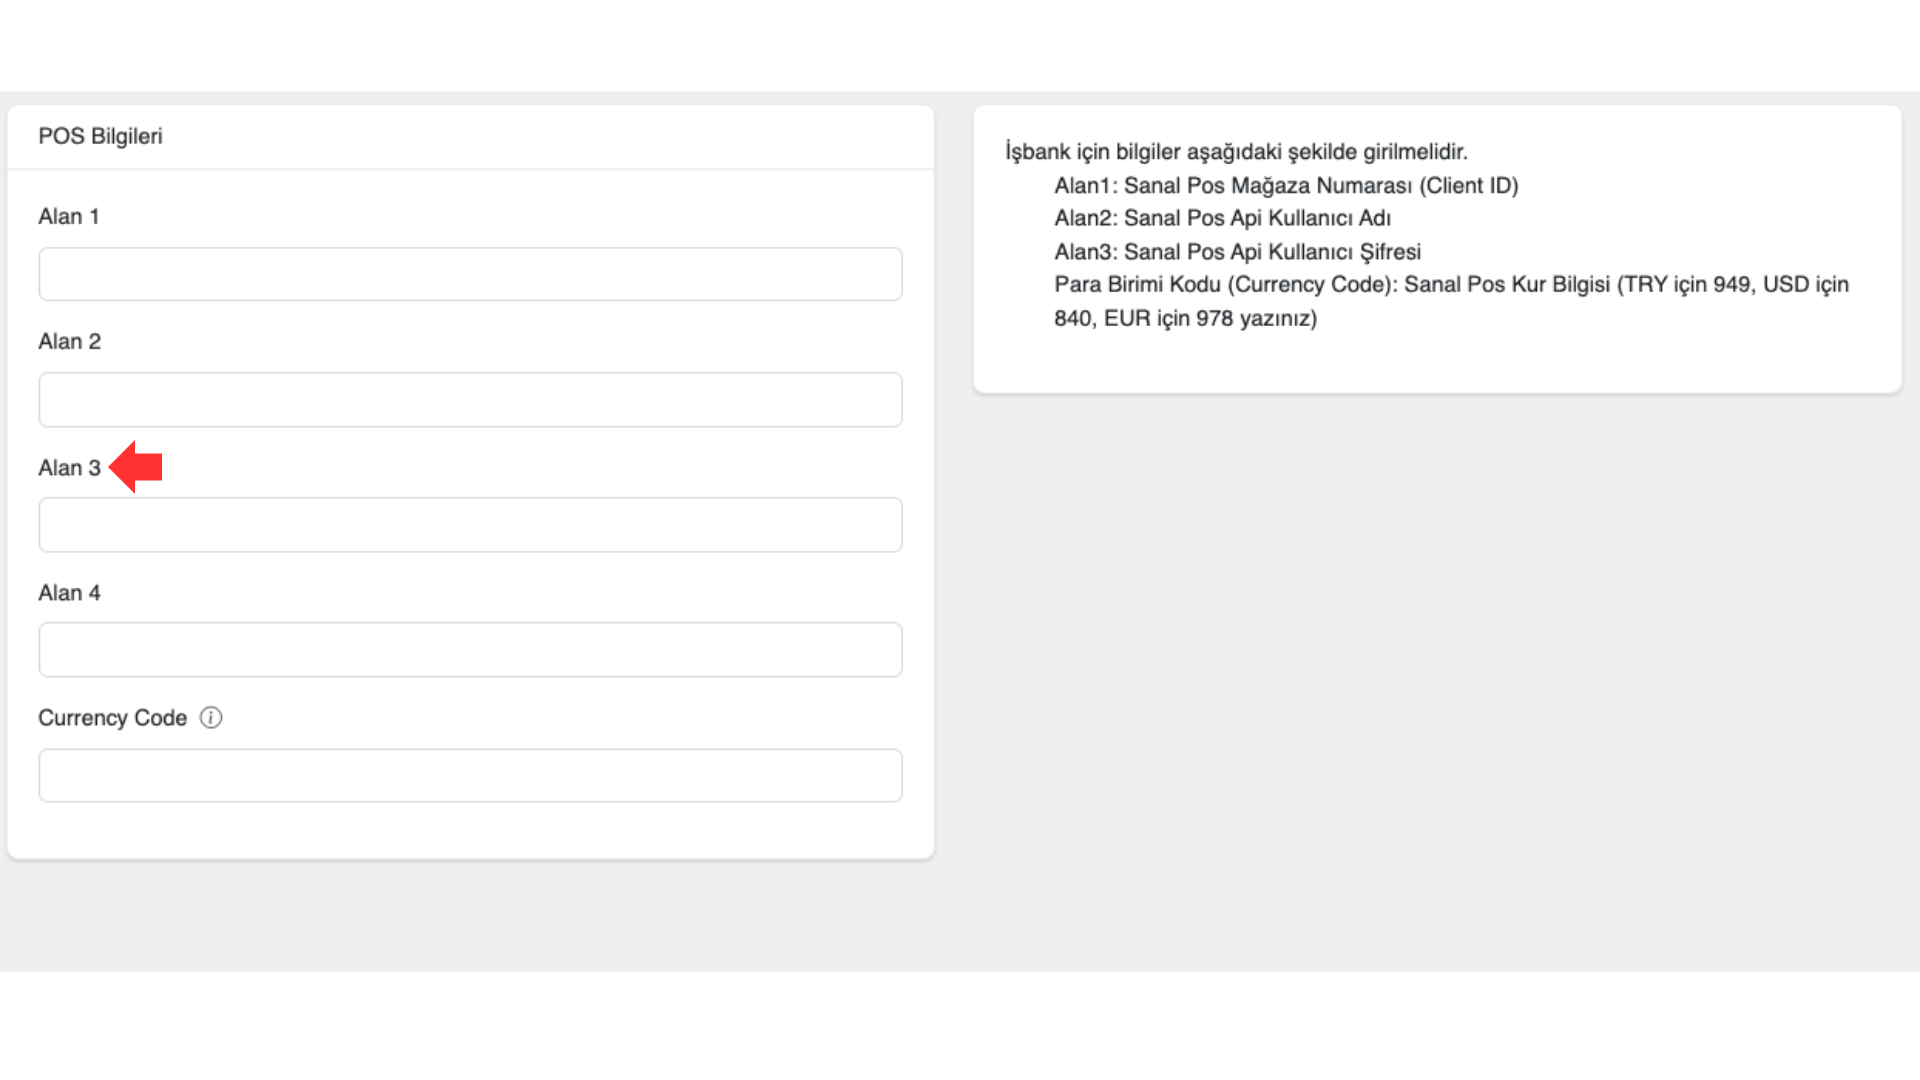
- Paste the Virtual POS Store Number (Client ID) you obtained into the Field 1 area in the serB2B panel.
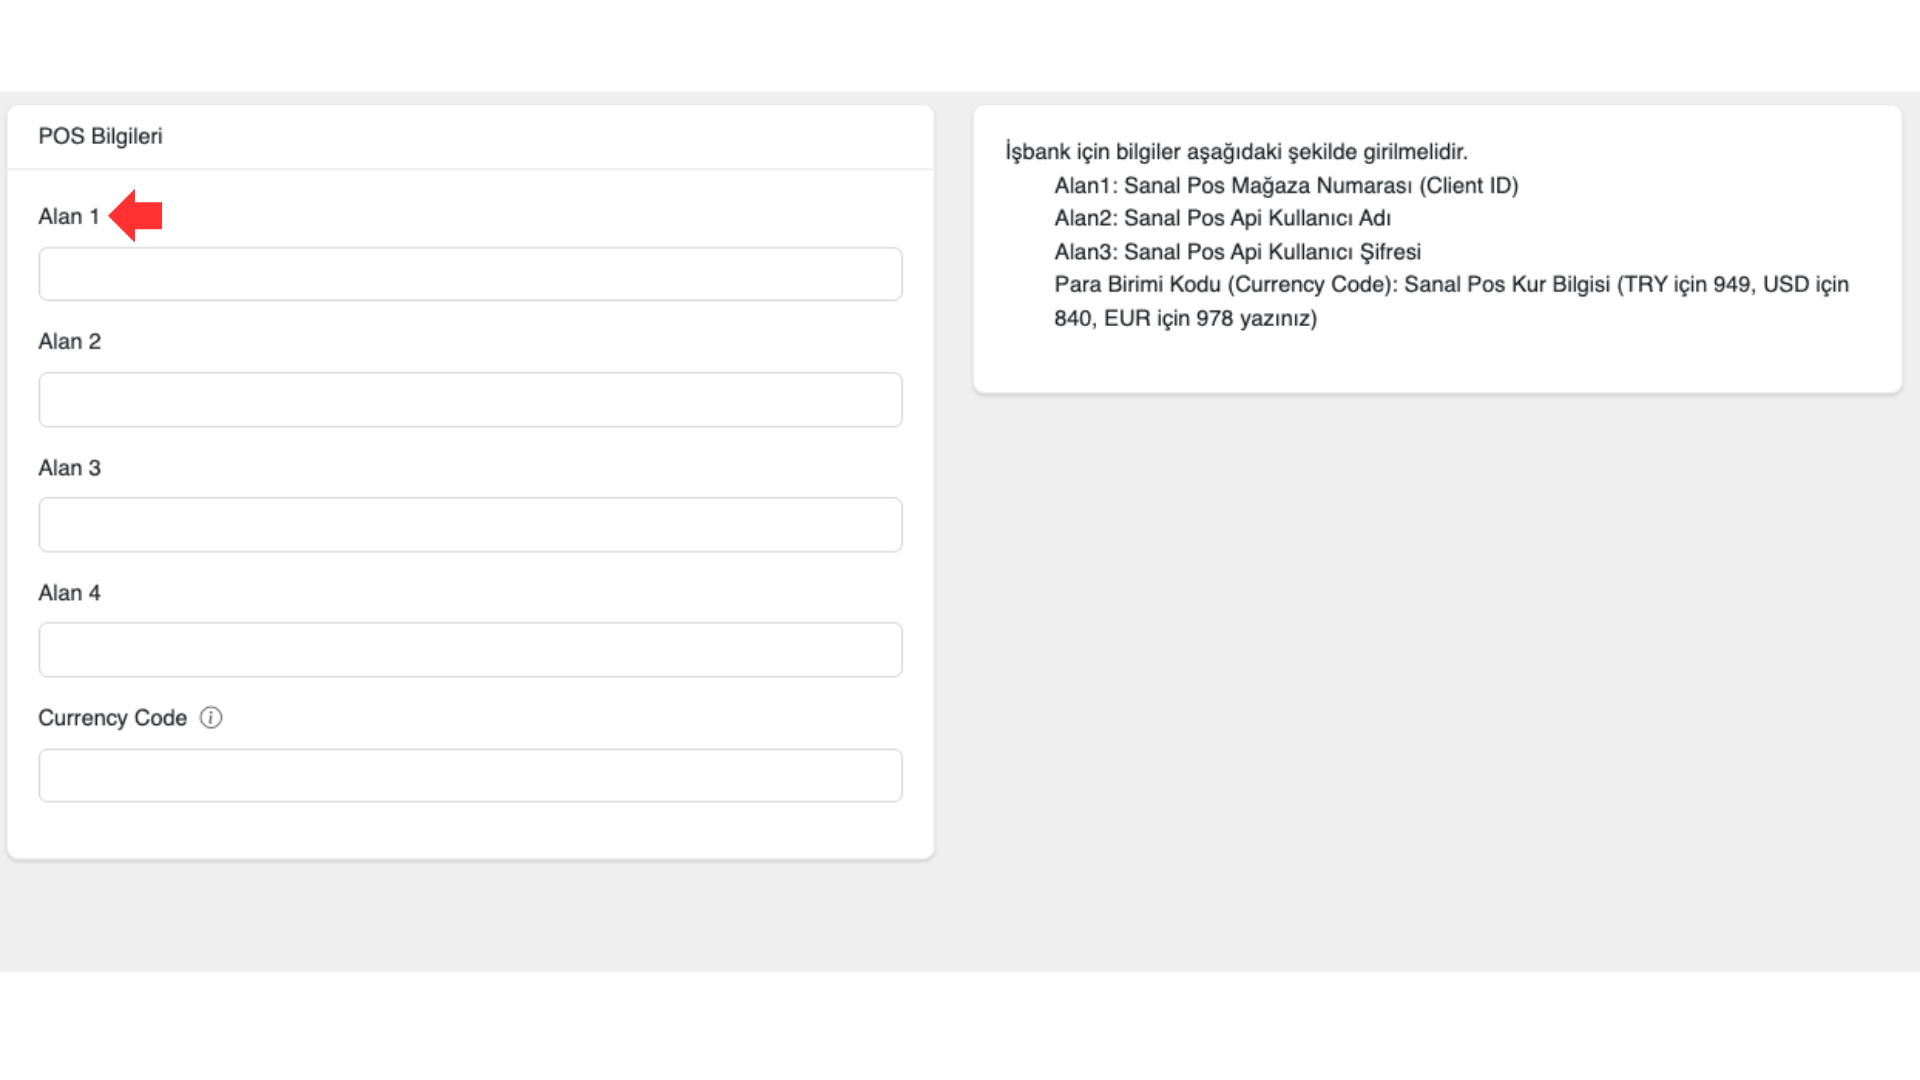
- Paste the Virtual POS API Username you obtained into the Field 2 area in the serB2B panel.
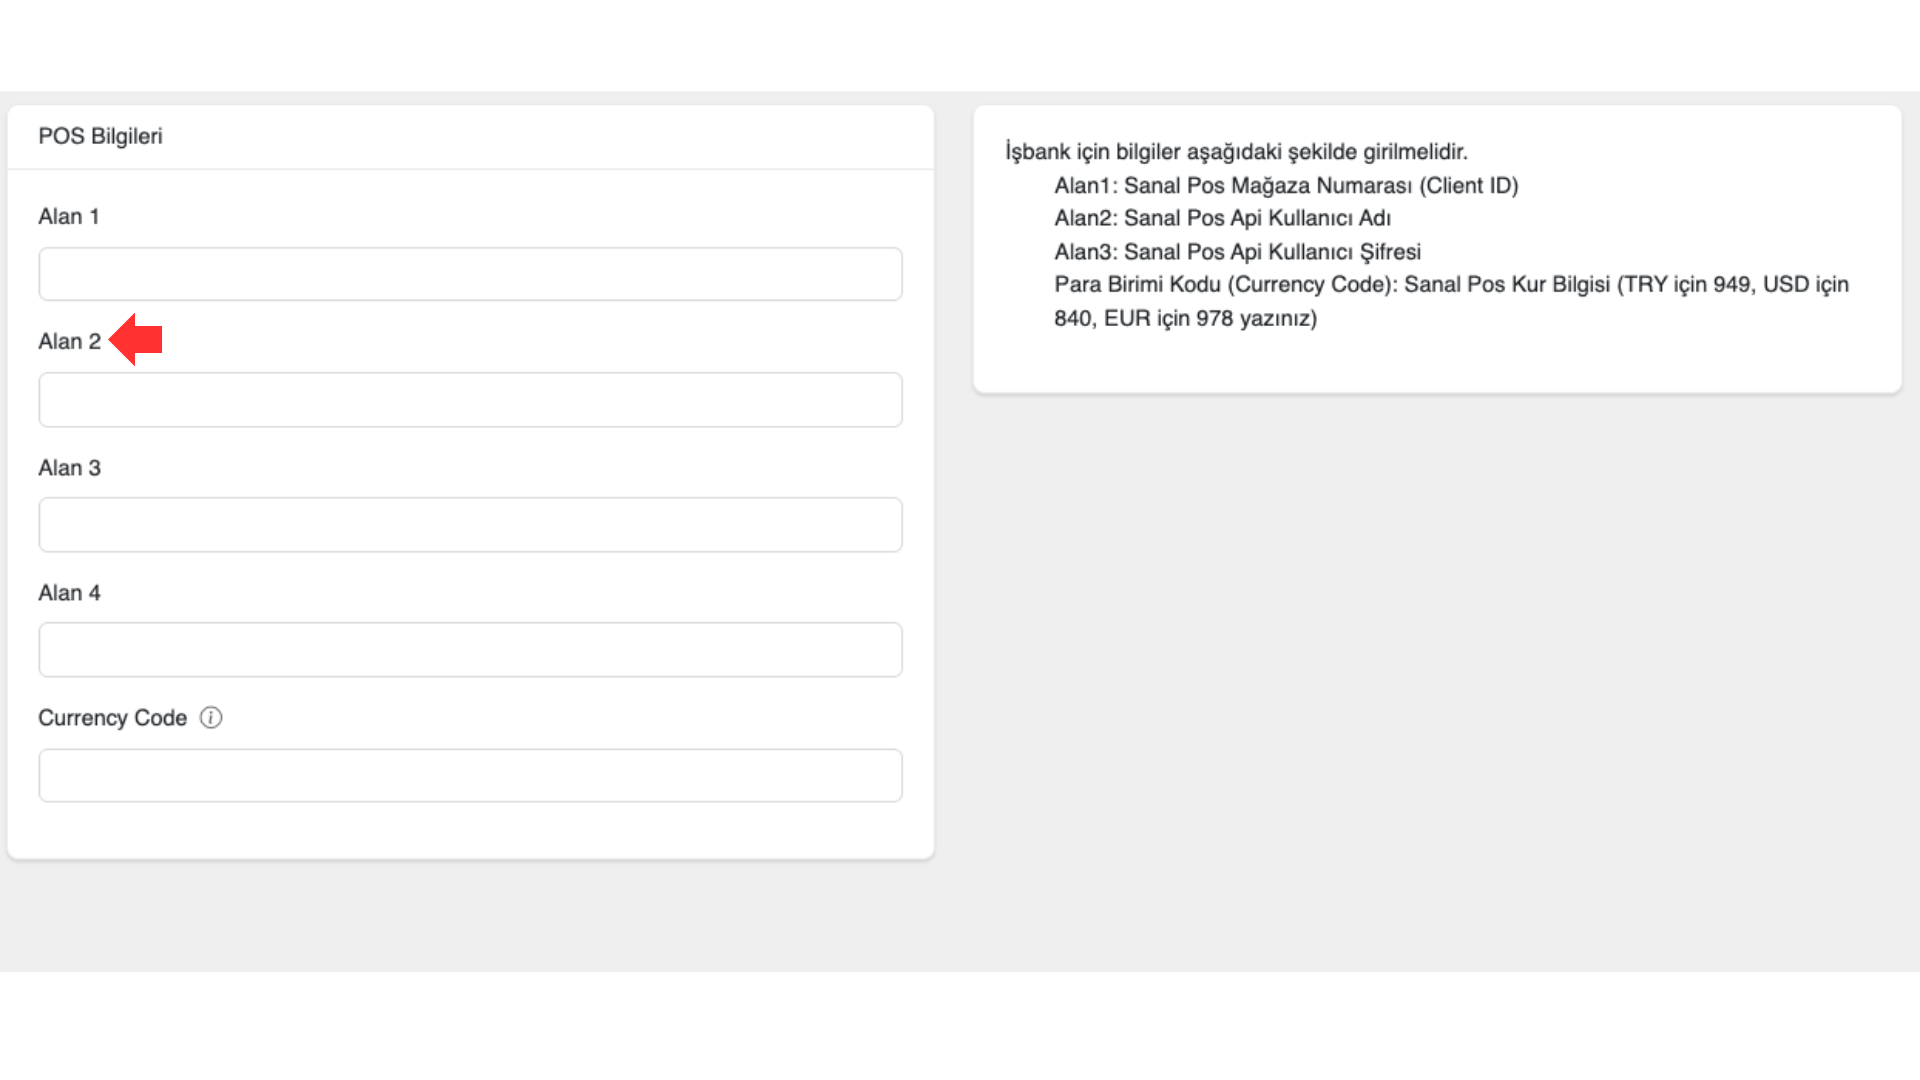
- Paste the Virtual POS API User Password you obtained into the Field 3 area in the serB2B panel.
2.3. Activating the Virtual POS
- Enter the defined currency code. For example, enter 949 for Turkish Lira.
- Click the Save button to save your settings.
3. Virtual POS Configuration Table
- Select Isbank from the Bank POS field.
| Field | Description |
|---|---|
| Field 1 | Virtual POS Store Number (Client ID) |
| Field 2 | Virtual POS API Username |
| Field 3 | Virtual POS API User Password |
| Currency Code | The Virtual POS currency information must be entered as follows: |
- 949 for TRY | |
- 840 for USD | |
- 978 for EUR |