Yapı Kredi Virtual POS
You can follow the steps below to complete the Yapı Kredi Virtual POS integration.
1. Defining a POS in the serB2B Panel
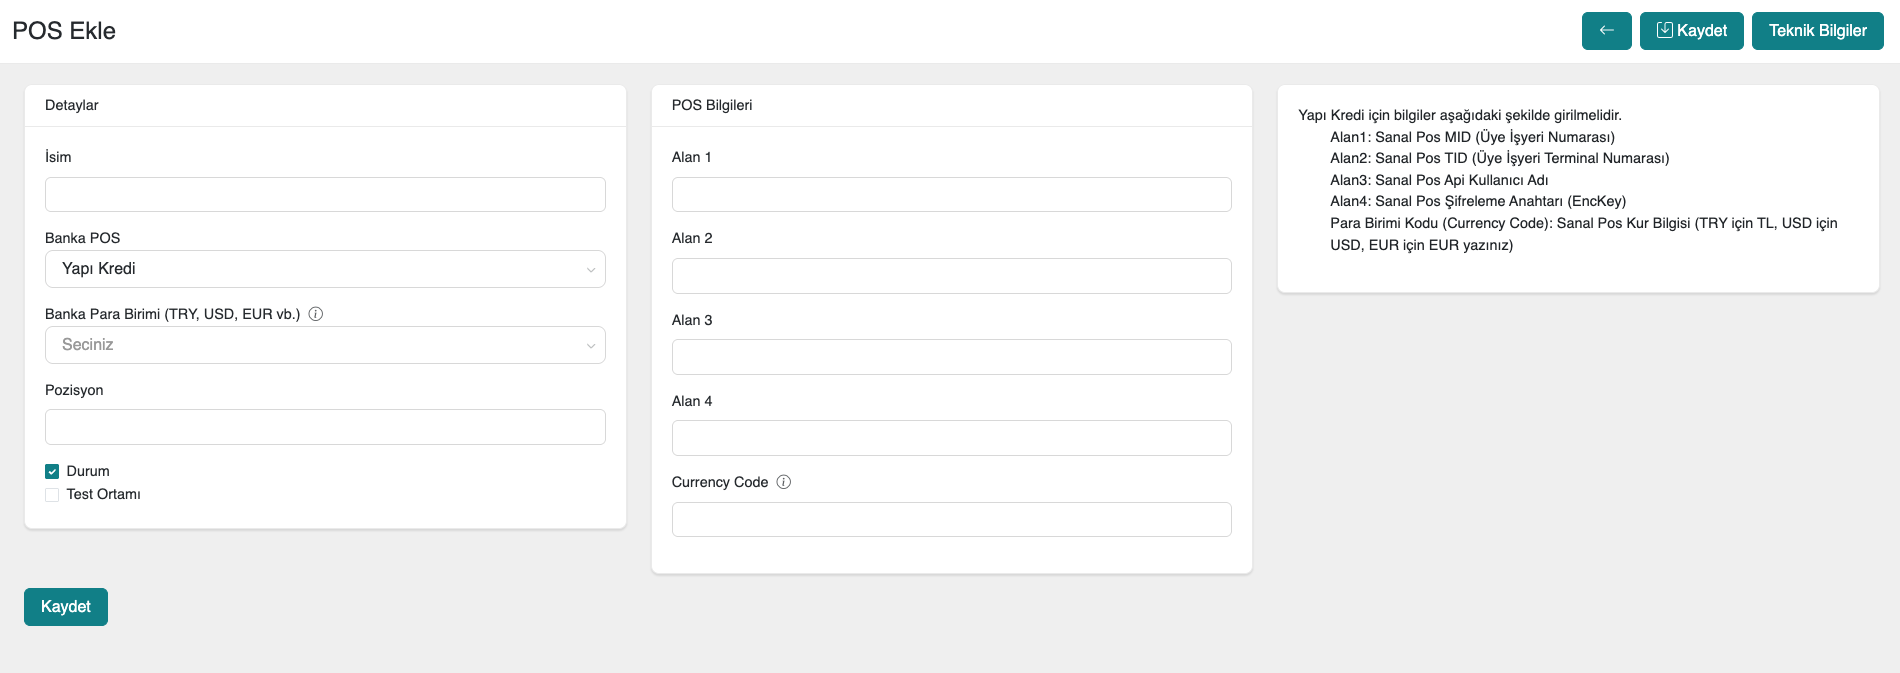
First, in the serB2B e-commerce admin panel, click on Settings > Payment Settings > + to be directed to the new virtual POS setup screen.
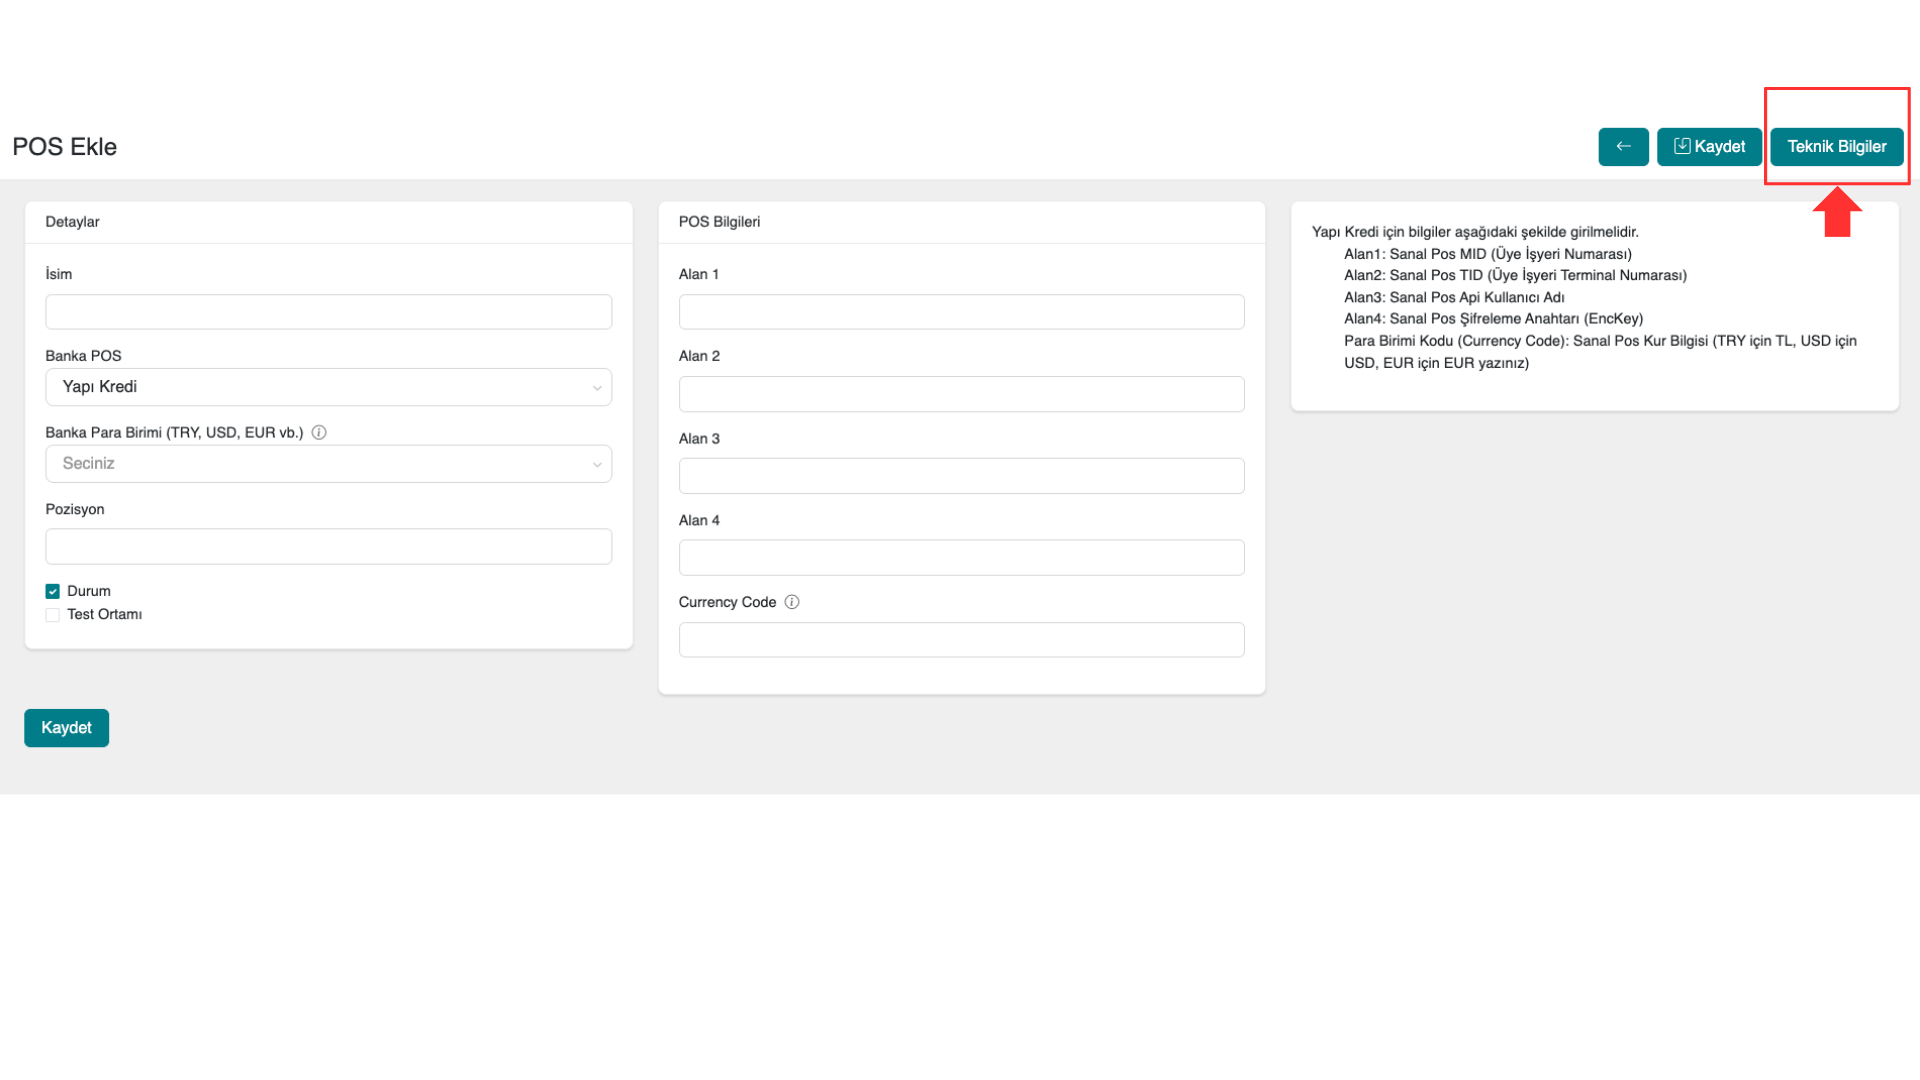
Since this virtual POS performs IP verification, you need to register your IP with the bank. To do this, click the Technical Information button in the top-right corner on the same page.
2. Obtaining the Required Information
Next, you need to log in to the Yapı Kredi Virtual POS Management Screen.
- You can request live environment credentials from your bank. The information provided will be in the form of Company Code/Customer Code, User Code, and Password. Using the corporate login menu, log in to the bank management panel screen with the provided credentials.

After logging in to the bank panel, you need to obtain the following for integration with your serB2B site:
- Virtual POS MID (Merchant ID)
- Virtual POS TID (Merchant Terminal Number)
- Virtual POS API Username
- Virtual POS Encryption Key (EncKey)
2.1. Steps to Follow in the Yapı Kredi Panel
- After entering the virtual POS management screen, click on the Posnet/My Information section under the Merchant menu in the top menu.
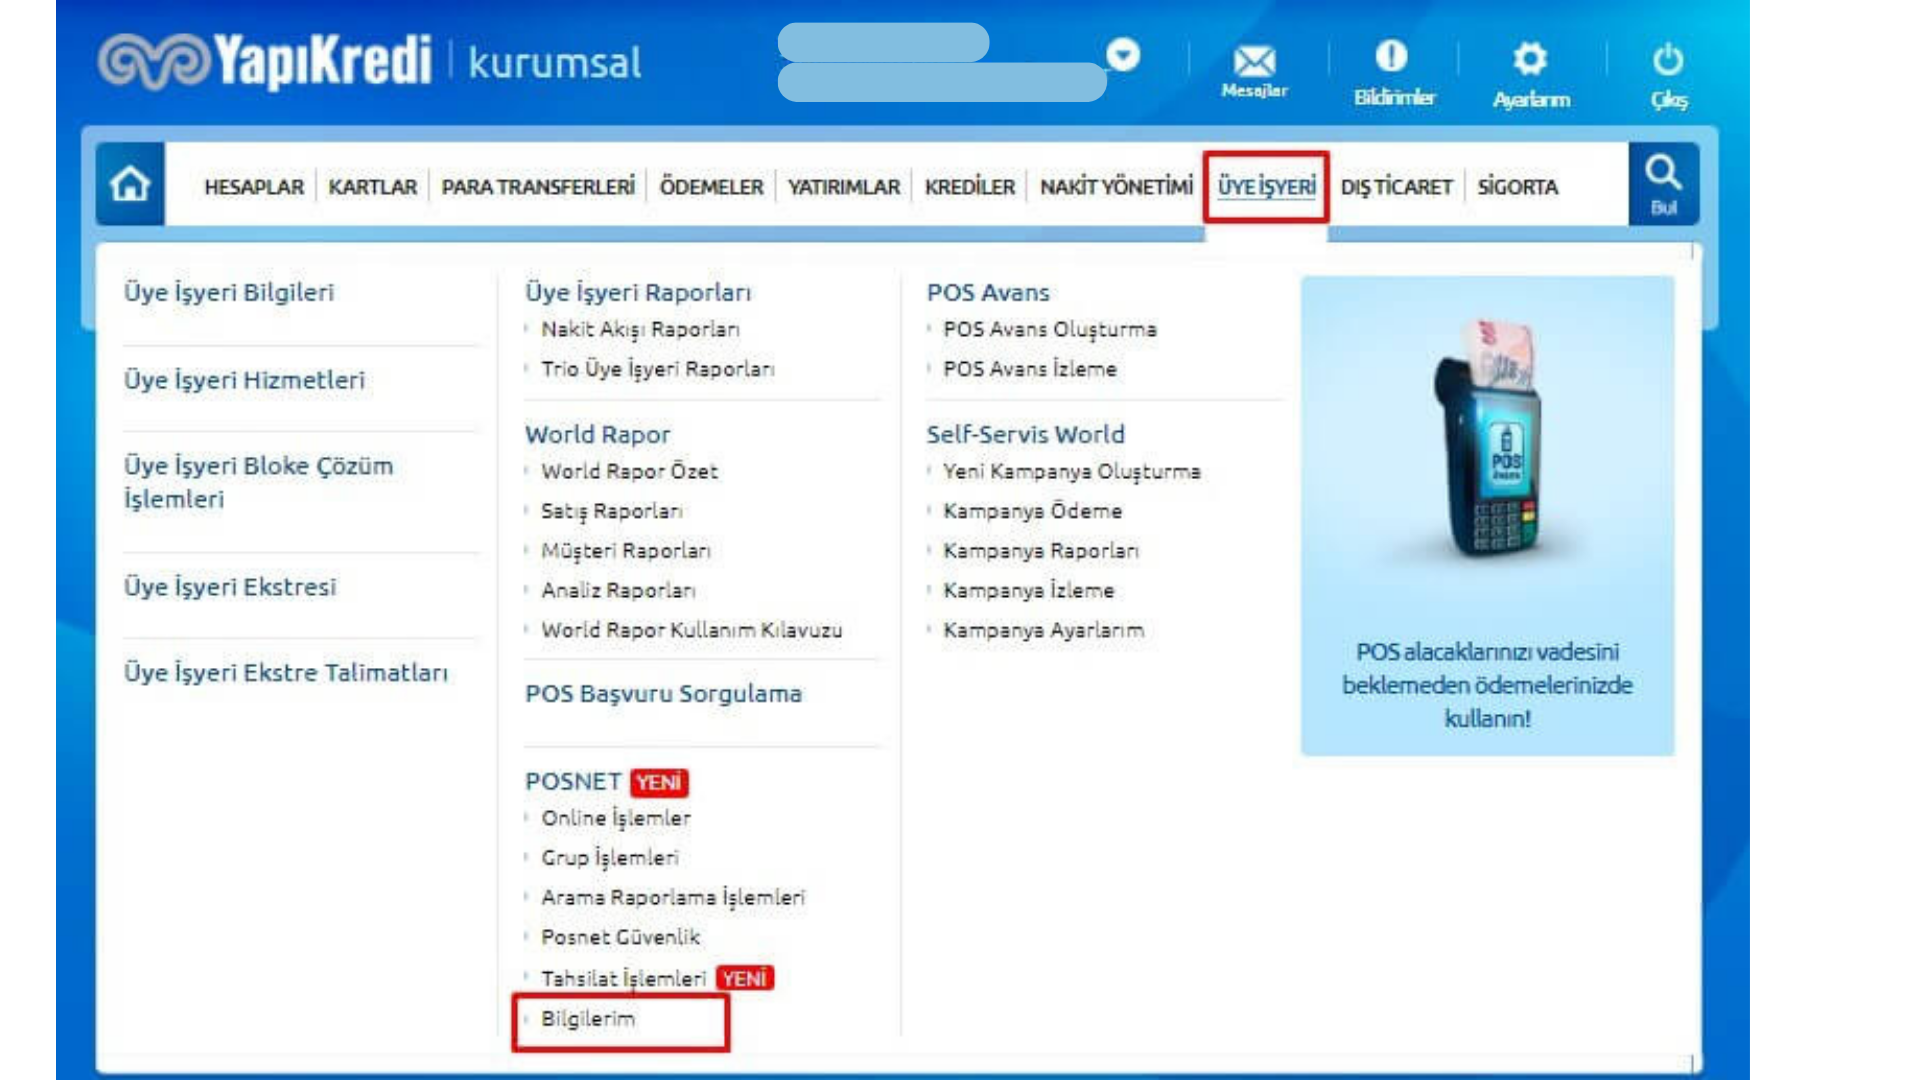
- Then click on the "My Merchant Information" section under the Transactions heading.
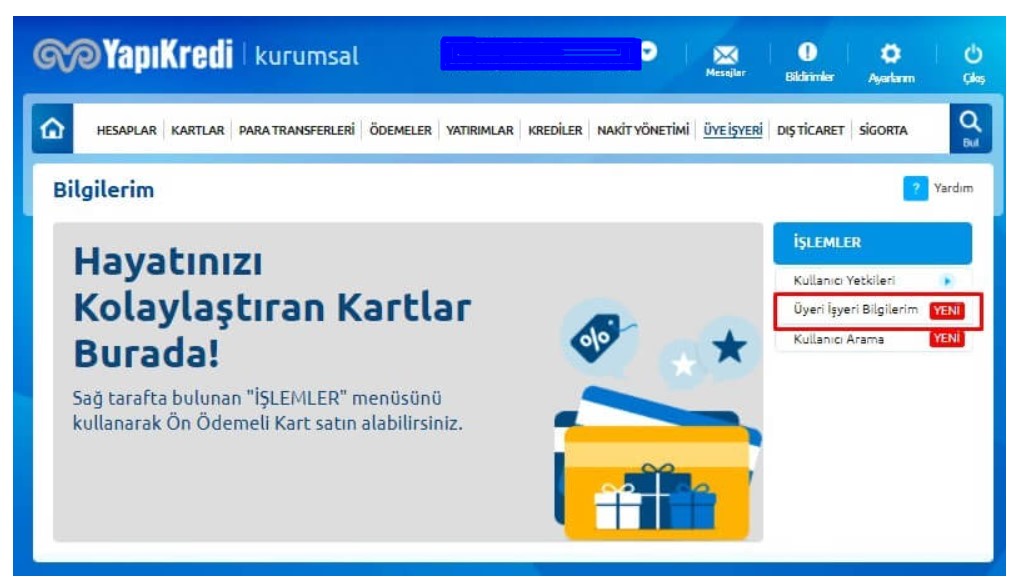
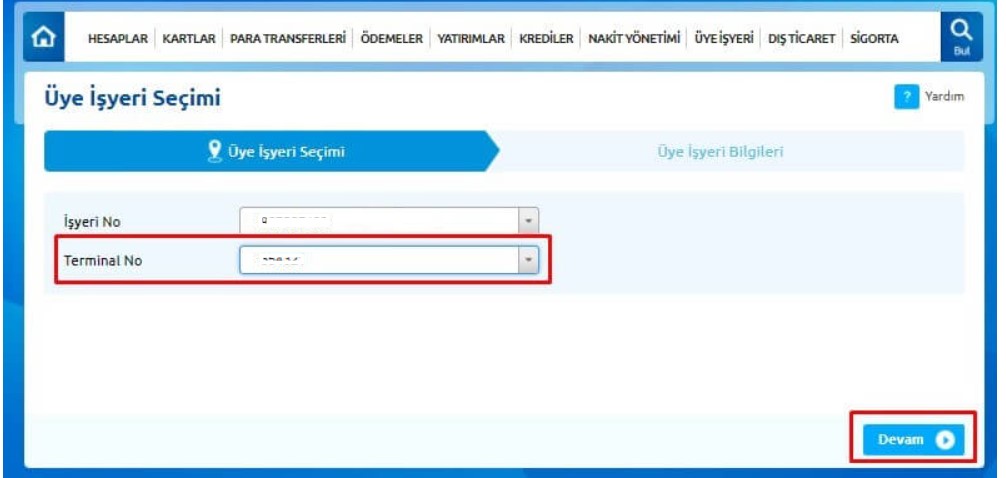
- On the screen that opens, select the "Terminal Number" information and click the Continue button.
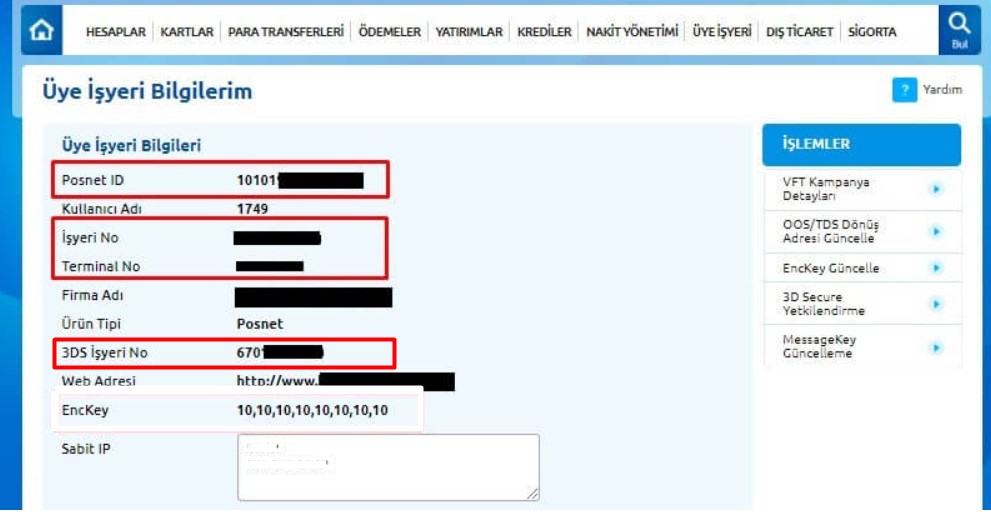
The information you will need from the My Merchant Information section:
- Posnet ID
- Merchant Number
- Terminal Number
- 3DS Merchant Key
- After obtaining this information from the Yapı Kredi panel, switch to the serB2B admin panel.
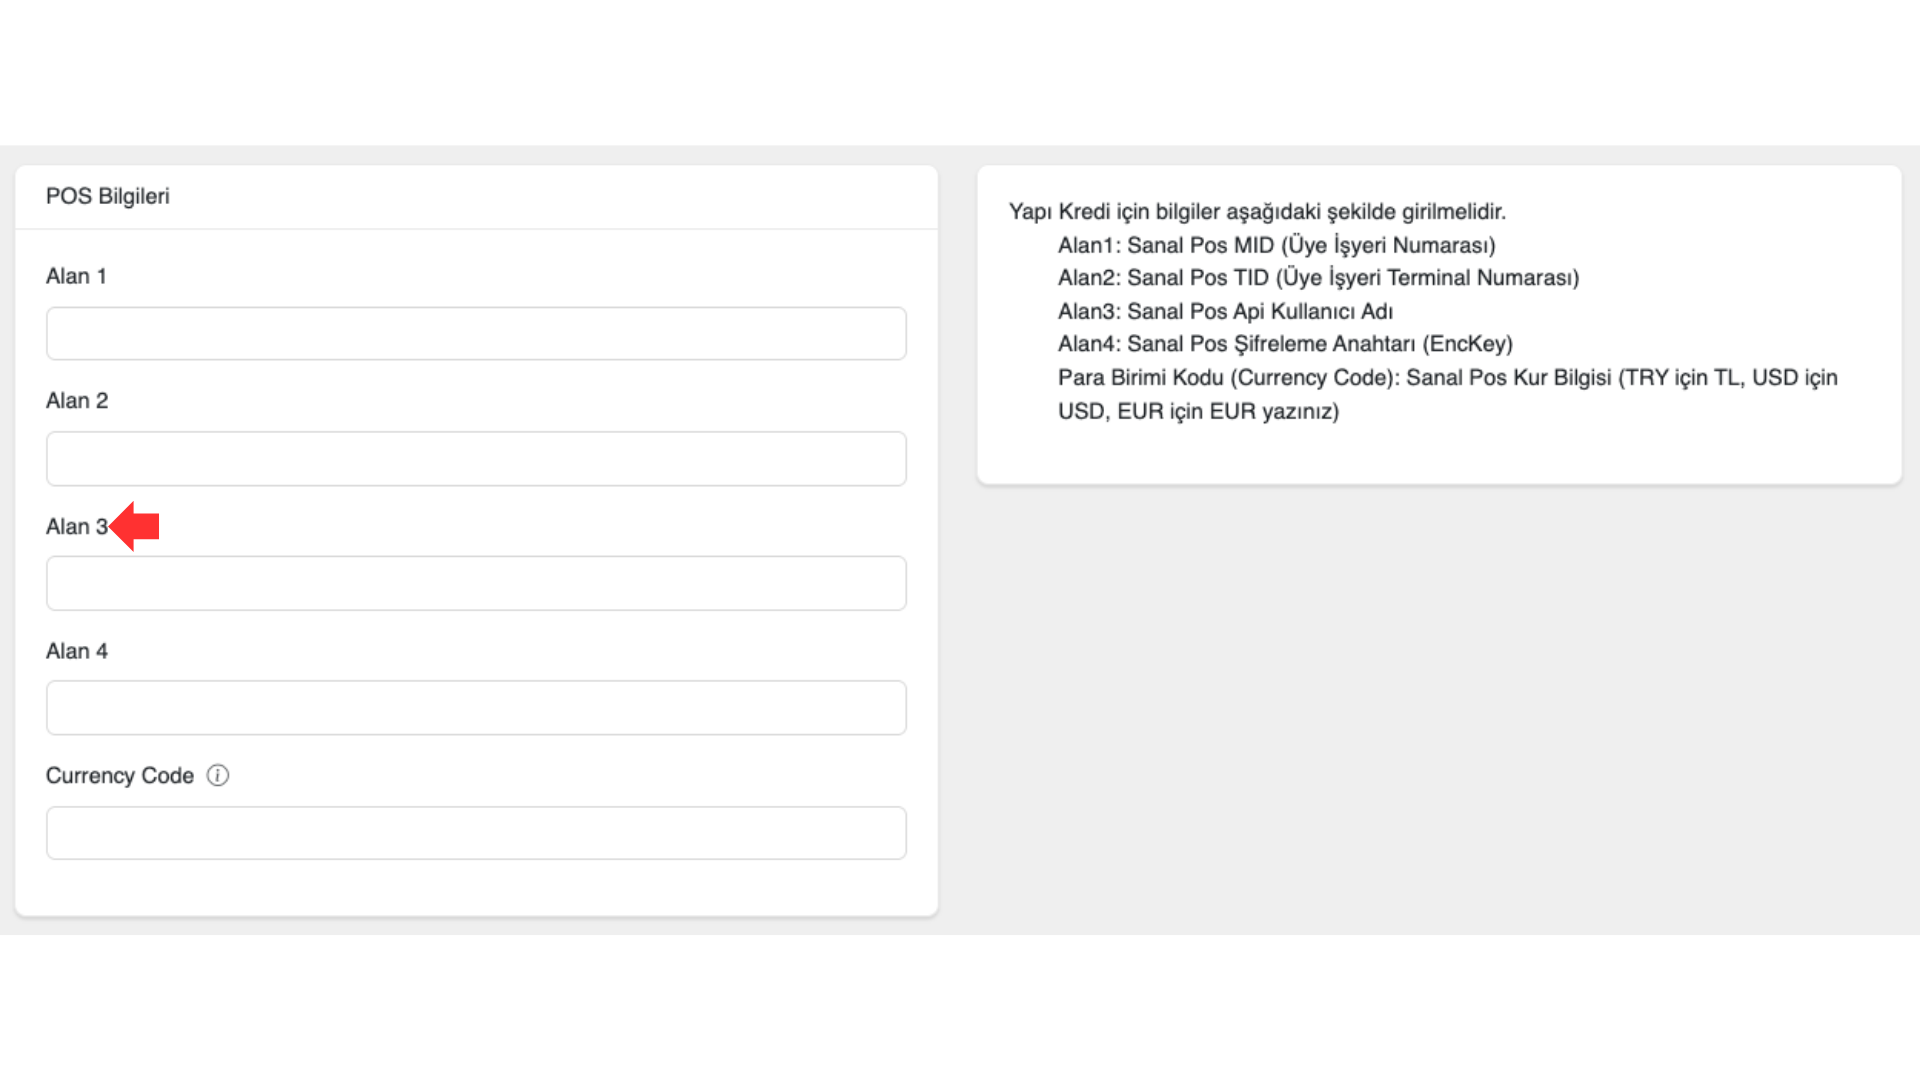
2.2. Steps to Follow in the serB2B Panel
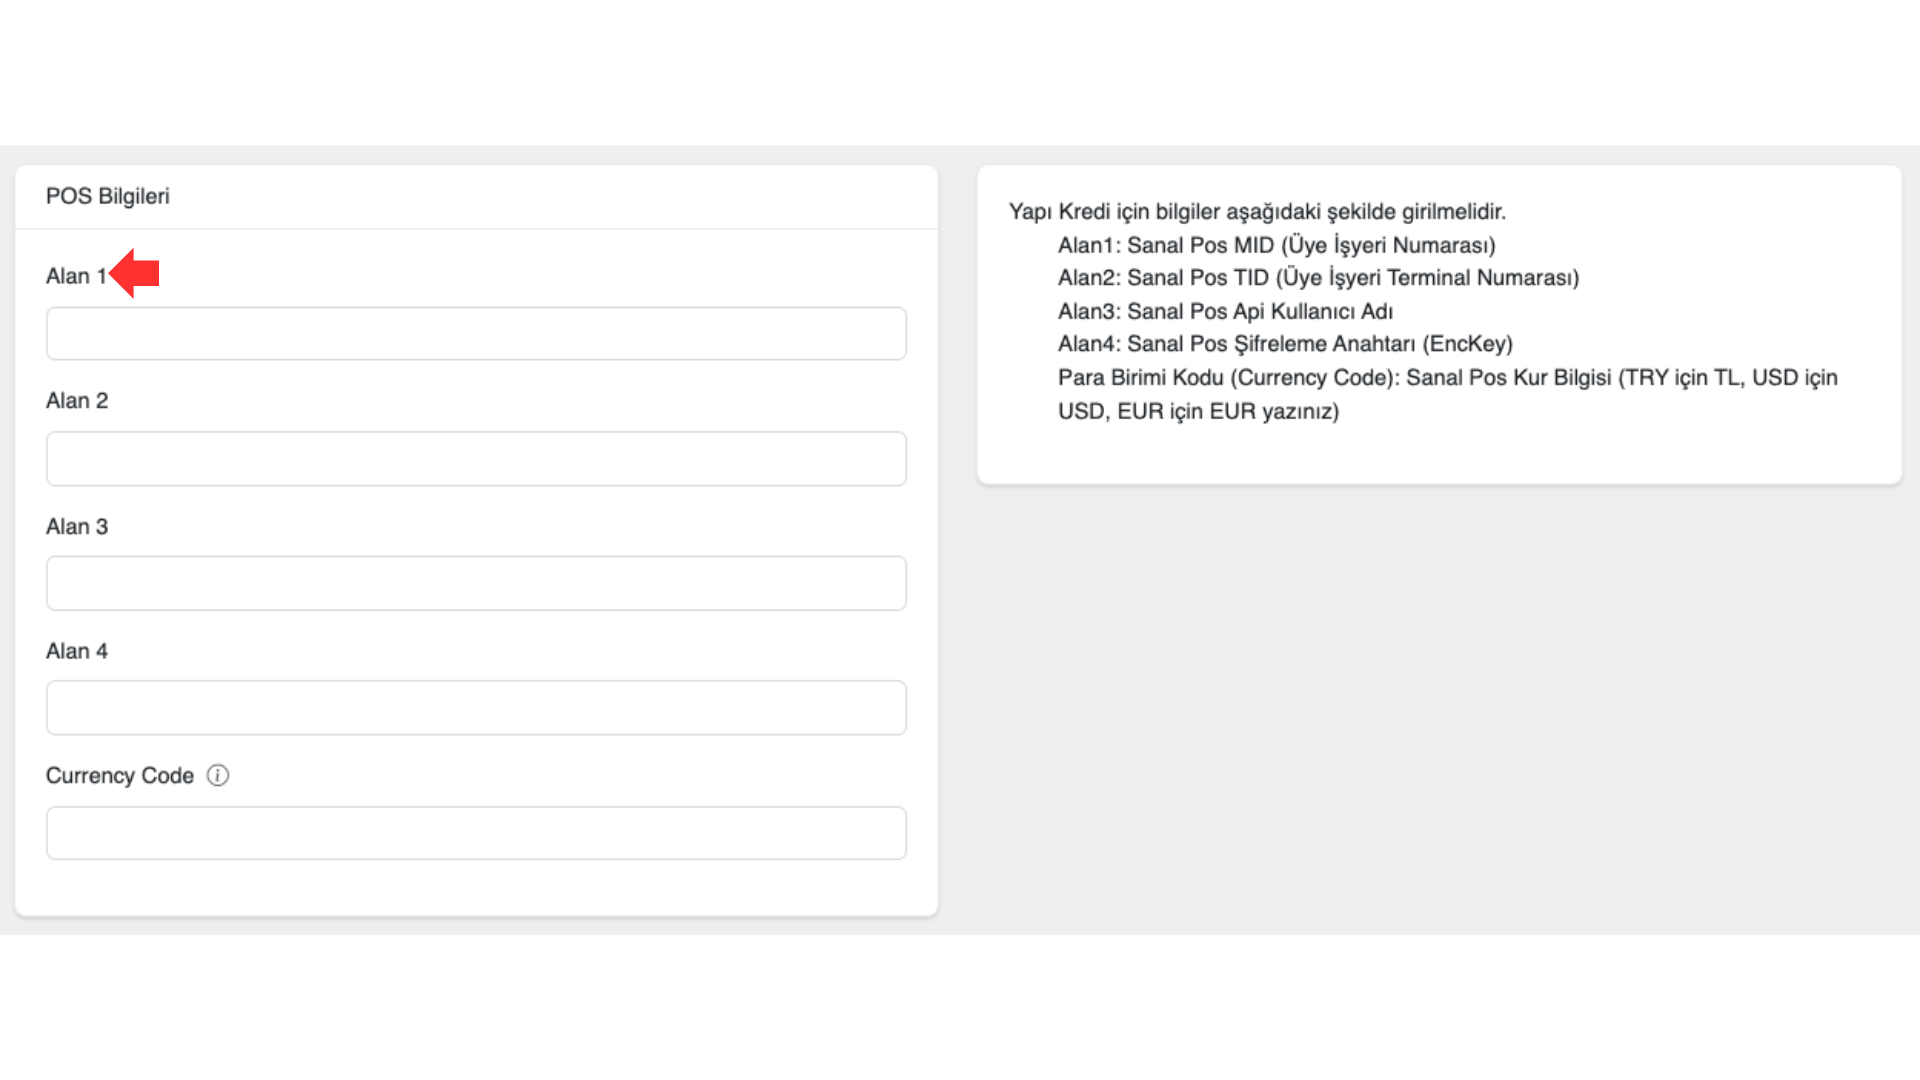
- Paste the Virtual POS MID (Merchant ID) you obtained into the Field 1 area in the serB2B panel.
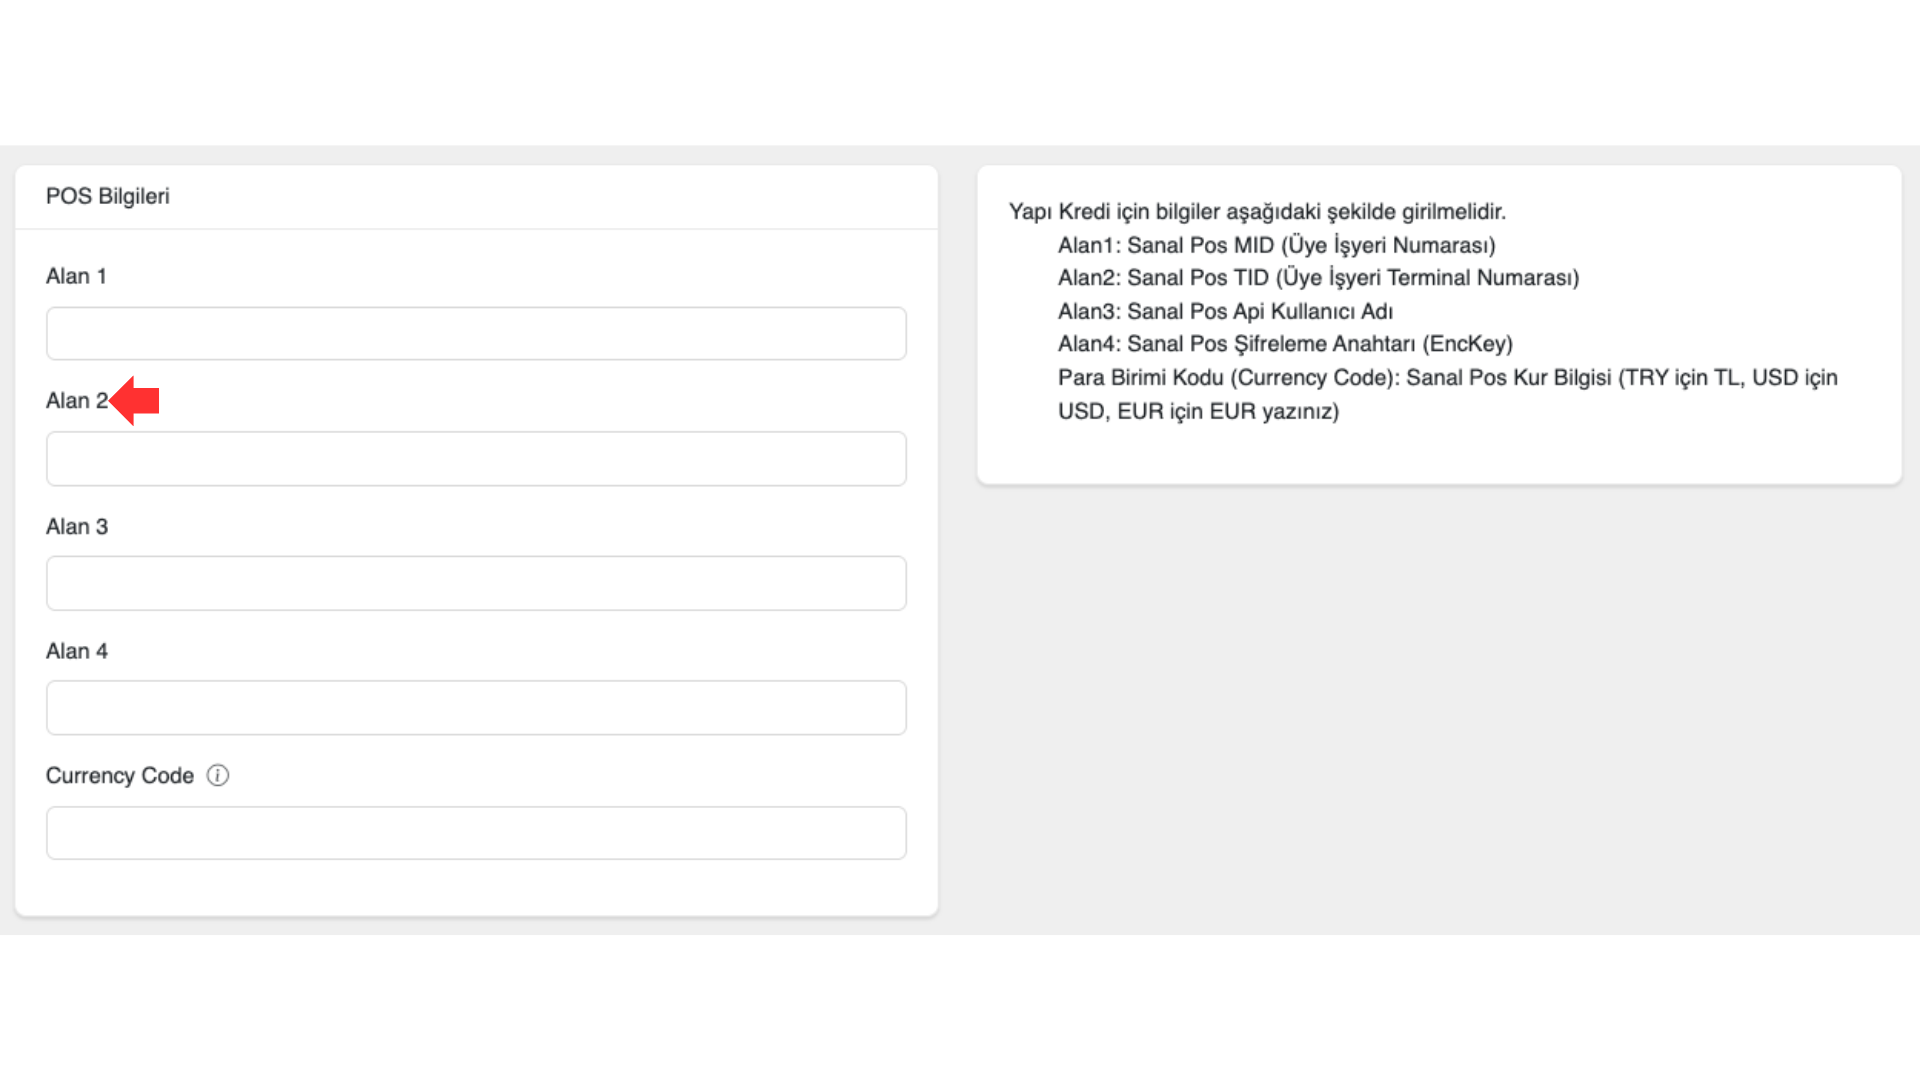
- Paste the Virtual POS TID (Merchant Terminal Number) you obtained into the Field 2 area in the serB2B panel.
- Paste the Virtual POS API Username you obtained into the Field 3 area in the serB2B panel.
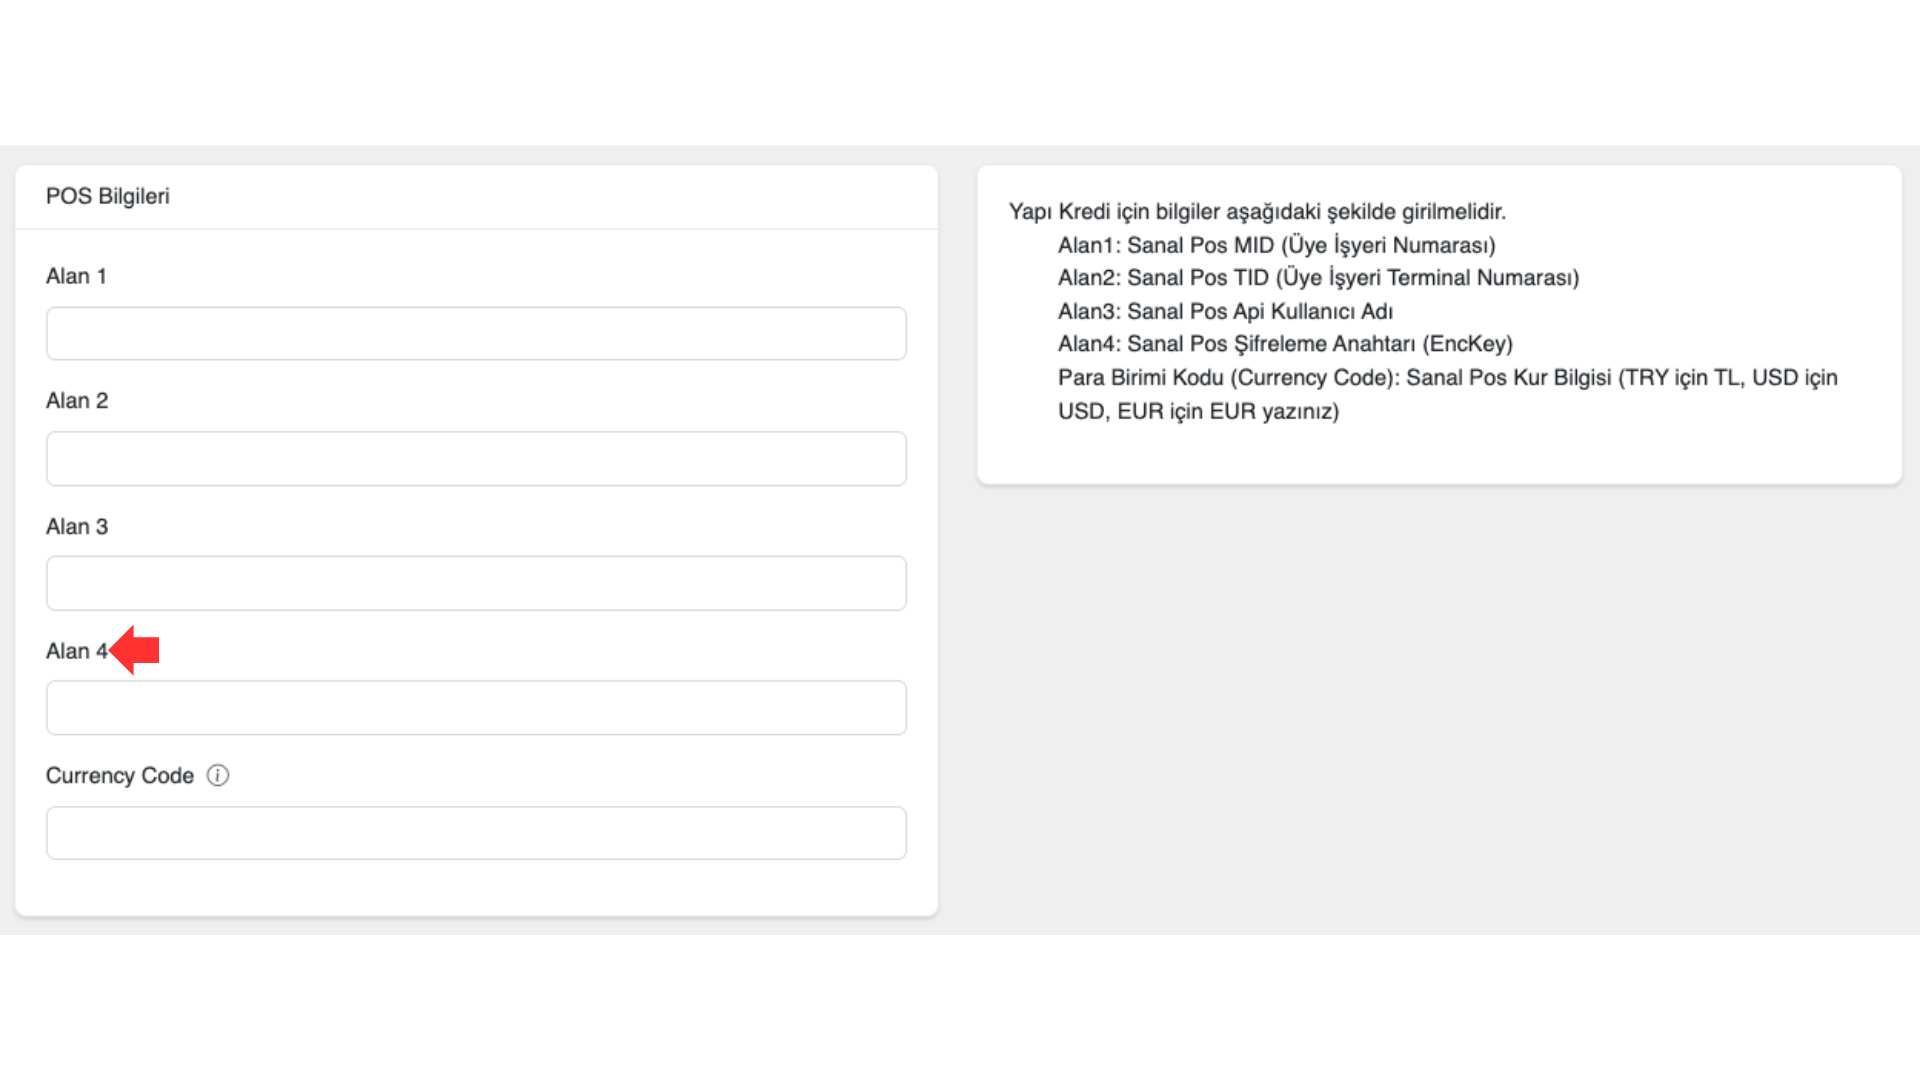
- Paste the Virtual POS Encryption Key (EncKey) you obtained into the Field 4 area in the serB2B panel.
2.3. Activating the Virtual POS
- Enter the defined currency code. For example, enter 949 for Turkish Lira.
- Click the Save button to save your settings.
3. Virtual POS Configuration Table
- Select Yapı Kredi from the Bank POS field.
| Field | Description |
|---|---|
| Field 1 | Virtual POS MID (Merchant ID) |
| Field 2 | Virtual POS TID (Merchant Terminal Number) |
| Field 3 | Virtual POS API Username |
| Field 4 | Virtual POS Encryption Key (EncKey) |
| Currency Code | The Virtual POS currency information must be entered as follows: |
- TL for TRY | |
- USD for USD | |
- EUR for EUR |
4. Common Virtual POS Errors
When starting the Yapı Kredi Virtual POS integration, you must contact the bank. In this conversation, you need to clarify how the 'amount' (price) information will be returned to you. That is, whether the amount will be sent in kuruş (multiplied by 100) or in its normal form (not multiplied) must be configured by the bank.
This setting is of critical importance for your payment transactions to proceed without errors. Clarifying this detail with the bank before starting the integration process will prevent potential errors and integration problems that may occur later.