Iyzico Virtual POS
You can follow the steps below to complete the Iyzico Virtual POS integration.
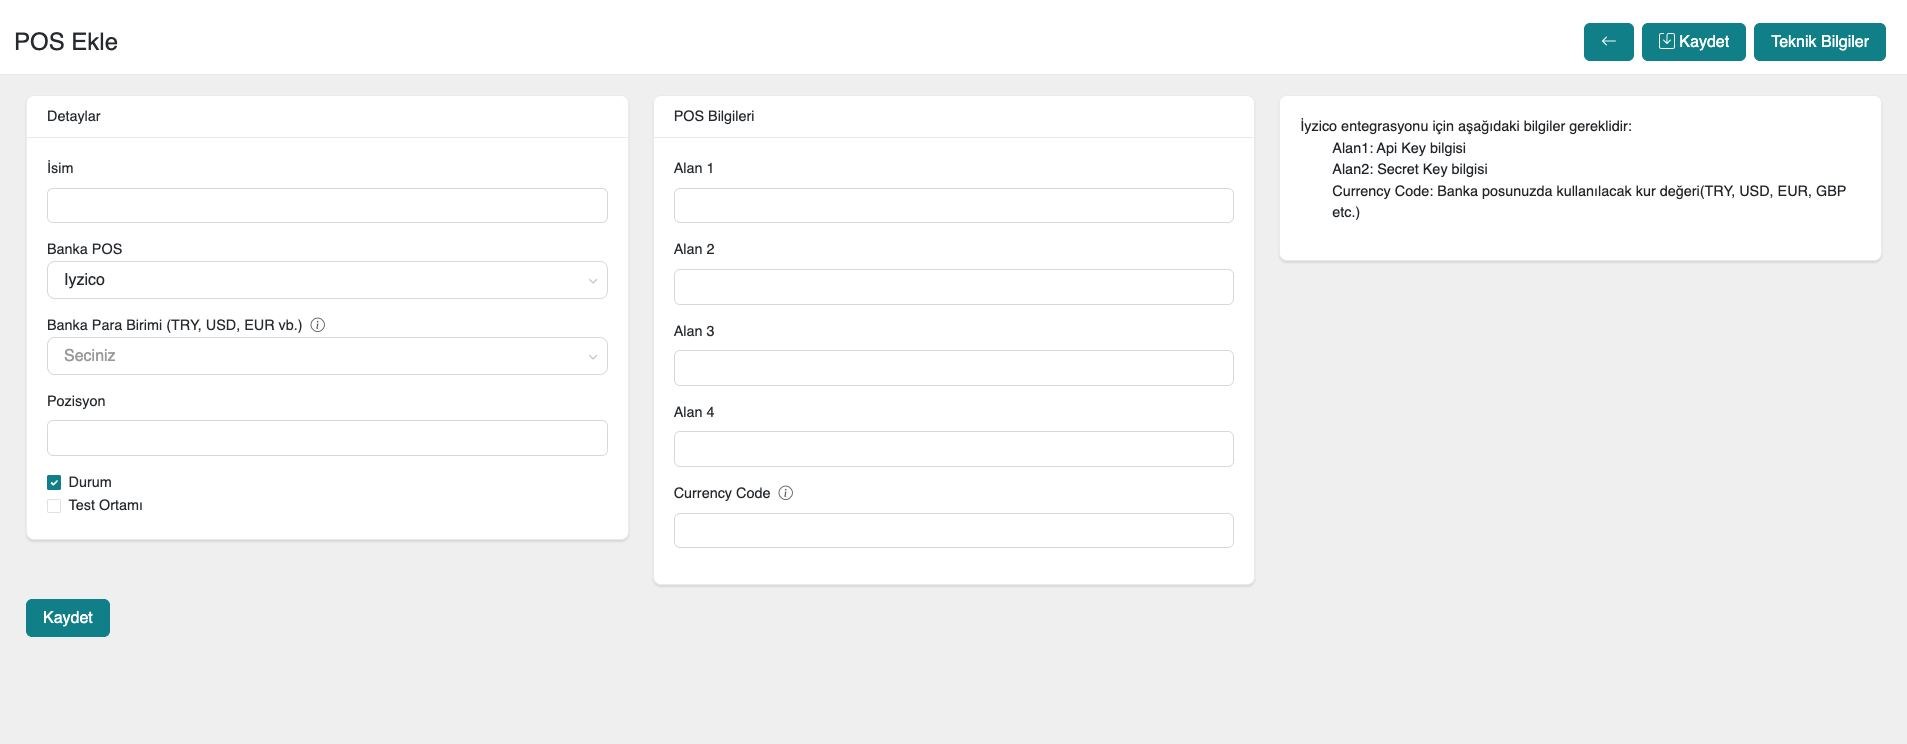
1. Defining a POS in the serB2B Panel
First, in the serB2B e-commerce admin panel, click on Settings > Payment Settings > + to be directed to the new virtual POS setup screen.
2. Obtaining the Required Information
Next, you need to log in to the Iyzico Merchant Panel. Log in at https://merchant.iyzipay.com/auth/login.
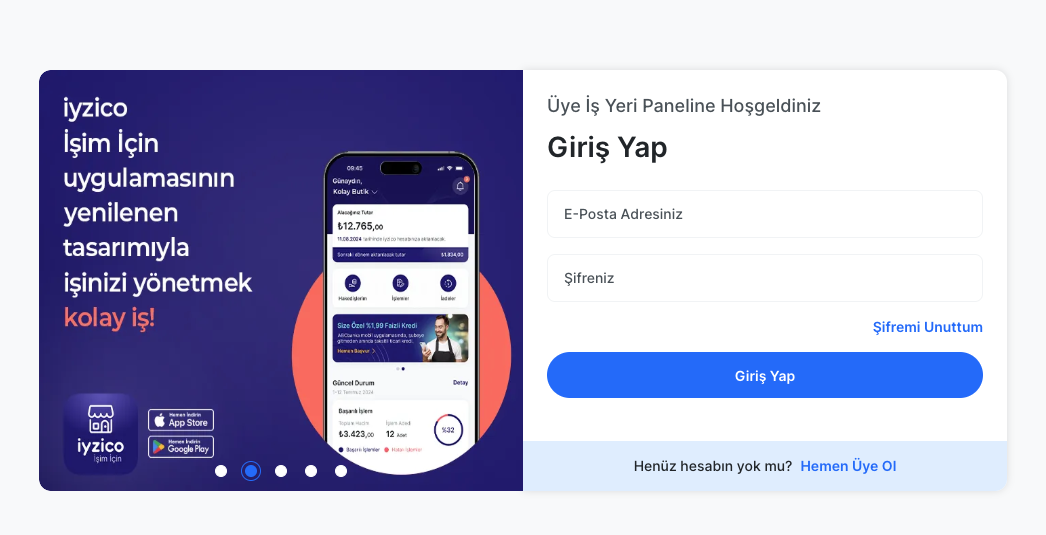
After logging in to the bank panel, you need to obtain the following for integration with your serB2B site:
- API Key
- Secret Key
2.1. Steps to Follow in the Iyzico Panel
-
First, open your iyzico Control Panel page, then go to Your Account > Account Settings > API Keys > Live Keys and copy the API KEY and Secret Key values. Then paste them into the relevant fields in serB2B.
-
After copying the API Key and Secret Key values into the relevant fields, the only thing you need to do is send a message to the iyzico Integration Team. After the team has completed their checks, they will activate your account live and finalize the process.
-
Do not forget to save the API Key and Secret Key after you have finished. Now let's switch to the serB2B admin panel.
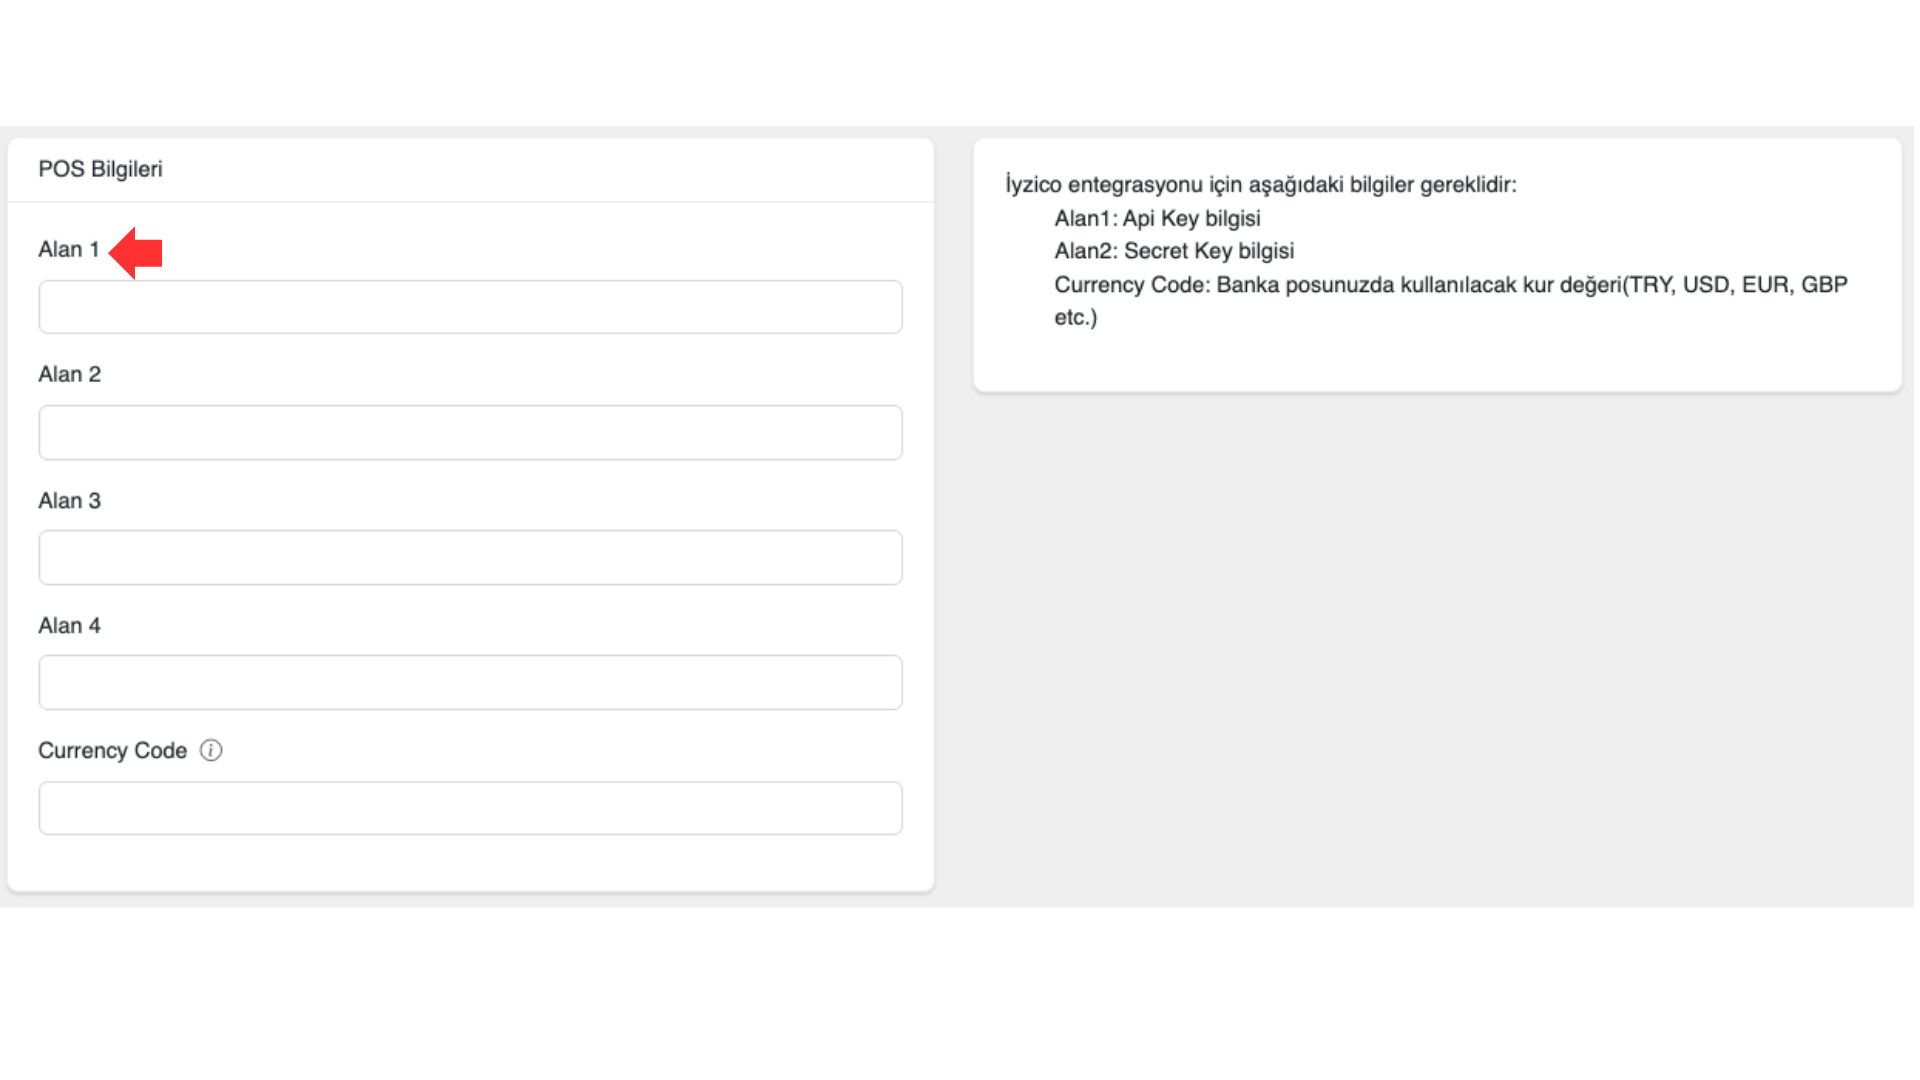
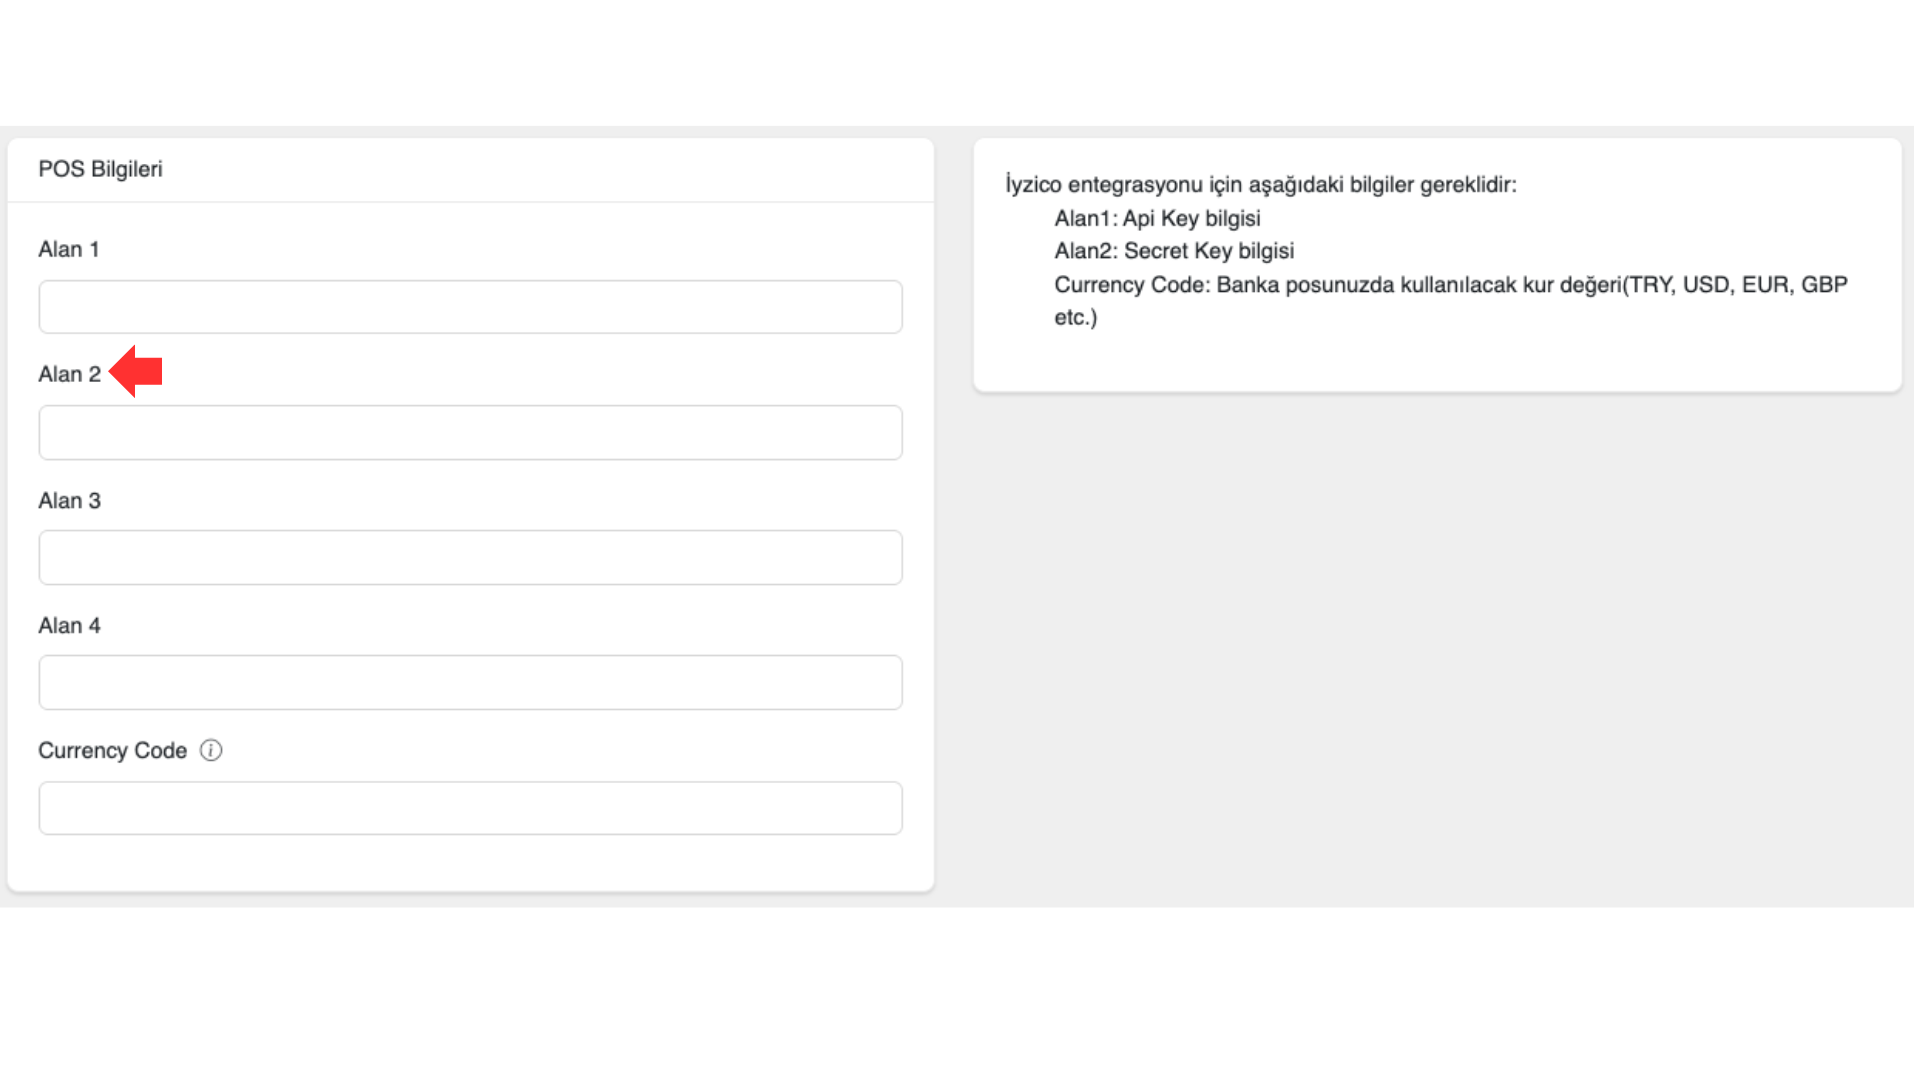
2.2. Steps to Follow in the serB2B Panel
- Paste the API Key you obtained into the Field 1 area in the serB2B panel.
- Paste the Secret Key you obtained into the Field 2 area in the serB2B panel.
2.3. Activating the Virtual POS
- Enter the defined currency code. For example, enter 949 for Turkish Lira.
- Click the Save button to save your settings.
3. Virtual POS Configuration Table
- Select Iyzico from the Bank POS field.
| Field | Description |
|---|---|
| Field 1 | API Key |
| Field 2 | Secret Key |
| Currency Code | The Virtual POS currency information must be entered as follows: |
- TL for TRY | |
- USD for USD | |
- EUR for EUR | |
- GBP for GBP |